Monday 31 August 2015

Day 21 Creativity – Sewing a chair cover for a discerning 2 year old


My youngest grandson is just over two. He has decided he is grown up and sits to eat on the same sort of chair as the rest of the family.  He does very well but has been known to get distracted from the serious business of eating or drinking. At this time he might spill some food or drink.
His parents have some superb dining chairs and our ( his Mum and me) challenge is to make a cover for his chair that does not look like a cover that he has to have but others don't! Being 2 he is more discerning than many adults. My aim is to make the cover liquid proof.


I was going to line the cover with the 'stuff' that is used to make under pillowcases for the allergic amongst us. However, after experimenting I found that liquid is slowed from going through but not slowed enough for my piece of mind.
My next experiment was with blackout lining which I had in my stash. This seems to fit the bill. It is not totally waterproof but slows the passage of liquid down considerably.
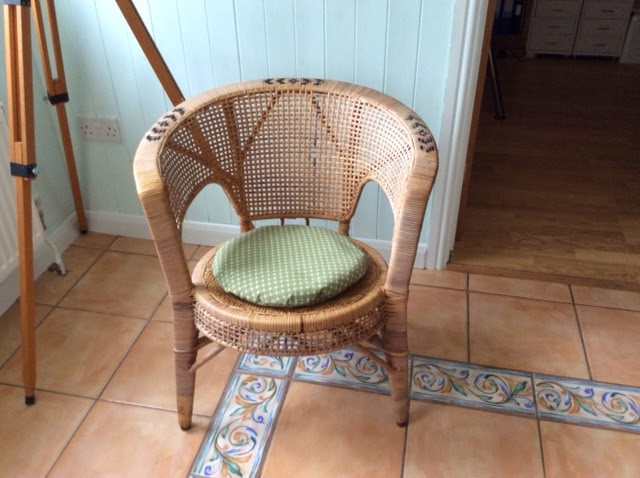
I had some cotton/ linen mix material that I thought would suit the chair. It's not identical but doesn't shout out at you 'I am a child's chair cover'.
After further experimenting I decided to make the under chair cover from blackout lining with sides of the anti allergic under pillowcase stuff- as this helped reduce the bulk.
I then made the outer cover completely separately and attached 2 slightly elastic ties under the chair which close with a hidden press stud.
Job done. (Pity about the sun, or rather the photographer!)


Will he now sit on the chair or want to sit on one of the others?

Saturday 29 August 2015

Day 20 Creativity – Fleece: 19 types and counting.......


Thursday was the monthly meeting of Diss Guild of Weavers, Spinners and Dyers. We had a very interesting talk about fleece- ranging from the different groups of fleece, differences between fleece of the same breed, differences between areas of one  fleece - in fact anything connected with fleece. Our Speaker (Maggie Hunt) brought her Fleece files with her where she has recorded details of the breed , with examples of the fleece and sample skeins and knitting.

This got me thinking - I keep an accurate Dyeing record in files , but not of the fleece I spin. So I think I will start doing this !
My two favourite books about fleece. Other useful sources of information are the Wool Marketing Board and the individual breed societies.

I have listed below the fleece I have spun or that are in my store to spin. (Brackets mean I have the skein, or knitted item but no example of the fleece.)


Types of Fleece
Pure Bred:
Bleu du Maine
Cormo
(Hebridean)
(Icelandic)
Jacob
Manx Loughtan
Merino
Norfolk Horn
North Ronaldsay
Shetland
Soay
Suffolk
(Swaledale)
Wensleydale

Crosses:
Cheviot x Shetland
Corriedale x Shetland
Shetland x Bluefaced Leicester
Swaledale x Bluefaced Leicester
Teeswater x Bluefaced Leicester
(19)

Other animal Fibres - only spun skeins of these
Alpaca
Angora
Camel
Cashmere
Goat
Mohair
Possum
Yak
(8)

I was surprised the list came to 19 different fleece, including the cross bred ones. But there is a problem I understand there are 60 pure bred or so types in this country - more than any other in the world. How can I find time to spin the ones I have got let alone the ones I don't have yet?

My favourite of course is Shetland and I have this fleece type in different colours and different grades! However, Jacob is a close second and Norfolk Horn which I have just discovered is right up there with these.

Tuesday 25 August 2015

Day 19 Creativity - Remodelling again

I do like to have useful items with me that have a story to tell, it helps make each day a little bit more special.
 I was an early user of a pocket computer. I think it was a compaq and was brilliant  as I could write on the screen with a stylus and also carry a comlete list of my textile books!  I made a fabric protective case for this. The case was from spare velveteen material I had used to make a suit for my 6 month old son to wear to attend a wedding. I used the navy as a background for the mountain flowers I embroidered, they are reminders of holidays taken in Switzerland.


Back of case ( showing 2 loops) so I could put this on a belt if I wished

But all this was a long time ago and the computer has now been superseded in my life by an iPod and iPad.

I do like to keep the main items like my iPad and iPod in handmade cases when in my handbag ( story of the iPad sleeve on blog of March 7th 2014
) and all the cases have a story to tell.
Now that I have moved on to have a touchscreen phone my iPod kindly gave up its smart Ikat woven case and has been without a case.

While searching through a box ( a regular occurrence as my textile things are not yet fully unpacked), I found my old Compac computer sleeve and thought I could make use of it again!


Unfortunately the case, as it is, is too big!

With some remodelling and relining it decided it would be ideal as my replacement iPod case.I decided to line it with my favourite printed silk left over from making my coat (more about the coat blogpost of February 1st 2012).

The finished item.
I will enjoy seeing it each day due to the story it tells and of course it will be useful protecting the iPod from the tumbles in my bag.


Saturday 22 August 2015

Day 18 Creativity - A sewing machine is a wondrous thing


My whole life, I have lived with a sewing machine, my mother was an ardent dressmaker and I can't remember at what age she let me use the machine. It was a hand turned Singer which I think taught me to be more dexterous than if I had been brought up with an electric one. So, when I have a problem with something in the house that's textile based I always assume I can solve it. Hand sewing or the machine will cope with everything.
Once I had the entrance hall looking so much better, my eyes turned to the blinds.
They looked like this ( bigger window):


I can live with the colour, but not the bottoms! I assumed a sewing machine would stitch through the strange fabric - and I was correct.

So starting with the smallest of the two I chopped the bottom off and made a new hem to hold the weighted rail. It was a little difficult stitching the blind with the wooden roller still in place but with the help of DH to support the roller all worked well. So on to the larger blind, this meant planning where the sewing table would be when I started and where I would move it to as I got closer to the end of the blind. Again success. That's at least £200 saved for the time being by this remodelling, to be spent on something else.......
(For the exra observant this is the smaller window)
Now why didn't I think of that when we moved here in November...... But we've had another thought - we will do the same with the kitchen blind. Now that is a seriously long blind and I will have to plan where to sit, when using the sewing machine, very carefully with that.....


Friday 21 August 2015

Day 17 Creativity - Sewing a Round Cushion

We are so fortunate in having an entrance hall in the 'new' house which is the size of a small room. ( I can easily have one or two knitting machines working in there! ) We are trying to make this hall more welcoming without redecorating it yet, as we are in the middle of 'doing' the sewing room and a spare bedroom. We started off swapping the shoe rack for a painted cupboard. This is so much better than everyone who comes to the front door seeing our shoes- how welcoming is that?
We are now looking for a matching coat cupboard !
With some furniture rearrangement I have room for my mother's Lloyd Loom style cane chair. However, the square cushion doesn't work in terms of shape or colour!


I have found a spare square cushion pad and 40 cm of some different Laura Ashley fabric from 'way back' in olive green - a great colour for the room. So I decided to make a round cushion for the chair. It sounds simple but it turned into an epic job.
Why is life so contrary? The spare cushion pad is uncomfortable compared to the square cushion, so taking apart the pink cushion was needed. Then I decided to make the cushion lining and circular cushion pad first. Problem one was drawing an accurate circle. My pair of compasses only stretched to 17 and a bit cm and need more. So I made a circle straight onto the lining material and cut a bit bigger. I then needed to cut the square of wadding to be a circle- a physically difficult job. It all seemed to work until I placed it on the chair. This had turned out to be a disaster in two ways and a classic case of more haste than speed!
So back to the drawing board and start again and do it properly....
1. Make an accurate circle of 20 cm diameter using a large piece of paper, ruler, string and drawing pin.
2. Check the radius carefully all round the circle.
3. Cut out the circle in the actual cushion material as 40 cm is my maximum measurement.
4. Stitch 2/3 way round the cushion taking a small seam allowance.
5. Press the material to get the best finish possible and place on chair - to check!
6. Looking good so now to make a lining the same size, not smaller.
7. Remove pad from previous attempt - this took ages as I had sewed it in so well - grr!
8. Complete cushion pad in its's cover.


9. Place cushion pad in cushion cover and complete stitching round by hand invisibly - no more taking shortcuts!!!
10. Result a cushion I am proud of.


As you can see the base of the chair is woven beautifully and I would like this to be on show, but the chair does need a cushion for comfort


 The weaving around the edge hints at the weaving under the cushion and I will be more than pleased if any of my weaving friends ( or other friends) look underneath at the intricate chair seat.
As William Morris said :


Thursday 20 August 2015

Day 16 Creativity - Storing Fleece.

- apologies for the break, my body decided I 'needed' a migraine....

What do you think is the best way to store fleece?
I like to store mine in pillowcases - or cotton bags that I have made to simulate pillowcases.
I then do a cedarwood join in the neck of the bag.
By this I mean I saturate a cedarwood disc in cedarwood oil and then make a foil container for it.

I wrap foil around the disc leaving a little finger sized tube above and below to allow the aroma to escape. I then tie this in the neck of the pillowcase, tieing below and above the cedar wood bridge. I believe this helps deter any moth thinking of getting in through the neck of the pillowcase!

Ideally I renew the cedar oil every 6 months!!! I have used this method for some time and not had a moth problem yet, even though I have kept fleece for a long time, 14 years or so.  (Many fingers and toes crossed at this point!)

Storing fleece washed or unwashed, I do both and will explain why in another post.

I'd be interested in other peoples ways of storing fleece.....


Tuesday 18 August 2015

Day 15 Creativity - Hand Spun yarn and a Chunky Knitting Machine


Some time ago I was given a basic chunky machine. Well, it is not that basic - it will do slip and tuck stitch and weaving and has a ribber. What I really mean is that it does not have a punchcard facility so that means no fair isle.

I replaced the sponge bar when I received the machine but with ill health and moving I never really got round to putting it through its paces. So today I tried a little experiment. I wondered how it would manage with my hand spun wool. I have some (12 wpi) that is thicker than I would use on my standard gauge machine and I wondered how that would work. Well, surprisingly that knitted well at tension 1.

The blue is waste yarn.
So then I thought I would try some of my hand spun brown Jacob yarn which is about Aran thickness (8 wpi). That knitted nicely on tension 6.
 
Notice how the different thickness of yarn and tension makes the swatch have irregular sides! I started the off white on T3, then turned to T1 - the equivalent of changing needles in hand knitting.

So now  I wonder how thick it will knit as the maximum tension is 10.2. More experimenting needed.

Seeing what this machine can cope with, fair isle would seem unecessary. Double thickness (as you get with stranding of fair isle) of these yarns would be too thick in all but the coldest of conditions!!

I like fine (ie thin) yarn knitting but I'm looking forward to trying something a bit different - and of course I have the rib and different textures to experiment with too. This feels just like a new toy.

Sunday 16 August 2015

Day 14 Creativity- my favourite two spindles


This box doesn't quite go with me everywhere, but it does go most places. eg. It went to the hospital with me on Friday when I accompanied my husband. ( He went in on time and was out, all completed in 15 mins though so the box didn't get opened!)

The box is a bit like a Tardis. It contains: my two spindles, 3 sorts of fleece, woollen tops, comb for combing the fleece, scissors, talcum powder ( for when I spin in hot weather), leader yarn, pen, labels and 2 kebab stick plus stick for spinning round in case I am called upon to show anyone how to spin just using a stick.

I have two favourite spindles. The first is the 80 mm Turkish one. I love it because the dark wood at the bottom is English Bog Oak approx 3300 BC and I do like how you get little balls of yarn building up. It is from IST Crafts. For those that don't know, the slats at the bottom pull out easily when you have a big enough ball so you have a little ball of yarn ready for plying.


My other favourite, and if I could only have one this would be it. It is a Bosworth and the top is in Canarywood and weighs 17g. I use this one by adding twist to the yarn by rolling it up my leg.


Both are super at spinning very fine yarn, which I so love. Why the Bosworth in preference to the East Anglian bog oak one? Well, I do find it a bit of an effort to add the spun yarn to the cop around the basein the Turkish spindle. I am definitely NOT one who worries about doing things fast, but I do find stopping to do this breaks the flow more than winding the yarn on to the Bosworth.

What am I spinning? It's hand carded rainbow dyed fleece ( acid dyed) from Blue faced Leicester / Swaledale cross. The rainbow dyeing was from an experiment to see whether microwave dyeing or steaming was better for the fleece when dyeing small amounts. The lace weight yarn will be used to knit ear rings. More about that at a later time.

The kebab sticks - why are they in the box? Well the box when empty is my Lazy Kate. The cops of wool each sit on a kebab stick which goes through the sides of the box so I can ply.


So this is the story of my portable spinning box. It was actually a ballet pumps shoe box! A good thing to accompany one on journeys- I recommend it!


Saturday 15 August 2015

Day 13 Creativity – Fine Crochet Lace


Monique who designs THE most amazing knitted lace/lace knitting mentioned on fb that she had taken a class in lace making – with bobbins.

This reminded me of when I spent some time learning the basics of bobbin lace. I just couldn’t get on with it. I had done quite a bit of crochet lace and preferred this. This got me thinking about the crochet lace that I had done and whether I could do it again.

I used (about 20 years ago!) to crochet round handkerchiefs! I bought the finest handkerchiefs in Switzerland and then would crochet round them, while I was on holiday in Switzerland and back home. I even subscribed to a German magazine to get some of the patterns and ideas for patterns ((Filethakeln).


And an enlarged view of the lace:
 

As you can imagine these are 'priceless' items, even if you ‘pay’ yourself the minimum wage.

I used the finest crochet cotton I could find DMC Cordonnet size 100- not unlike sewing thread. I used the smallest hook I could find (0.4mm) and wore magnifying glasses. Once started I mainly did this by feel as you can’t actually see the hook eye. I need to get my macro lens and tripod out to stand any hope of posting a decent photo of the hook end here!


I have used these handkerchiefs for years and they go in a boiling wash and yet they are still as new. I always have one in my handbag and it reminds me of sitting on top of a Swiss mountain crocheting.

I am keen to have another go- so have sorted out a hook and some thread and wonder if my eyes are up to it still. It is one of the best portable projects there is due to how little equipment you need. So there will be more about this later and that reminds me I also had a go at tatting and found that I was more successful at that than lace with bobbins too.  

You can see more about Monique’s lace knitting at www.bridgetsbrei.blogspot.co.uk

Friday 14 August 2015

Day 12 Creativity - Inspiration from the garden

Since moving to Norfolk, our new garden continues to be a delight. There is SO much I can use for dyeing and then there is so much for inspiration for weaving. These are some of the photos I have just taken.
This is the Lily that is now in one of the solar dyeing jars.

 
The Golden Rod is just coming out  into flower behind the Japanese Anemone. Golden Rod  is a must for one of the two jam jars I have repurposed from the fridge!
 
I wonder if this Dahlia is worth trying for dyeing....
 

This Crocosmia is such a delight that I would like to weave something as a tribute to it.

Oh for more hours in the day!

Thursday 13 August 2015

Day 11 Creativity – A balanced hand spun plyed yarn

I have been spinning my Norfolk Fleece yarn each evening that I can. I have arranged it that each skein is approx 25 g. I am hand combing the yarn and spinning it mainly worsted. I say 'mainly' worsted as there are always a few fibres that will try and not 'obey'. I am trying to curb my perfectionist tendencies but to little avail.
I am aiming for completely balanced skeins as I know these knit well.


For those of you who are not spinners this means that the twist you put in when spinning completely balances the twist you put in when putting two yarns together , ie plying but turning the spinning wheel the other way. Once the skein is made you hold it up and it should hang exactly straight, not twist up.

If it does twist up, horror of horrors, then by looking at the twist you can tell if you turned the wheel more when you spun the original yarns or if you were too vigorous in your wheel tuning when plying.

It is possible to correct it at this stage once you know this......

The aim is to avoid this by making a balanced skein the first time!

I am an obsessive 'counter' when I spin. I measure the length ( roughly) when I ply and count the times I treddle. If the skein is not balanced it usually means there was something too interesting on the TV or I got distracted in some other way!

** Getting the number for the counts per length is established by experience and a sample piece for each yarn type I am making. This is what makes spinning such a joy. Each yarn type is unique and is something that is planned for.

Day 10 Creativity - Solar Dyeing - setting up

Just setting up solar dyeing from some plants I have never tried before.
As yet Unknown red bush ( front garden) , Lily (Orange) , Rosebay Willowherb, Tansy ( from the garden)
A friend (from Diss WSD) tells me that the 'red' bush is good from dyeing from..... Must ask her the name again - and write it down!


I have now scoured and mordanted several more skeins so can try some more but I need to go on a jam jar hunt......

Monday 10 August 2015

Day 9 Creativity - Inside my Fleece Store


Since moving we have replaced an old shed near the house with a new 'workshop', the main aim of this to make a fleece store. Any other textile related things that fit in will be a bonus.

Outside with dyeing paraphernalia ready for more dyeing  
 
Difficult to get a good inside view but this is it.


My aim is that my entire fleece collection fits on these two shelves, lovingly (?!) made by DH.
An impressive number of fleeces, many which are rare breed. Ideally I like to store the fleece in old pillowcases, and have a method for treating the opening so that it is as moth unfriendly as possible. I store fleece washed and 'as they come' and my thoughts on which is best have changed over the years but more on that later possibly. However, I never have enough bags for my fleece. You will have guessed why!

But I feel as if I have just got a free gift to help. We inherited 2 pairs of very heavy navy curtains in the room which is to be the sewing room. I had thought to give them to the Heart Foundation (my chosen charity) but they are very badly faded at the front edges. This is because one window in the room gets glorious morning sun and the other one gets glorious afternoon and evening sun. It is a super light room. I hate to seem to waste things. On looking at the curtains the linings looked very good, nice cream cotton and yes you've guessed it - just right for more fleece bags! Repurposing in Action.

Sunday 9 August 2015

Creativity Day 8 - A Lovely Surprise from Solar Dyeing


Can you guess what these have been dyed with?


Some months ago, my aunt who has never done ANY solar dyeing thought she would try some having checked with me what I did. Well first of all she had no wool and of course no mordant. What she did have were some flower heads that she was de heading and she knew they stained her hands. So she put the flower heads in what looked like a carafe, added a clean washed man's cotton handkerchief and closed the top  with a plastic bag and rubber band. This was left on the kitchen windowsill. After about a fortnight she brought it over to me and I was amazed at the depth of colour that had developed. I popped in a mordanted skein of wool - which horror of horrors I don't scour to 'wet it'. It was all pretty tight in the container. I then offered it back to her but she said she had done it for me.
I wasn't sure what would happen, cotton handkerchief not mordanted, unwetted wool added - all not very promising but the colour of the solution was intense - navy blue!
So today I opened it. It must have been on the Windowsill for about 2 months all together now. No colour came out after two rinses.
Brilliant result! I can't explain the blue and green. The wool was my normal off white pure wool that I use for solar dyeing. I guess it must be that one is a cellulose based fibre and one is a protein fibre.
The plant - blue Flag Iris and only the dyeing flower heads were used.

I am now eyeing up my orange lilies that are in flower in the garden and wondering what stage to try them . They are making such a wonderful show I don't want to de head them until I have too.

A natural dyer’s life is full of wonderful surprises.


Creativity Day 7 - Spinning Norfolk Horn fleece

Had a busy day decorating the Sewing Room 'to be' - more later.

Then a restful evening spinning the delightful Norfolk Horn fleece ( blog post May 31st 2015)
25g here. All hand combed as it is such a lovely fleece- hopefully more spinning tomorrow evening - although my mind is on more dyeing, so many tempting plants around just now.


If you look back at the previous discussion of Norfolk Horn fleece. Yes, the FSM method of washing the fleece was great, as I always find it is. And yes, I did get more Norfolk Horn Fleece as it is so fantastic to spin. I have now spun it singles lace thinness, just like Shetland to my surprise and thicker 'approx 4 ply / DK' . Will do more accurate measurements when it is washed - and possibly dyed!!!

Day 6 Creativity - a trip to Southwold


Today was the day to go to the seaside - the aim being to visit Norfolk and Suffolk Guild of Weavers, Spinners and Dyers Annual Exhibition. We couldn't have had a more beautiful day, sunny and very hot. It was lovely to see so many people enjoying themselves on the beach.
The exhibition was good - as always - and I wouldn't want to single out a single item. It's so good to see how creative it is possible to be with fibre and yarn. It was nice also to see interactive peg loom weaving and members spinning and particularly weaving on a 4 shaft floor loom. Besides the exhibits there was also equipment to buy too. I was particularly taken by the tapestry looms, 'made in any size you want' by a member's husband. It was great to talk to members who were stewarding the exhibition. It's a date (first week in August) to definitely put in the diary for next year and I hope to get to some of the meetings during the year too.

A general view of the exhibition


However, my  creativity day item for the day was found in a vintage shop! I can't every resist looking at old sewing patterns and today's find was a real gem.


It's very simple - I particularly like the sides! I have plenty of material in my stash that would be a good candidate for this so the brain is working out which to use.
I plan to use a fine wool material and wear with sleeves underneath, I was attracted to how the sleeve openings 'happen', I just like the simplicity of the design. As some of you know the pattern is big for me so more creativity will be needed in getting it to fit but should be OK using my body duplicate! But this project is one for the back burner for now - an early autumn project I think.

Thursday 6 August 2015

Day 5 Creativity - what's not to love about Natural Dyeing


I decided that yesterday's post would be the last on Natural Dyeing for a while. However, today has seen such wonderful colours appear that I am not sticking to that.

I decided that I wanted to keep as much as I could of the meadowsweet dyeing so went for the fair isle yoked jumper option. I plan to do the traditional star and tree Shetland version if the stitches work out..... so I need main plus 5 colours. Last night I worked out a bit of a plan for the five colours, and this morning started on my quest. I may be tight for wool for the main part so decided to mordant 50 g more and dye that with madder as it will be a colour that will lift the meadowsweet colour and give me another 30 g for the main part of the jumper.

So this is what I have got by using additives:
Lighter green - iron
Darker green - more iron
Coral - madder on its own
Golden brown - madder over dyeing the meadowsweet
Bright gold - tin


(Apologies the skeins have not been re skeined so the washing ties are still in them, hope this is not too distracting)

This is what I just love, having decided on a colour range, using my local meadowsweet dyed yarn ( except in one case) I have a collection of gorgeous strong colours all by Natural Dyeing.

I will so enjoy making and wearing this jumper knowing that it is British Wool and dyed from meadowsweet a few hundred yards from my house. Of course, in addition the meadowsweet are due to be cut back as soon as the farmer is not harvesting the corn and has time to clear his ditches.

Quite a good example of sustainable textiles I think. All the waste dyestuff has gone on the garden to water the plants and the heated meadowsweet residue will be composted. The additives do contain metal salts but by careful calculation very little is left in the dyepot.

Now do I go and gather more meadowsweet and dye the rest of the other cone of cream yarn so I can weave the scarf I intended to do initially?

Wednesday 5 August 2015

Day 4 Creativity - Dyeing with Meadowsweet- part two


This morning I decided to dry all 500 g worth of dyed skeins. This is to give me more time to decide on the project for them. Usually I leave the skeins wet when using additives.

So having changed my mind completely from the woven scarf in meadowsweet and meadowsweet and iron I am still thinking of a knitting project.

The skeins look like this :
The lighter one has tin additive
The dark green one has iron additive - rather a lot
The darker meadowsweet has copper additive.
The bigger skein ( background ) is meadowsweet on its own.
In real life the meadowsweet skein has a definite greeny tone to it.


Part of the reason for drying them was to compare the skeins. I dyed 2 lots of 200g and the the remaining 127 g with some handspun yarn with it - this was interesting and I'll explain further on.

I dyed one lot of 200g in an aluminium pan and one in an enamel pan but with EXACTLY 400 g of meadowsweet. The enamel pan took ages to get to boiling point and then I forgot it at lunch time so the yarn was in for quite a bit longer BUT the colours of both sets are identical. This amazes me. One might think the meadowsweet had reached its capacity for reacting with the dye. However, I think not as the separate 127 g is definitely a deeper dye. I weighed the total amount of yarn in the pot and doubled this for dyestuff so I think it must be due to the hand spun yarn not taking up so much of the dye for its mass compared to commercial yarn. I find this perfectly normal for all sorts of reasons. I also included a small sample of non scoured, non mordanted yarn to show how essential it is to scour yarn well and mordant thoroughly. This is the skein on the right. The odd skeins, ie the non commercial cone, are much browner in colour – again difficult to get right here but I have done my best. (I do hate it when the ipad think for me!!)
 

The ‘odd skeins’ – the one on the right is the non scoured, non mordanted one ! (Apologies for the lack of clarity in the picture but it’s the colour that matters in this context)

So back to my choice…… At the moment I am pondering on knitting a yoked sweater in meadowsweet colour with a fair isle yoke - using 4/5 yet to be dyed yarns using the exhaust dye and additives. I have tried the yarn 'on my front' to see if the meadowsweet colour will be good for me as a sweater - answer is 'yes'.

Or, whether to change more of the meadowsweet yarn into other colours using additives and knit a fair isle jumper.

I intend to knit either jumper on the knitting machine - once I have designed a pattern! But I think I have 2/3 days to make my choice as I want to you the dye exhaust at its best.

What a lovely choice to have to make!!!!
(Apologies, no idea why the text size has a mind of its own today!)


Tuesday 4 August 2015

Day 3 Creativity: Dyeing with Meadowsweet - part one


I love Natural Dyeing and I love my textile work to have a story to tell. Now that we live 'in the middle of nowhere' (otherwise 'the country'- Norfolk in fact), I have my own source of many dye plants within walking distance. One of my favourite natural dyes is Meadowsweet and the ditches down our lane are full of it just now.

You can see it is a glorious place to live – but more importantly you can just spot the meadowsweet.


A better view of the meadowsweet
 
If all goes to plan I intend to weave a scarf in 2 colours. On its own Meadowsweet will give a greeny mustardy yellow. I intend to dye half the wool again using iron as additive to give a more greeny hue. Natural dyes 'go' together and I like to dye a family of colours from the original dye bath.

All this needs lots of planning. I ordered a 500g cone of natural coloured British Wool - approx 4 ply weight if you are a knitter! Then this needed to be made into skeins, ready for the dyeing.

Once skeined, the wool needed scouring and mordanting to allow it to accept the dye more evenly.

Lots of skeins – I decided to do 50g skeins

When this preparation is done it's time to get the dyestuff so I can use if fresh. I've decided to dye at 200% ( compared to weight of dry wool) so that's quite a lot of meadowsweet. However, compared to the amount in the ditches it is insignificant,  only the tops are needed not the roots and very soon the farmer will clean out the ditches and the wonderful meadowsweet will be gone.

So the penultimate stage is to extract the dye from the meadowsweet. This involved chopping the meadowsweet & boiling it up - a super activity for a sunny day (Sunday) interspersed with deadheading some plants! For good measure I left the dyestuff in the water until Tuesday. It was meant to be Monday but I ran out of time yesterday.


Meadowsweet soaking in water


So now for the dyeing in the strained dye. The dye and the yarn was brought to the boil slowly and then left simmering for about 45 minutes. The dye liquor will be  kept and could be used again as an exhaust dye to get a lighter meadowsweet colour. However I will split up the exhaust dye and use it as a base for some additives.

 So I’ve had a long day today. The camping gas stove ( about 30 years old) decided to play up – flames from the knobs so had to give up with that. So, I have just been using the electric ‘dyeing’ double hob outside. So it’s taken twice as long. However, all the yarn is dyed with  meadowsweet ands its resting in rinse water. I have done 2 additional sorts of samples as well :

1.      Using different yarns – mainly hand spun, including one with no scouring or mordanting

2.      Samples of overdyeing the meadowsweet dyed yarn with solutions of tin, iron and copper.

These samples are drying – results tomorrow. All looking even better than hoped for.

What was going to be a two colour woven scarf, might just be a fair isle jumper…..

Monday 3 August 2015

Creativity Day 2 : Portable pocket


Diss Guild of Weavers, Spinners and Dyers are making a 'dressing gown' for the 60th anniversary challenge of the Association of Weavers, Spinners and Dyers. The challenge is to produce 60 dressing gowns, to celebrate 60 years of the Association. Having looked at examples we decided our aim would be to also showcase weaving, spinning and dyeing at its best. We also wished to involve as many of the Guild as we could. Our contribution is to be a Saori styled 'dressing gown’.

 The weaving of the cloth took place on Saori Looms at Designers 21 in Diss where one of our members, Kim (www.twistedtailor.co.uk) has her brilliant Saori Workshop. 3 lengths of material were woven which included a good proportion of hand spun and hand dyed yarn, all donated by members. On Friday 5 of us met to construct it into the 'dressing gown' (or rather a super coat) following the pattern Kim designed for us.

Another member is weaving a belt on an inkle loom and I have spent about a day using the tiny amount of material left to make a pocket that will go on the belt and not detract from the fantastic fabric of the jacket. In fact having made a sample portable pocket I have decided that I can find a use for several of these! The sewing group designed the draft for the pocket at the end of our construction marathon.
Portable pocket as a draft
 
Actual pocket using the oddment of weaving - the orange section is the front of the tube to carry the belt. The hand goes in to the pocket at the base of the orange section. The seam up the centre is because we wished to use both selvedges - so this just made the job a little more challenging!

 
I am sure I will write more about this later as we have more plans for the design and the jacket. It is a stunning item and we are delighted with our contribution.

N.B.The 'dressing gowns' are to be donated to Knit for Peace, a charity which will distribute them to people in the UK in fuel poverty
. I believe the handing over of the  ‘dressing gowns’ will take place at the Knitting and Stitching Show at Alexandra Palace in October.


Sunday 2 August 2015

A month of creativity - day 1 - vintage cushion cover


I hope to have a month of textile creativity - sheer bliss - and to keep a journal of that on my blog.

The month has started well. Last March (2014) I wrote about repurposing some vintage linen - into making a case for my iPod. This encouraged me to make what was a linen cushion cover into a bag. I like to carry a spare bag with me all the time when I am out. I have enjoyed using the one that I have made – this has also sparked many interesting conversations with people too. Also, I am unlikely to meet another whilst out shopping!


After going through my set of linen embroidered cushion covers from clearing my aunt's house I decided one of these was just right for right for a shopping bag.
Unfortunately all the green thread had reacted badly to the light and needed replacing.


This duly completed, I lined the bag with part of a surplus white linen table cloth from my stash. This had been my mother's.

Now in July 2015 much more of the embroidery needed replacing. So I have been doing this gradually through the month and August the 1st was washing day for the bag.
This is the result - very pleased with it and it has memories of both my mother and her sister.