Tuesday, 14 September 2021

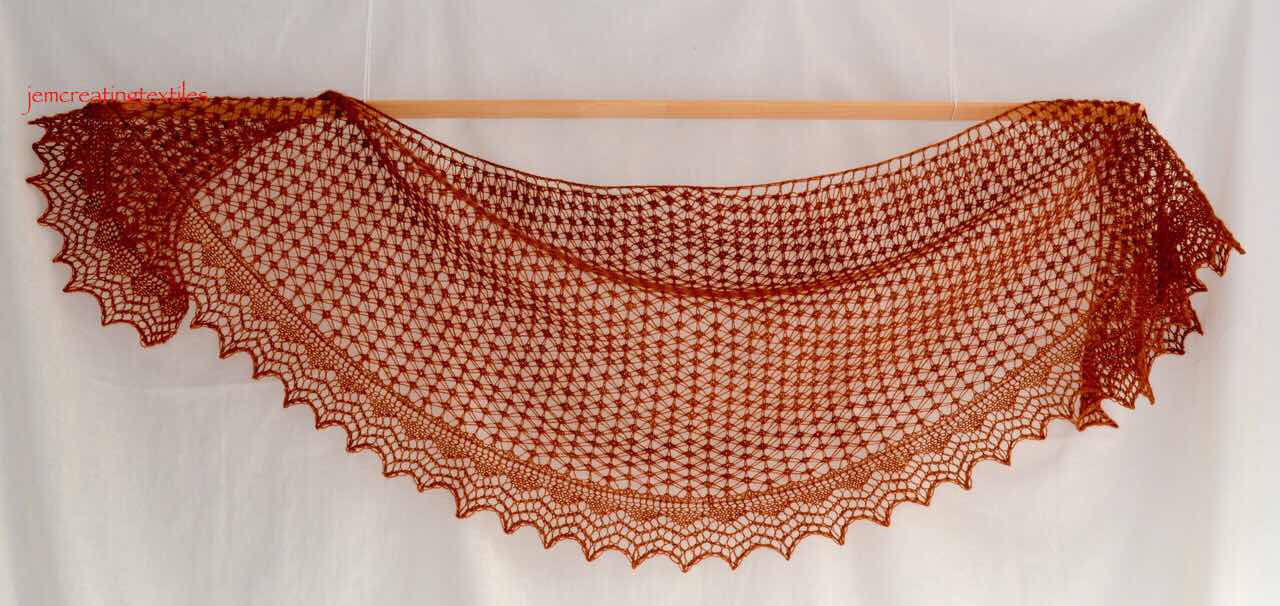
Fladda / Alchemilla is finished and I love it


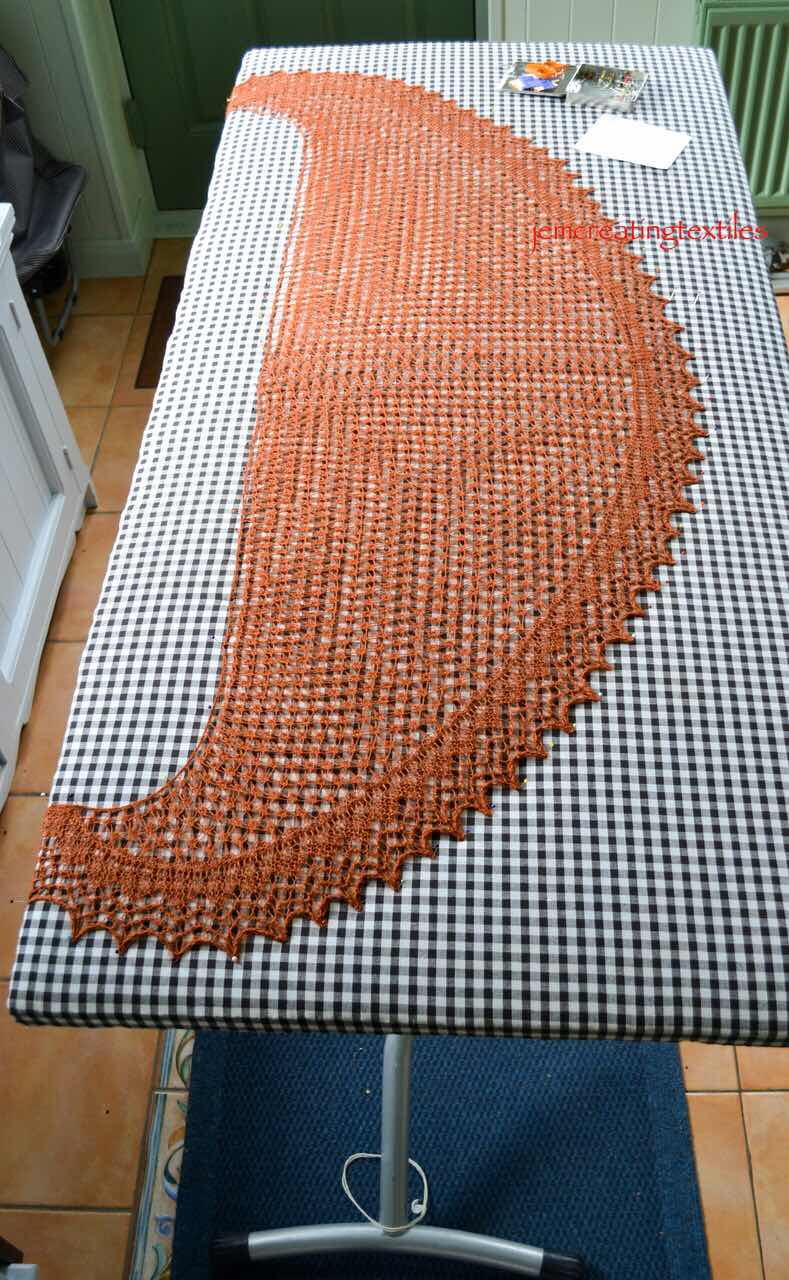
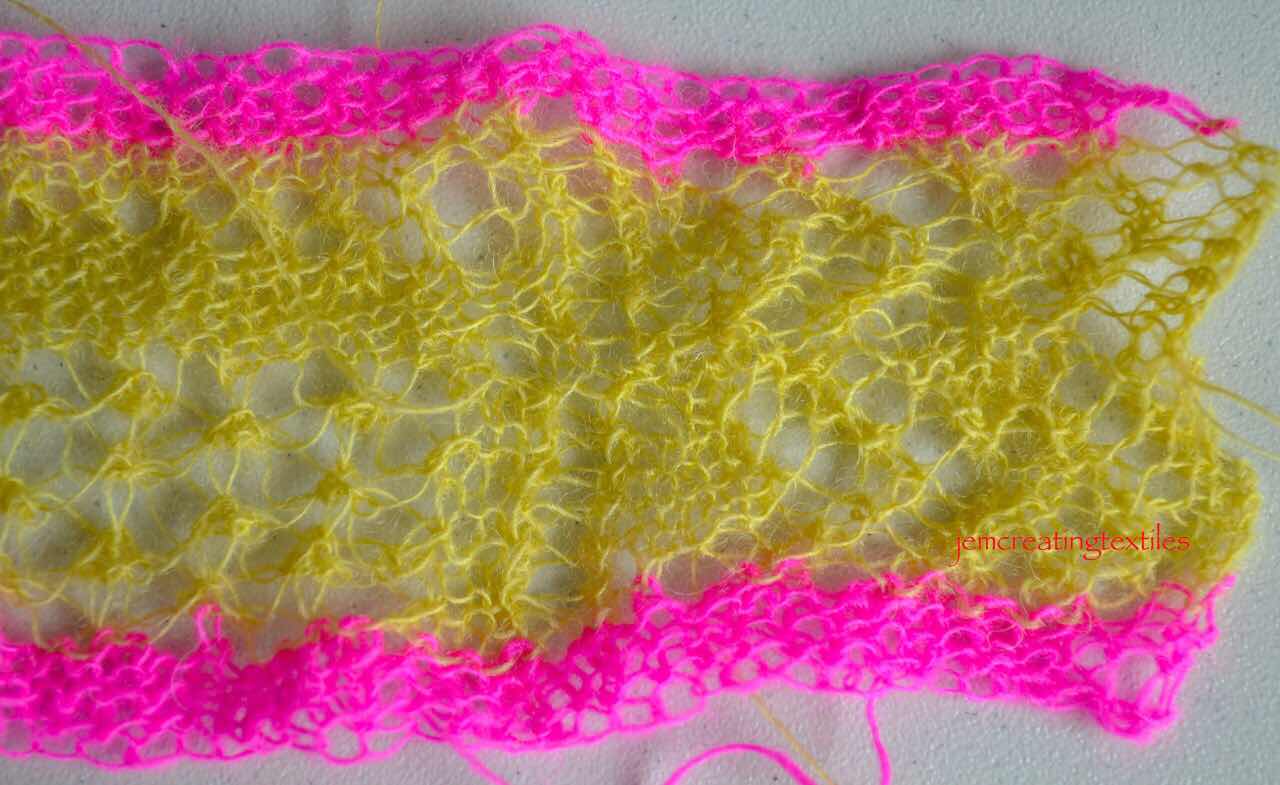
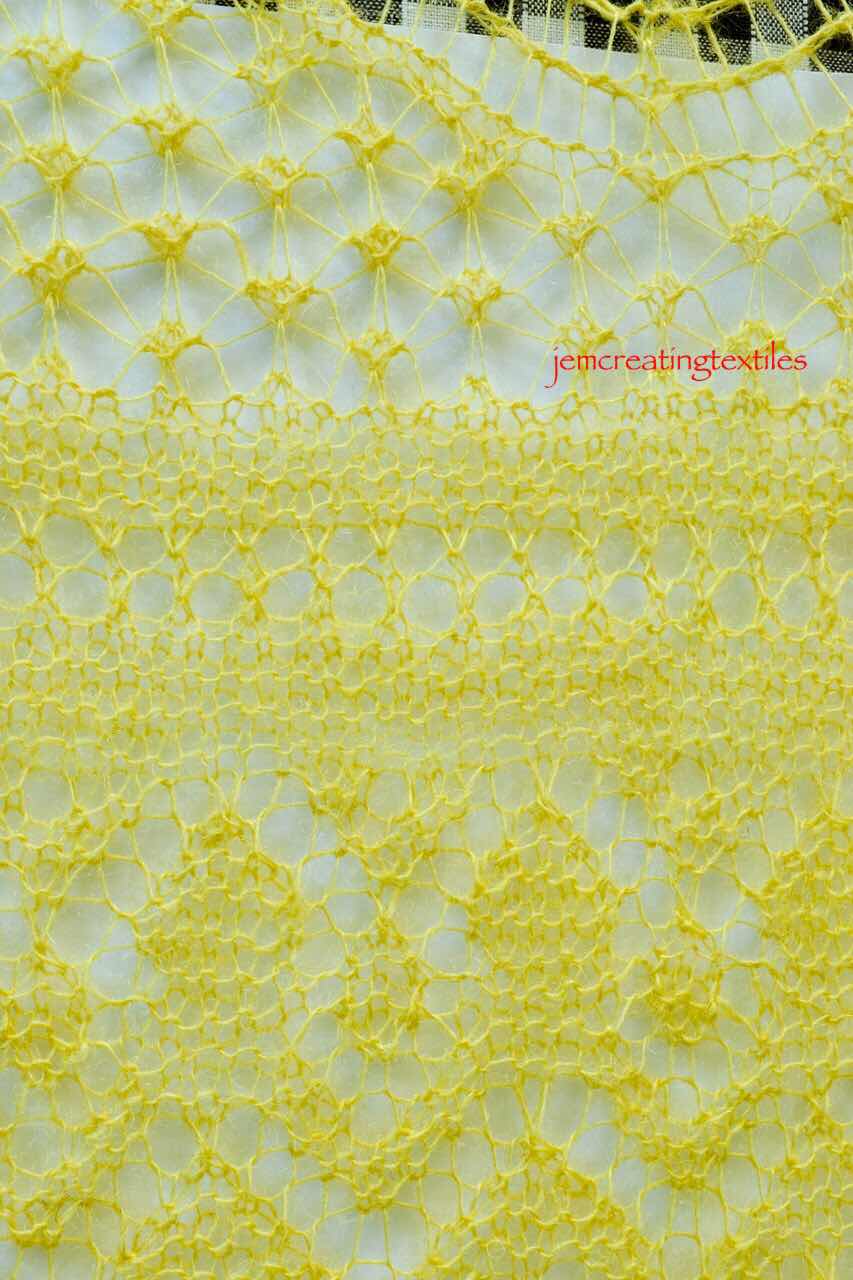
During June / July I was fortunate to attend a series of lace knitting workshops with Elizabeth Williamson, close by in Suffolk. During this time we saw a range of Elizabeth’s shawls, by range I mean in shape, colour, fibre, stitch pattern and challenge. You name it Elizabeth had an example. I fell in love with Elizabeth’s Fladda instantly, I loved the crescent shape and the openness of the design and determined to knit it. 


You will see that I also call it Alchemilla and that will be the name I use for it. Fladda is the name of the pattern, given by Elizabeth, it is a Shetland word. I decided that I would knit the pattern in my own naturally dyed yarn. I have had a couple of Alchemilla plants in pots on my patio and they have flowered profusely this year and given me real joy. 


Alchemilla plant


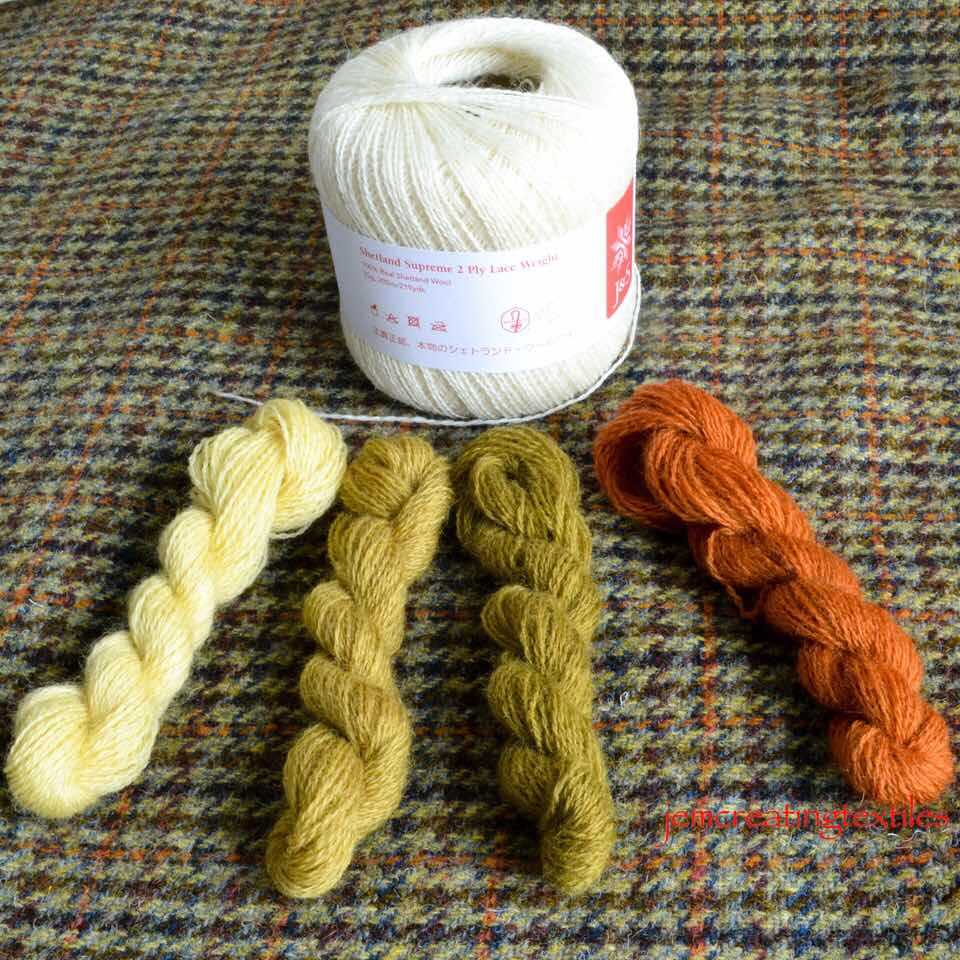
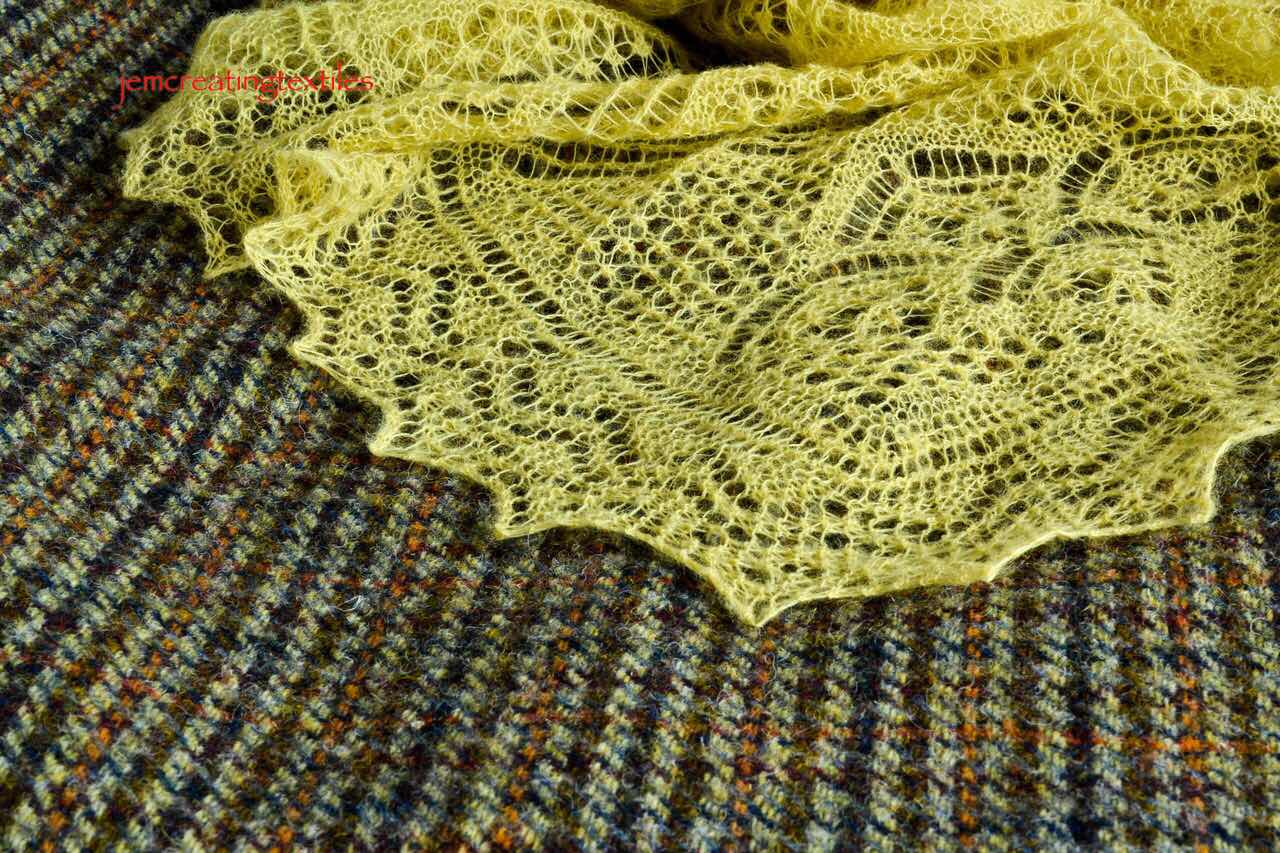
I also decided that this shawl would be great alongside my Hand Made Harris Tweed Skirt. The Alchemilla dyes  the yarn in a yellow hue and I decide I would do a sample dye using both madder and iron, after dyeing it yellow. 


I lived with these skeins on the skirt for some days before deciding to go with the madder modified one. I am delighted with my choice and I am only sorry that there was not enough dye to do the green version as well.

The yarn I used was Jamieson and Smith 2 ply Supreme. It dyed beautifully and was a joy to knit. It is a thicker yarn than the 1ply supreme and 1 ply cobweb that I normally use but my eyes have been opened to the superb lace shawl that can be made with slightly thicker yarn and bigger needles and I will certainly be doing such a design again. (After sampling I choose to use 3.5mm needles.) 


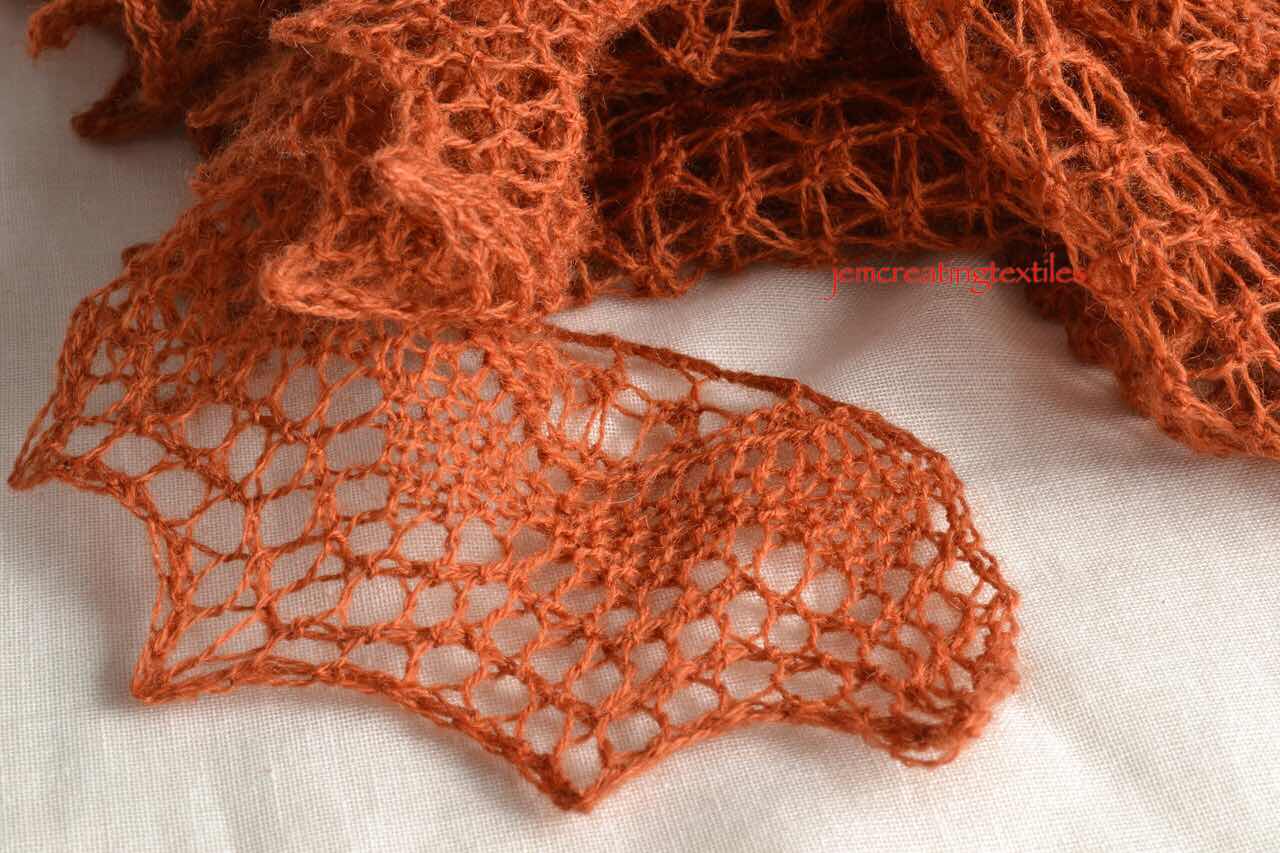
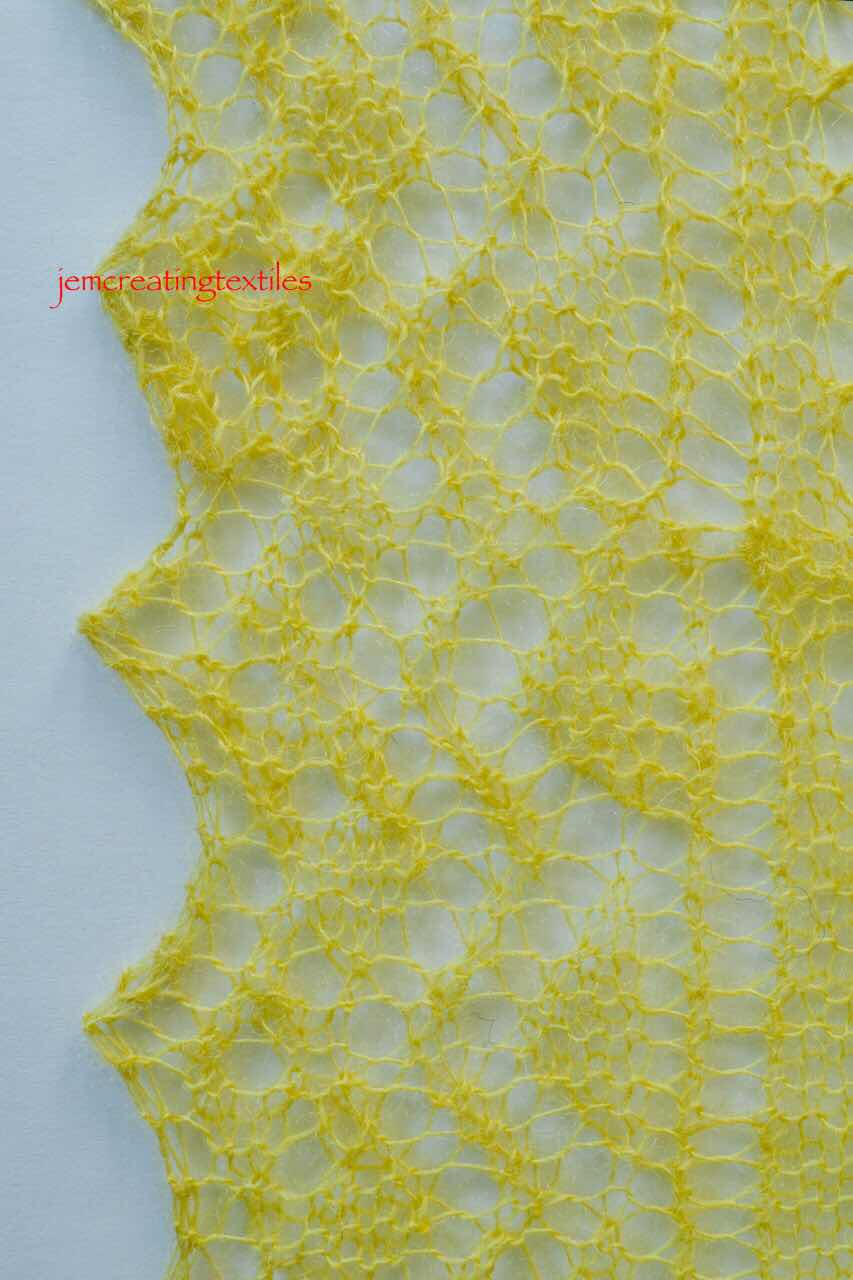
A corner of the crescent


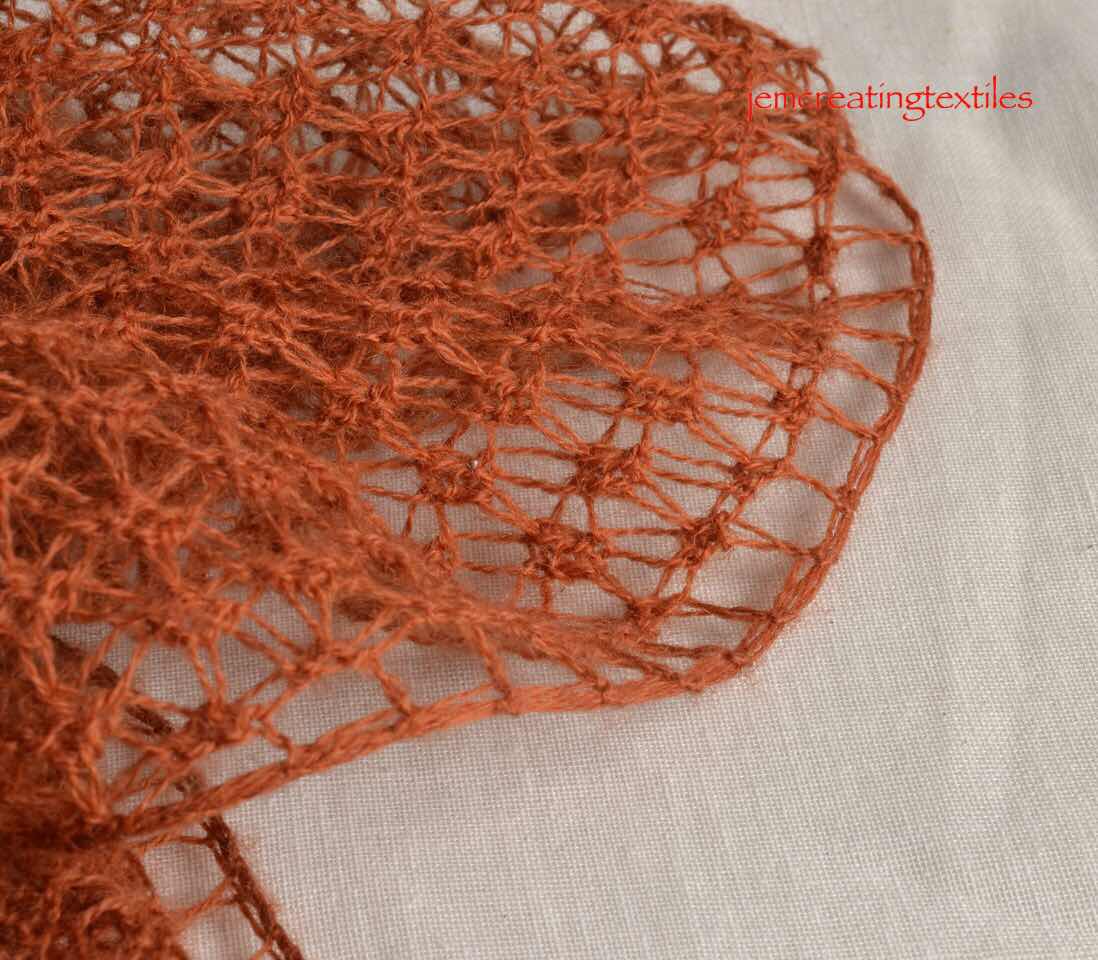
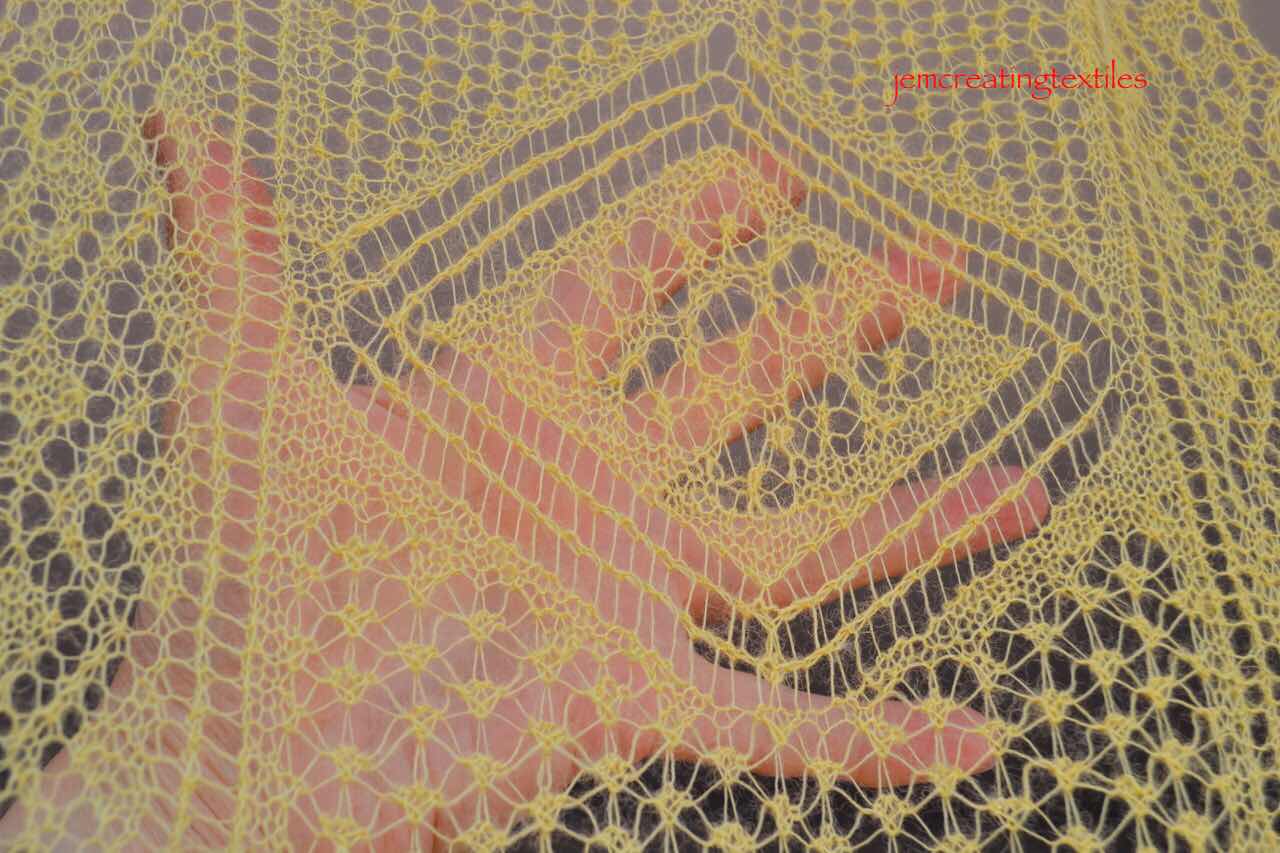
The long edge


Some facts: 

Finished mass : 49g

Knitting Time : 38 hours - added to this should be the checking stage, finishing ends etc and dressing, which is probably another 4 hours. 

shawl being dressed 


I knitted the shawl using 30 cm dpns, as I use a knitting belt. I have 40 cm needles but never needed to swap even when the number of stitches got large.  

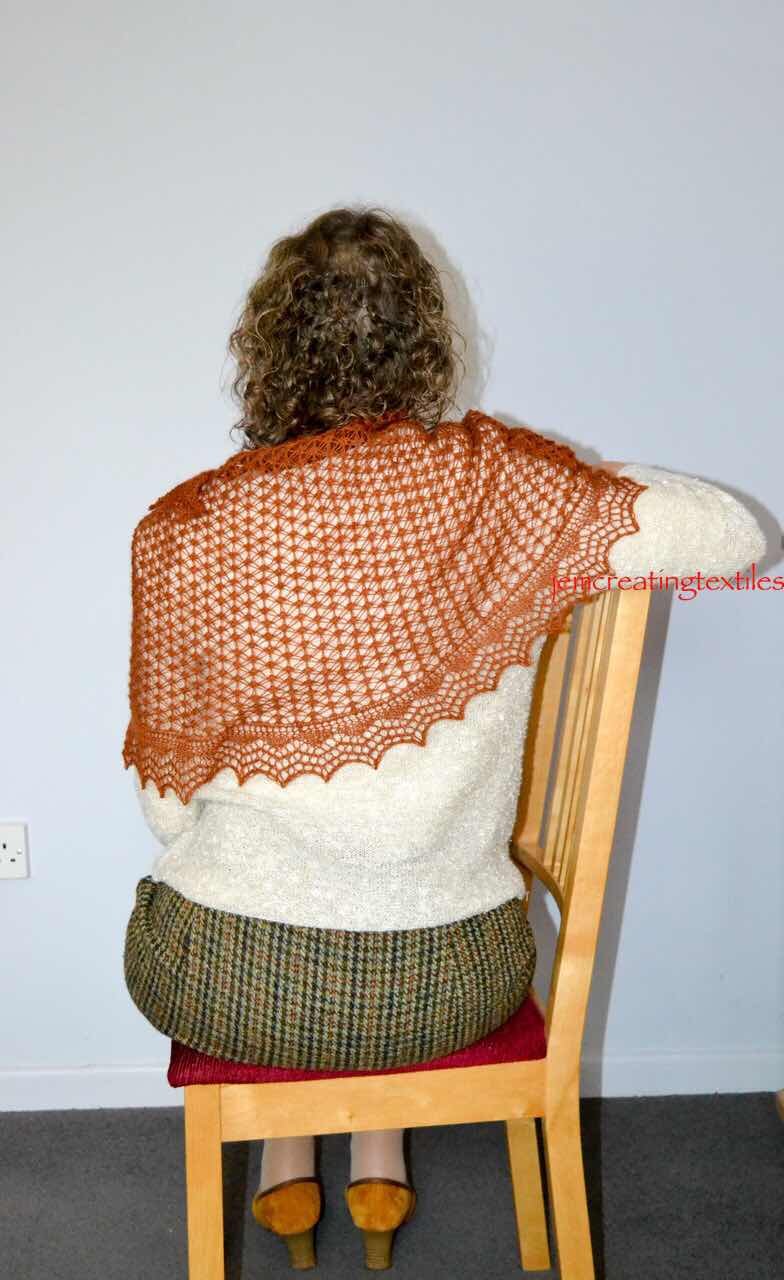
Finished width - 133cm and depth - 44cm centre back


Me, wearing the shawl 


It has been a very wet day and the light was poor! 


You can find Elizabeth’s patterns on Ravelry, under Elizabeth Williamson. Elizabeth was born and brought up in Shetland surrounded by Shetland Knitters. 

Sunday, 8 August 2021

Sheringham and Cromer


Over the summer I will try and describe some of our local places, starting with these 2 places. 

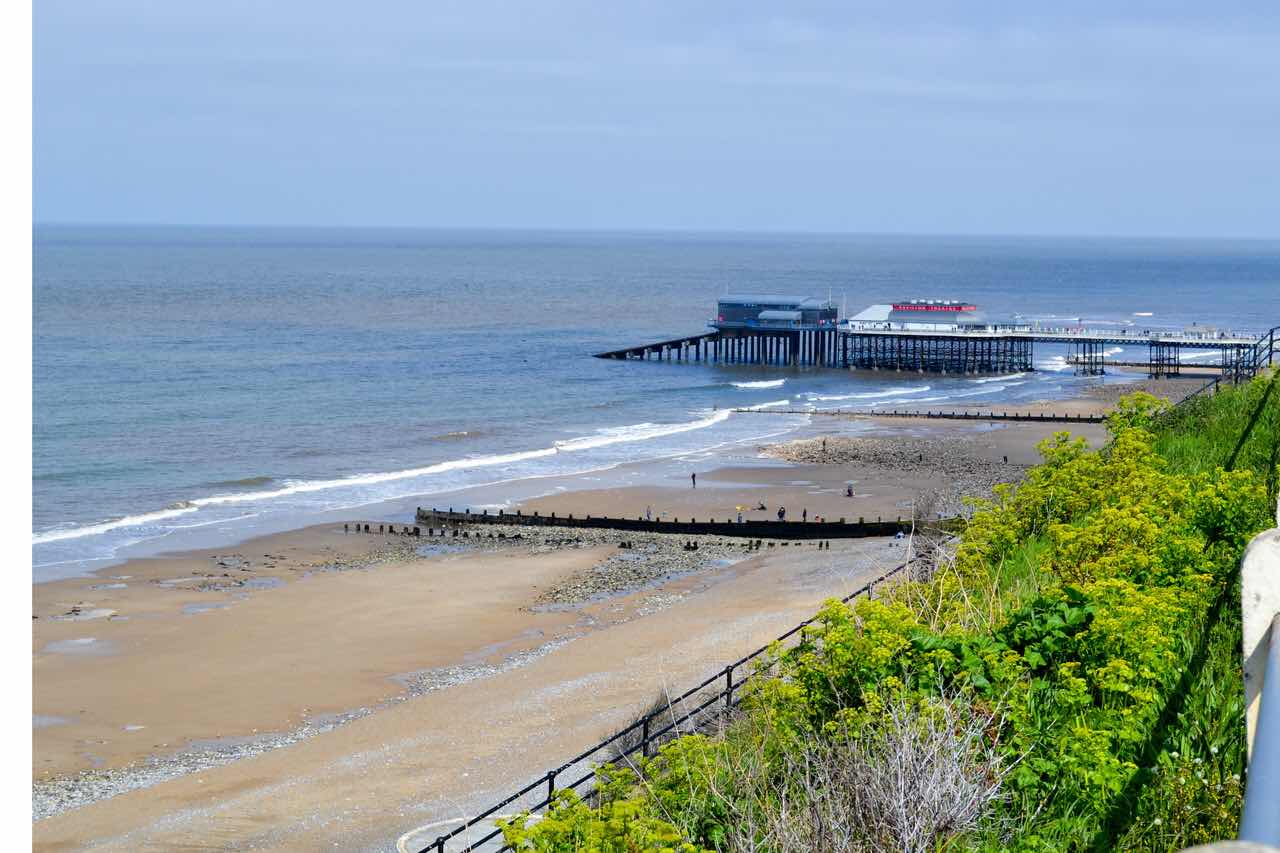
Cromer pier 


Both these towns are situated on the north east of Norfolk. We visited both at the beginning of June when we were booked into Sheringham Museum for a morning. This was towards the beginning of opening up the lockdown restrictions. It enabled me to visit the Gansey exhibition  and enjoy part of the Michael Harvey  Knitting Collection( see blog of 2June21 for pictures and more details). 

Both towns held bad memories for me as a child for different reasons. Every year, when I guess I was at Junior school, I was subject to the annual Methodist Sunday School Outing. I would rather have stayed at home and sewed or knitted but that was not to be. I had to go and get through the day. We went on a coach and were  looked after by the person who ran the Sunday School and I assume a helper! We had to sit on the beach and ‘play’ and then eat a prepared sandwich lunch! Eventually it was time to go home! Cromer held similar horrors for me as some elder girls, daughters of my parents ‘friends’ were bouncing me over the waves in the sea which I hated and dropped me! Eventually with the help of others on the beach I was ‘found’! I can remember it to this day spluttering out salt water and being very frightened. 

It was only when we moved back to Norfolk recently that I came to really appreciate both places. The reasons I love them are not ‘new’ reasons and I suspect would have endeared me to both places as a child….if only I had known about them. 

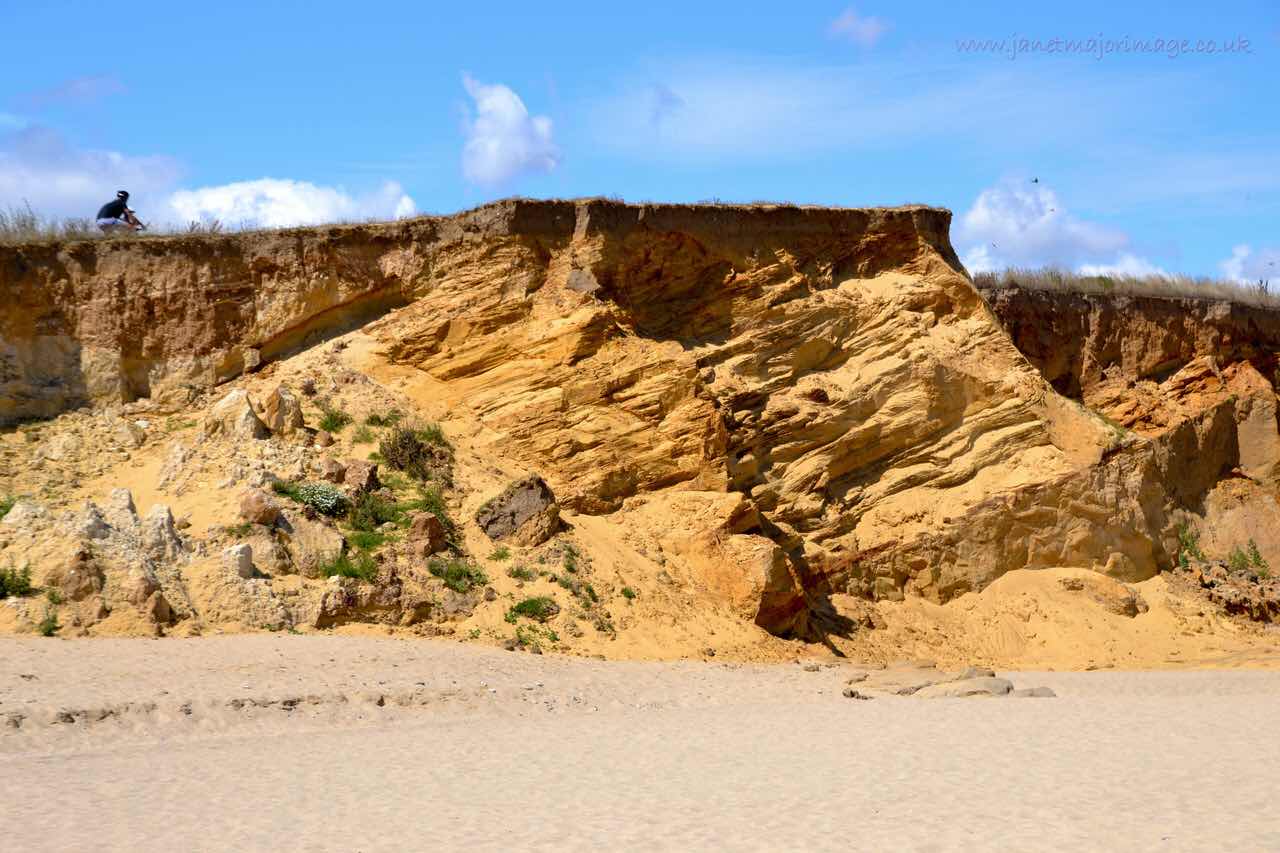
Perhaps I can tempt you to like these wonderful towns too. Both places are now along what has been coined ‘The Deep History Coast’ and recently more has been made of this important aspect of our our history. This 36 km  section  of the Norfolk coast extending from Weyborne to Cart Gap juts out into the a North Sea. Until about 6000BC (although there seems to now be some ‘discussion about that date) Britain was joined to Europe and if you ever  listen to the shipping forecast you will have heard conditions given for Dogger Bank. In the past ‘Dogger Bank’ had inhabitants and was on the path travelled by many from  Europe to Great Britain. Given the position of Sheringham and Cromer the coast is constantly being eroded and although a big storm destroys more of the cliffs, it is often after a big storm that fresh evidence for our past is uncovered. Writing  about this is beyond the scope of this short post, but two significant finds were the fossilised steppe mammoth discovered at West Runton in 1990   and the Happisburgh fossilised hominid footprints dating back over 800,000 years ago to the early Pleistocene discovered in 2013. 

Erosion such as this: 


It is always fascinating to walk along the coast here and keep an eye on the beach hoping to make a find! For anyone who does visit there are now interpretation boards along the coast, some great art work and an app to help you on your way. I hope all this is now taught in local schools! How cool is that, being so close to real history. (1) link to Deep History coast. 

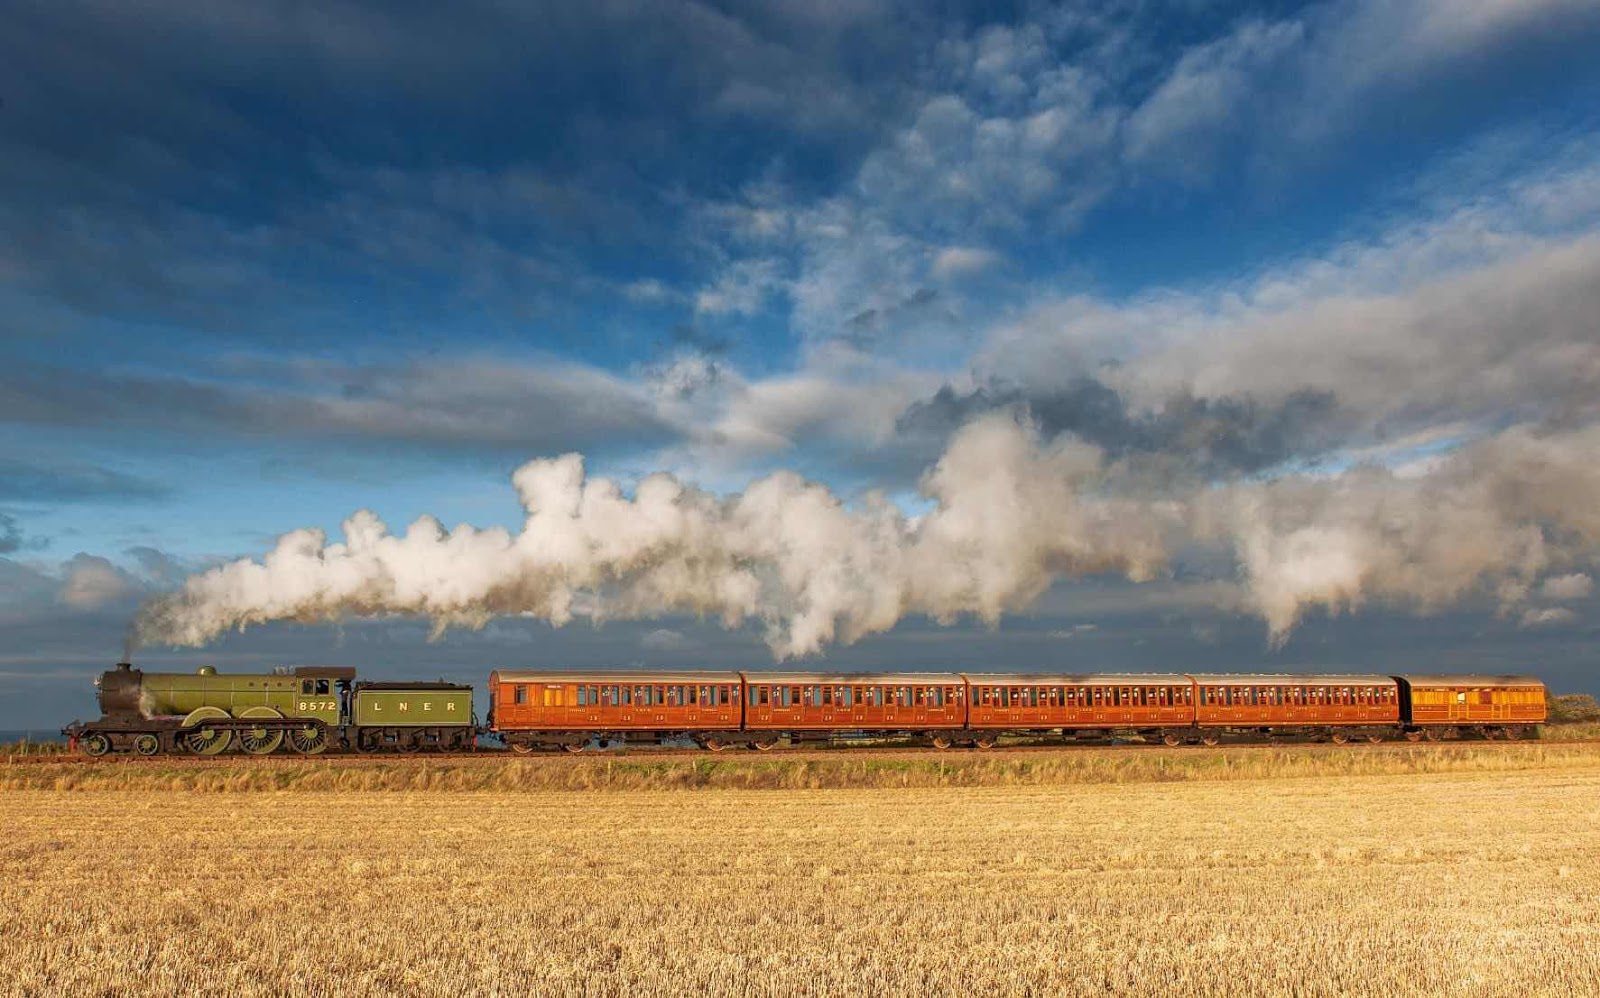
Another reason to visit Sheringham is the steam railway.

This is not my photo and I would like to credit the photographer but unfortunately do not have a name. 


 ‘The Poppy Line’ (2) travels west  along the coast to Holt, another delightful place to visit. Be warned however, it is a long walk from Holt station to the town, particularly on a hot day. If you are interested, do look up train times and type of train. If is is particularly hot the steam train may have to be swapped for a diesel. Sparks from the steam engine can cause a fire on the heathland the track goes though. Many years back we had a trip for a Father’s Day treat. 2 courses of lunch going from Sheringham to Holt and 2 course including cream with the puddling picked up a station on route. Another great trip is a Santa special. As adults we were given Sherry and mince pies by Santa’s kind elves….but then this was many years pre Covid! It is a delightful journey. You can still travel to these two places by train. I am sure some years ago you could get on a train in Liverpool and get off the same train in Sheringham. When I checked this it seems that you can travel direct from Manchester to Norwich and would need to change there for Cromer or Sheringham. You would need to devote a day for the journey  but it must be more appealing than the M1 or the M6! 


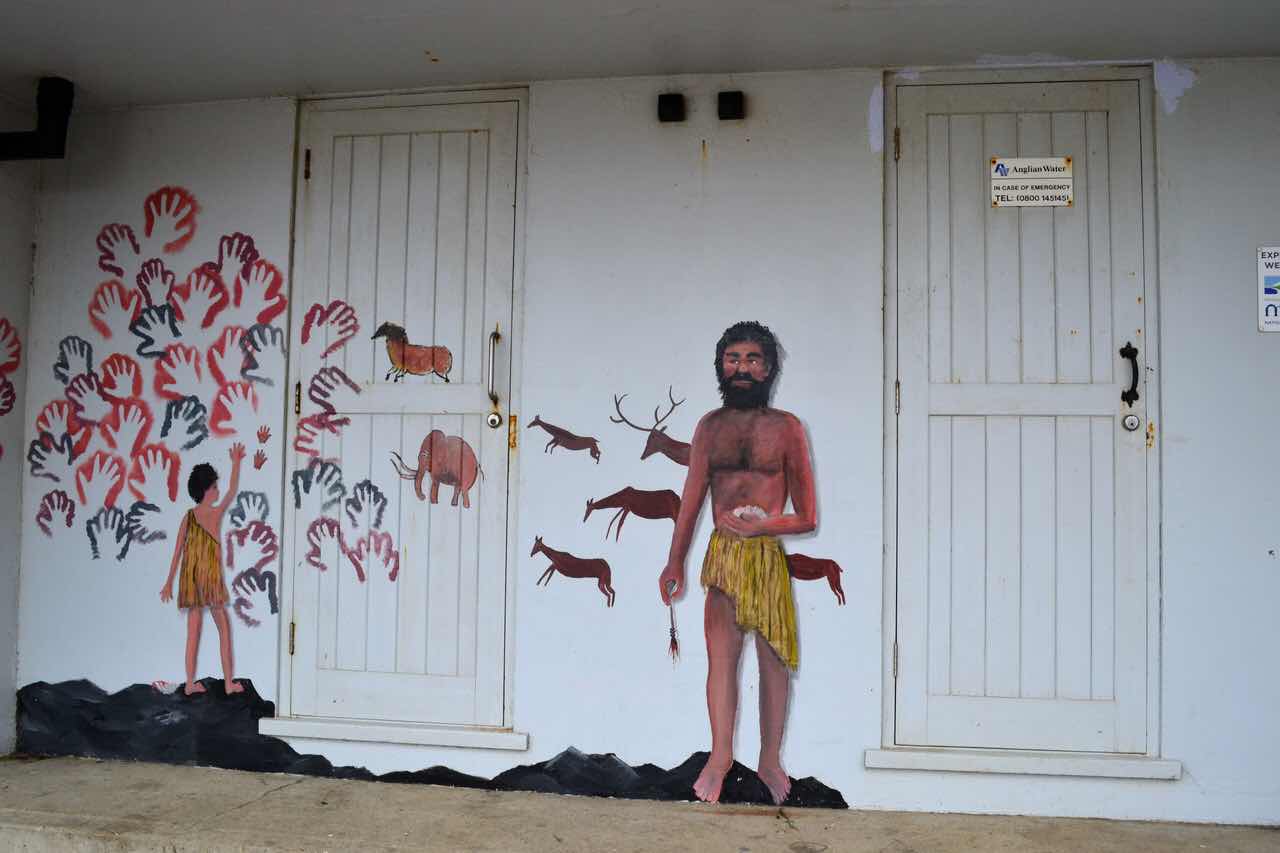
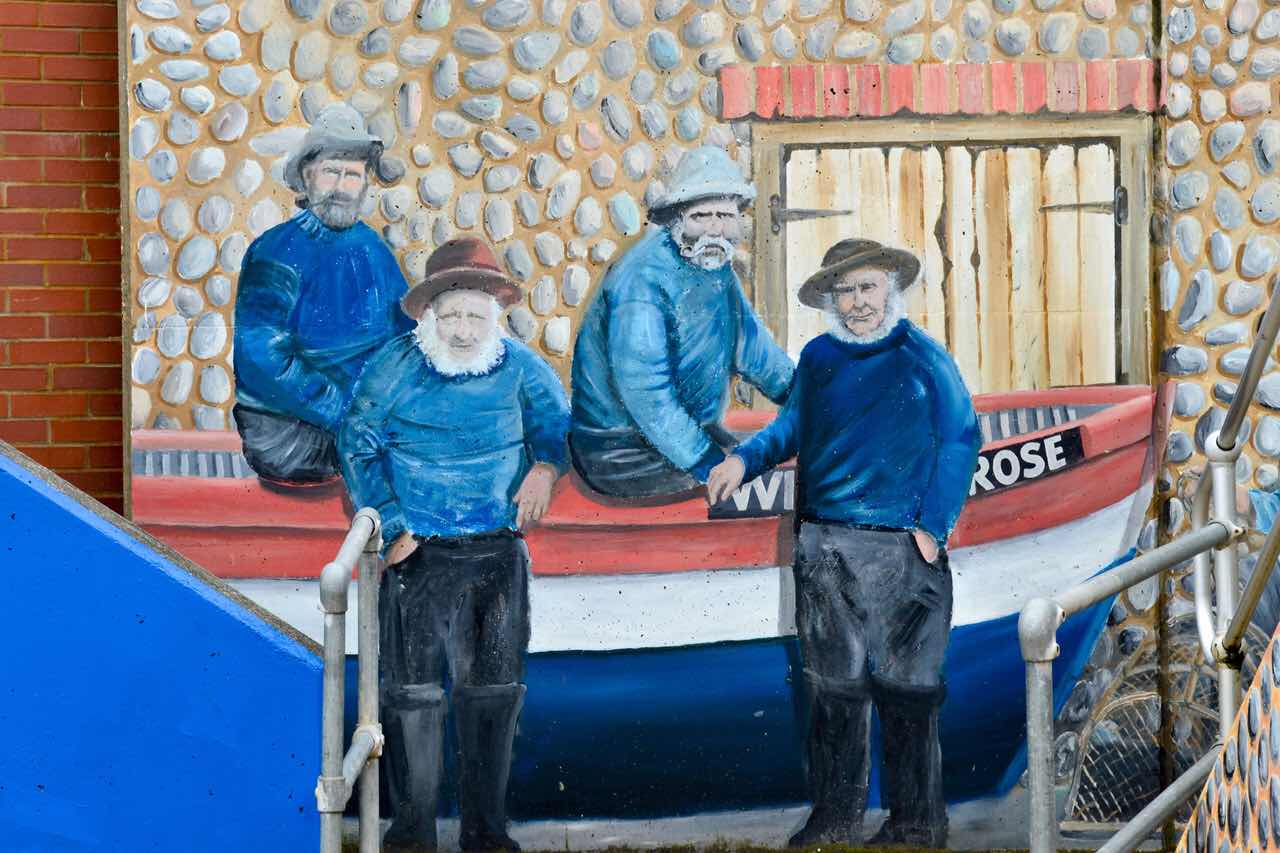
Both Sheringham and Cromer are famous for their fishing Heritage and Sheringham (3) in particular has some wonderful art work along the front along from the Museum, in terms of murals depicting this. If you are lucky enough to visit the Museum it is well worth allowing time to potter round outside to look at these.

Making the most of a concrete see wall


This is an Anglian Water Building and if you look up the history of the museum called The Mo, you will find some interesting facts about the link between the museum and Anglian  Water. Also it is good to read that Sheringham is a Blue Flag beach. I rather liked the use of art here! 


..and adjacent to the Museum


In Cromer Museum (4) you can see some bits of the famous West Runton  Mammoth. What a pity it is deemed too big to recreate. In my mind it is another Norfolk  jewel that could be boasted about! I have spent hours trying to find my photos of the bones! I think a winter project will be to sort the many digital photos I have. So this is a link to some photos of the bones. If you press visit, you can see an article written pre 2015. Alas Norwich Castle Museum  is now involved in a massive project to recreate the Norman Keep and sadly I fear seeing a reconstruction of the West Runton Mammoth has been pushed far into the future! (5)


However, it was the advent of the railway that brought Sheringham and Cromer their beginnings as Tourist Resorts in Victorian times. Trains full of people would come from the Midlands and for the first time many workers could appreciate the bracing air. Much building happened in both towns and there is some stunning architecture  in both Sheringham and Cromer. 

Taken from the top of the  cliff where I took the first photo:


I was pleased to see these adverts along the route of the zigzag climb from the beach in the resting  spots at the corners of the climb. (Michael searching his bag for his inhaler!) 


The pier dates from 1901 and has been renovated recently to restore it to something like it’s former glory. There is still an end of the Pier show if this is to your liking. It is also a brilliant place to go to photograph sunsets! 


Notes.

  1. The app for the Deep History Coast https://www.visitnorthnorfolk.com/Deep-History-Coast/deep_history_coast_app.aspx
  2. The Poppy Line https://www.nnrailway.co.uk/
  3. Sheringham Museum https://www.sheringhammuseum.co.uk/
  4. Cromer Museum https://www.museums.norfolk.gov.uk/cromer-museum
  5.  The West Runton Elephanthttps://images.app.goo.gl/3njSagVCiUS6Xjey8
It seems you need to be logged in to Google if you wish to comment. If that still does not work, look on the top right of the blog and you can get to my website which has a comment section that works! Sorry about the extra fuss! 

Sunday, 6 June 2021

Burrafirth scarf complete


This is one of the patterns devised by Hazel Laurenson for Unst Heritage Trust. This pattern is steeped in ‘Unst’ for me. We love the island and are sad that because of covid -19 we have missed 2 years of visiting. Hopefully we will be able to visit soon. Hazel has devised the motifs in the pattern from ‘The west Side Shop 1880’s collection’. The pattern is available from Unst Heritage Centre and the booklet with more of these motifs in, called ‘Recreating vintage Shetland Lace’ is also available from the  Heritage Centre.(1)

The construction of the scarf  is typical Unst to me: 

Waste yarn cast on, 

knit the bottom lace edge, 

turn the right hand corner, 

pick up lace edge stitches, pick  up stitches form the waste yarn and 

turn the bottom left hand corner,

Then the first border is knit between the two vertical lace edges, so each row you actually knit 3 different lace pattern. Good for the concentration! 

After the first lace border you leave this knitting.

Start again and repeat what you have already done but this time continue for the middle of the scarf.

All that is left is to graft the two together 

Wash and dress the shawl. 


I choose to knit this one in Jamieson  and Smith Supreme 1 ply. However, I naturally dyed this yarn with Golden Rod from my garden in South Norfolk. I did not know how the quite ‘ungentle’ conditions for the natural dyeing would affect the yarn. Would it come apart? Would it felt? Well I am pleased to report that neither of these happened for me. (I do quite a lot of natural dyeing but 

even though  I had dyed the cobweb yarn form Jamieson and Smith I had not dyed this finer Shetland supreme 1 ply. After natural dyeing The NM 1/16 yarn gave me 60wpi  measured using a gauge form FLP. (2) 

I previously posted  the dyed yarn with the Harris Tweed shawl, the picture above shows the scarf with the skirt.


Those that follow my fine lace knitting will know I am a bit obsessed with grafting. So I trialled the grafting for this stole even before I decided to knit the pattern. (I discussed this in detail in a blog post here on 20 Sept 20) 


I started  knitting this scarf in Sept 20 but after I had knitted the first section I didn’t knit anymore until Feb 21. When I finished knitting the stole I decided to do trial grafts of the edging and centre again. So I knit a duplicate sample  of the full width of the scarf.  This included the  last lace edging  repeat each side and the central area which is garter stitch.

Sample with grafting of the lace edging and  garter stitch. 


Again I would like to thank Joni Coniglio for her instructions for lace grafting (3)

I found this scarf  was less nerve wracking as I had previously grafted the Hinneywaar shawl last summer and done more trials since. 

Somewhere in one of these widths of garter stitch is my graft.

Garter stitch graft


The graft of the lace edging is in here. Not quite perfect, and  I think I could improve next time with a tweak to the tension. I have enlarged it as I know I like to look at other people’s  grafts and learn from them so I am guessing this is the same for readers here.


Unusually for me I noted down how long I knitted for in each session and for the whole scarf  my total knitting time was 60 hours. Then there was the grafting, Checking, washing and dressing which would be another 7.5 hours so the total for the construction would be 67.5 hours. (This does not include the time for dyeing the yarn, sampling initially etc).


Undressed length 100cm and width 27.5cm 

Dressed length 141cm and width 31cm

Total mass 31g.


It ‘s been tricky photographing this, one doesn’t like to complain about bright sun from morning to night, but it is not good for photographs of a scarf like this. 

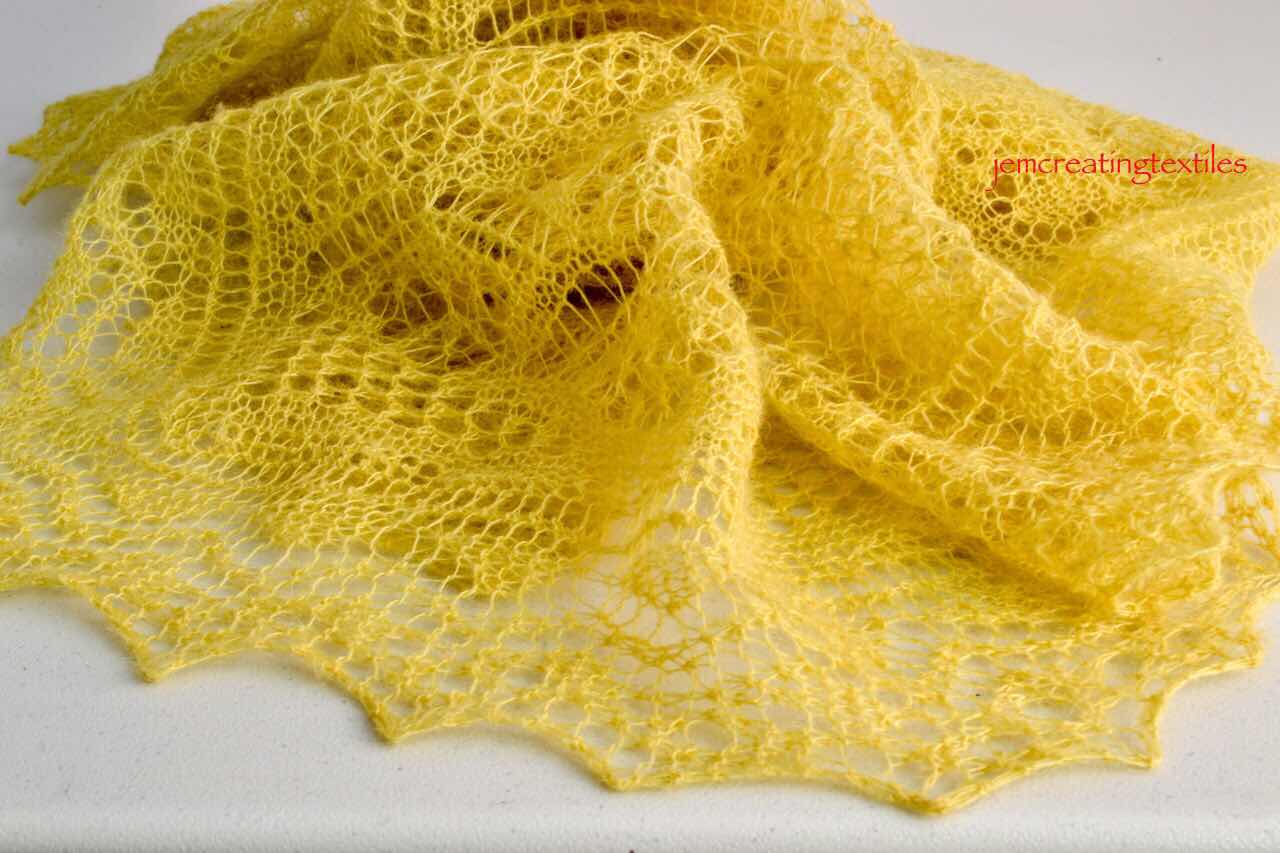
This gives an impression of the transparency of the scarf, but the background is very distracting. 

Hanging in the window


Looking inwards  allows the patterns to show up more. The scarf might not be very big but it packs in a good number of patterns! 


And the hand photo


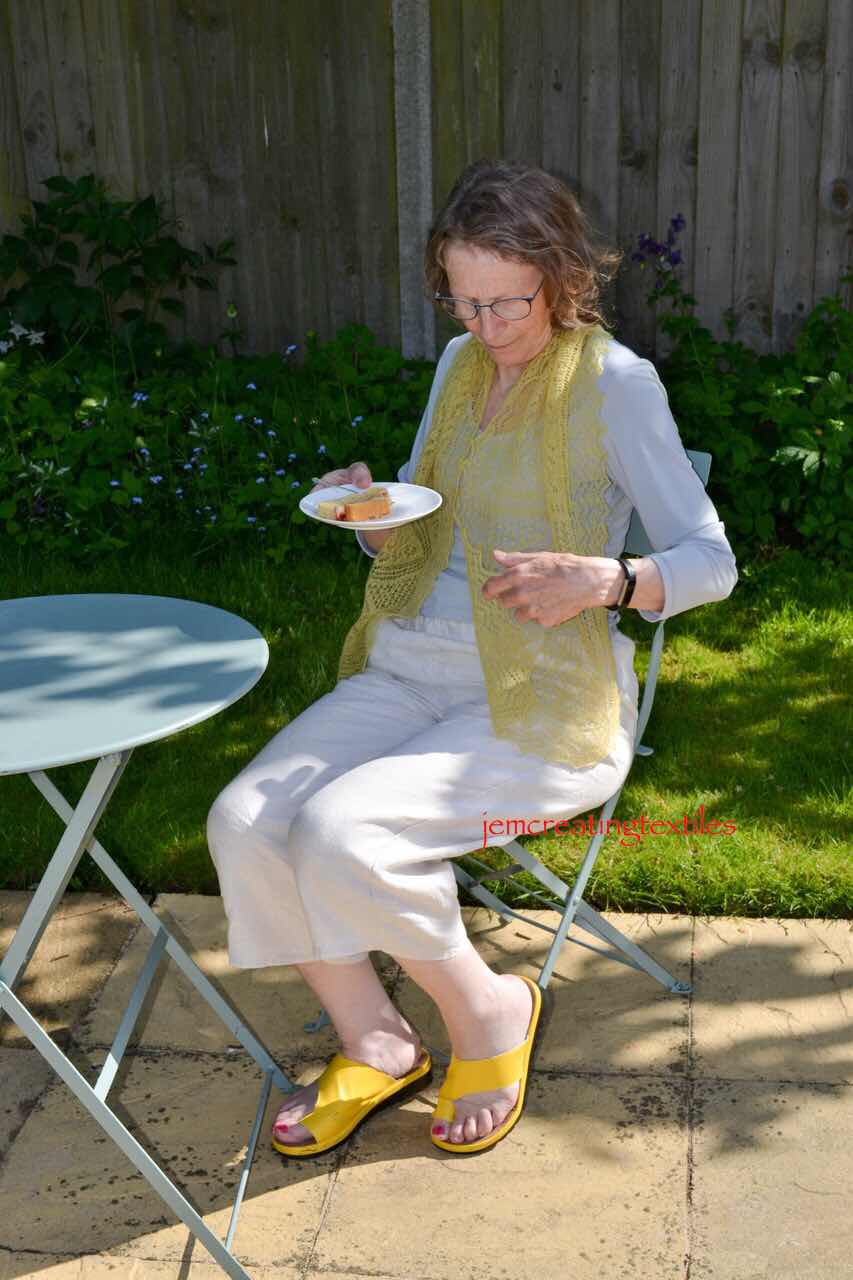
...and on me, in the garden for afternoon tea, when there was a gust of breeze! 


..and my favourite photo. 


Notes

  1. Unst Heritage Centre website http://www.unstheritage.com/web/
  2. FLP (Fleece Loved Products) can be bought from Jellybeans Yarns on Etsy, Beaker Button on fb or contact fleecelovedproducts@gmail.com
  3. Joni Coniglio’s 3 lace grafting lessons are available from Interweave, search under ‘lace knitting grafting’. There are 3 videos and an ebook in the series. 

Wednesday, 2 June 2021

Sheringham to see the Ganseys


We had a day out last Wednesday, it felt something akin to normality. We had booked a morning session at Sheringham Museum. Sheringham is on the superb North  Norfolk coast and the sat nav tells me is 48 miles from our house. 

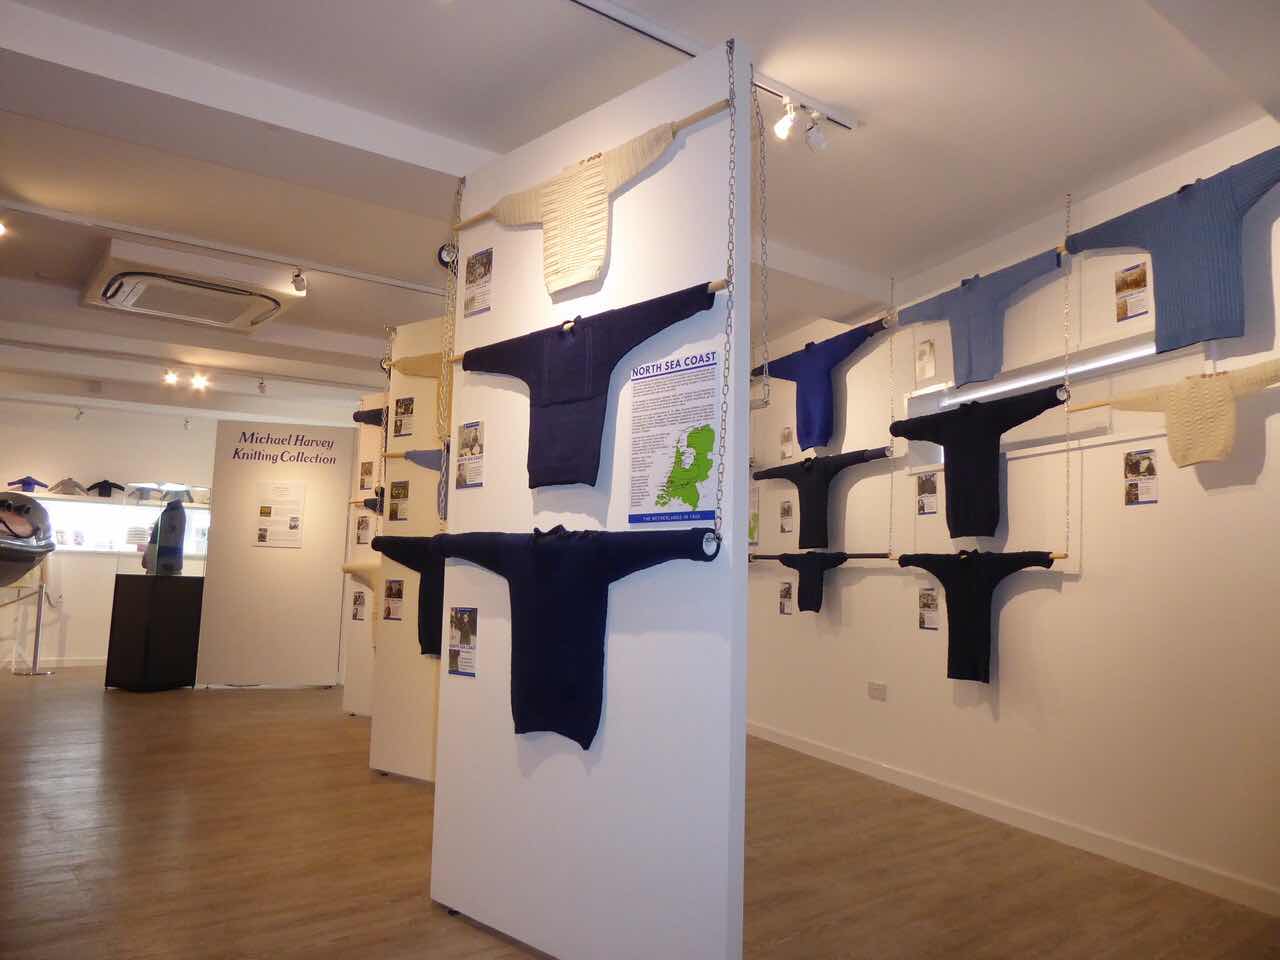
We had booked to go to see the display of  40 Children’s Ganseys and I was also particularly interested in the Michael Harvey collection recently acquired by the museum, as well of course as to see the Sheringham Ganseys. Currently going to a museum means booking in advance and we knew there would  be a smallish number of people and we would be able to be there from 11.00 to 13.00. The Museum would then be closed and sanitised etc ready for a fresh set of people in the afternoon. In terms of textiles, Sheringham is famous for the knitted Ganseys of the fishermen. The Sheringham ones used particularly  fine needles (‘old size’  16 or even 17) and 3 ply worsted wool. There is an important  collection of these Ganseys in the museum. As in Shetland nowadays the needles used were  called wires being double pointed and the Gansey was knit ‘in the round’.

Sheringham Fishermen wearing Ganseys and some knitting tools


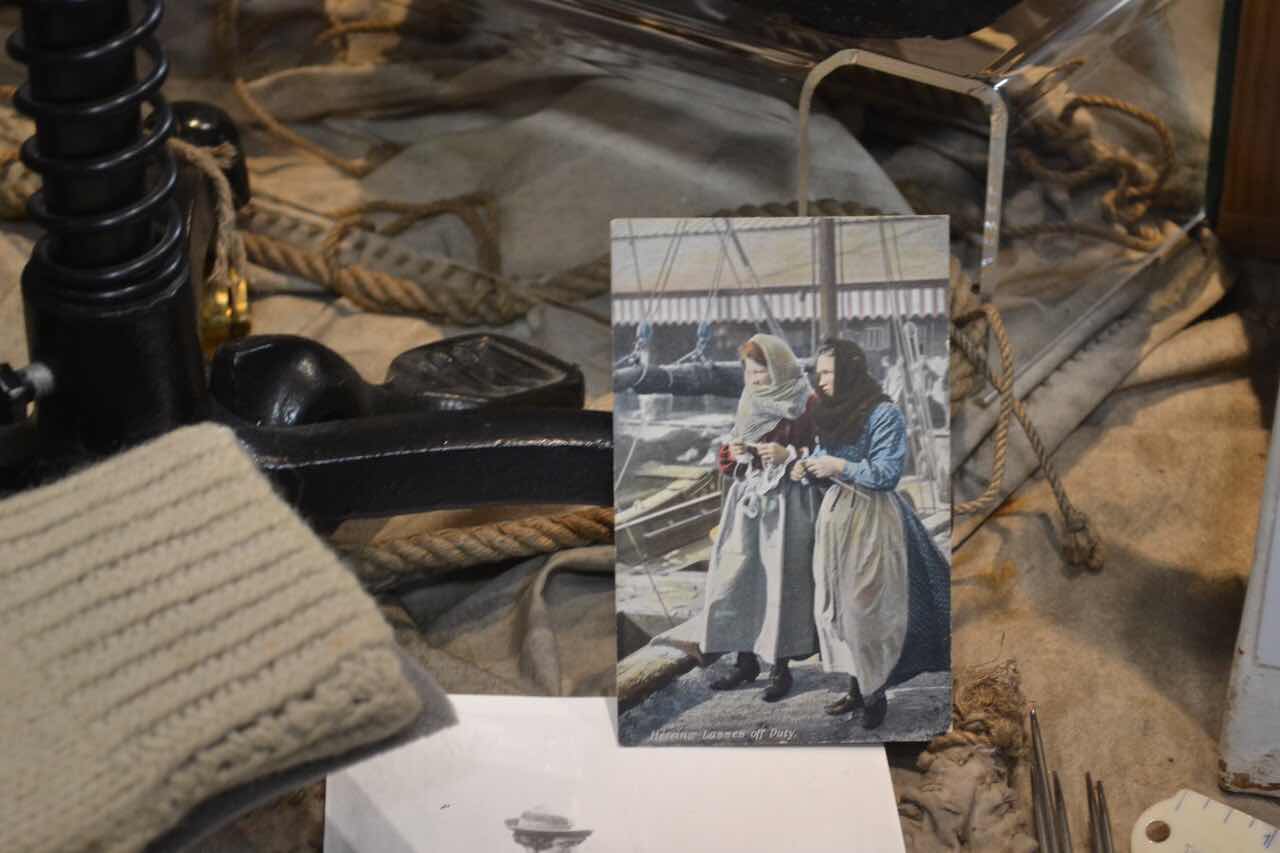
A link with Shetland, the herring lassies


The museum itself is a ‘new’ building (opened here in 2010) and the room upstairs used to display the knitwear is very light and has a good view out to sea. On a  good day a large wind farm can be seen on the horizon ( the exception being when a sea mist prevents this as it did on Thursday morning. We had a very enjoyable time there and if you can get there  this summer, I would highly recommend it. 


The local Ganseys  are well documented and the  museum ‘textile team’ are analysing the patterns and from my understanding their work in forming a recording template has been shared with other Gansey knitting communities, such as the Scottish Fisheries Museum in Anstruther (Fife). The glossary, also developed in this project is very useful too (1) 


The additional Ganseys to the local  ones this year have been put together by Stella Ruhe. I first heard Stella talk about Dutch knitting Ganseys at wool week some time ago, 2014 I think and since then she has continued her study of them and has now published 3 books. (3) I think it was in 2017 when I visited Sheringham museum to see the Ganseys in the Moray Firth Project


As I mentioned I was particularly interested in the Michael Harvey collection. I knew he had been a collector of Knitting Sheaths. I find it difficult knitting without using a knitting belt now, thanks to workshops during my time at Shetland wool week’s  with Hazel Tindall and also with Amanda Pottinger and Janet Irvine in Whalsay. It was great to see so many knitting sheaths , some very local and some from further afield. Norfolk was an important knitting area in the past (2) and having learnt to use a knitting belt I imagined that local knitters would have used a belt or the equivalent to increase their efficiency. I think my favourite was a cut down chair leg which had a drilled hole down the fatter end, making a tube for the end of a knitting needle. (4) it was good to see some leather knitting belts too.

A few of the Knitting Sheaths


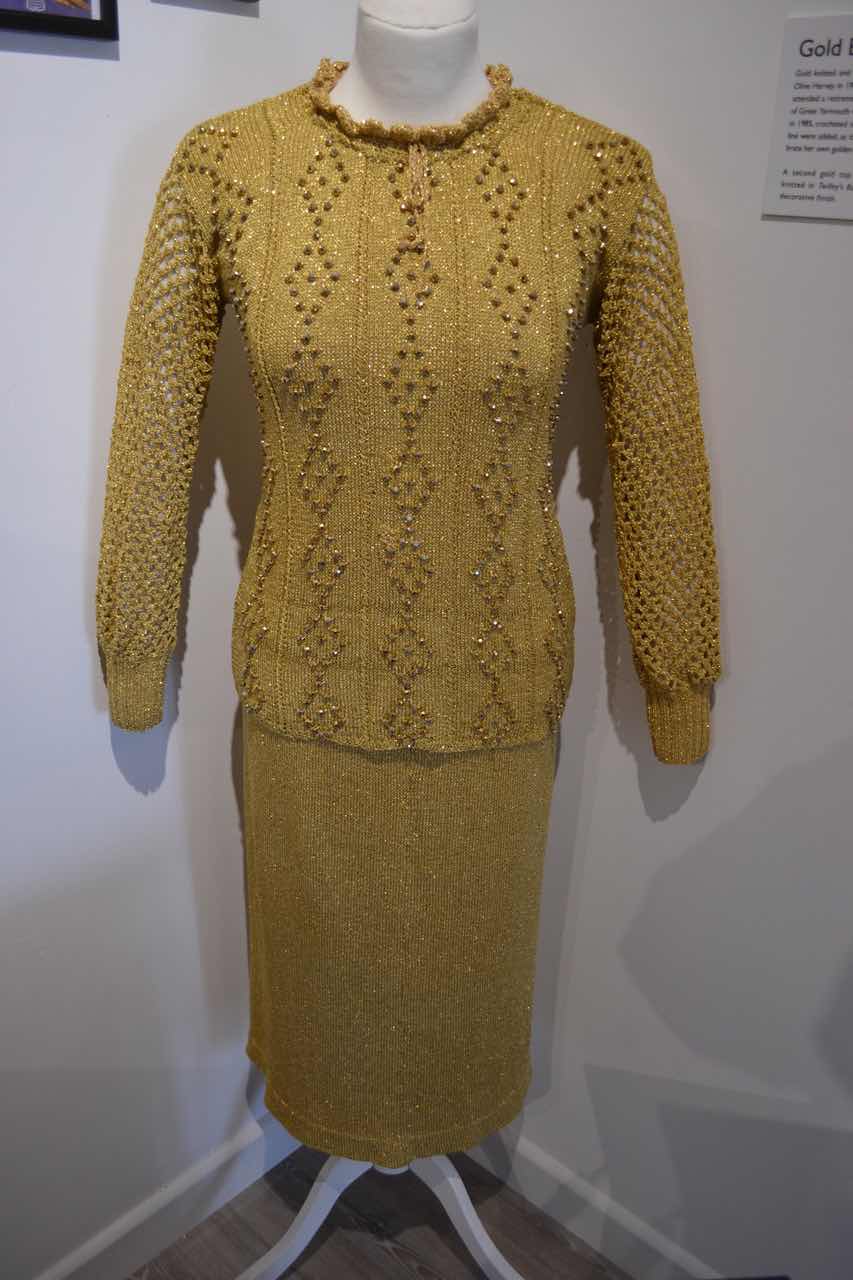
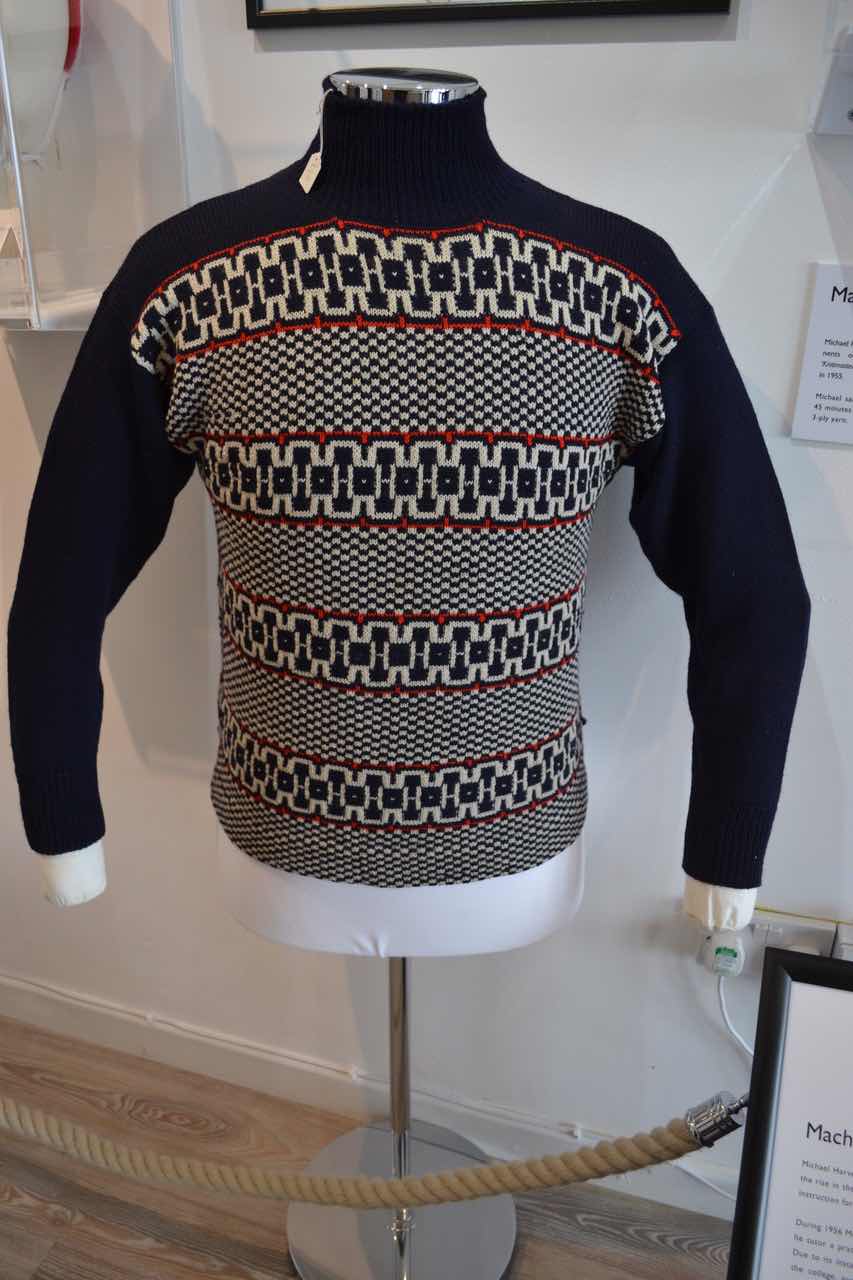
The Michael Harvey collection contains many more items that this. He was the son of a lady who ran a knitting shop, I think initially further south  in Great Yarmouth. As trade increased she had shops in other towns and even developed a brand of knitting wool. Michael himself has co-authored and written knitting books of his own. He promoted machine knitting and taught  Machine Knitting and Advanced  Machine Knitting in the county from 1950s. Some knitted items of his mother  and of his machine knitting were in the exhibition. Being an avid machine knitter myself it is very good to see Machine Knitting being valued. There is much more that I hope to investigate in this collection. 

Knitting from Michael Harvey collection, by Olive his mother


Machine Knitting from Michael Harvey collection, by Michael


Also in the exhibition room was case devoted to John Craske  and a chance to see some of his insightful needlework. (5)


What a great morning this was and it has opened up other branches of local textile history to explore further. It is worth more than one visit.


I will write another post more about the town (and it’s neighbour Cromer). Sheringham was in its heyday, in terms of tourists, when the railway first brought holiday makers from the Midlands in the late 19th century. Many of the buildings and shops come from  the late 19C / early 20 C period. 


Notes:

  1. Do take a look at the Museum website, under the Textile section. Here you will find a link to the glossary mentioned above as a short video about the Michael Harvey collection and information on the Craske Collection. https://www.sheringhammuseum.co.uk.  There is also a great booklet available from the Museum. It is researched and written by the museum textile group, this includes a chapter on pattern analysis and some patterns - Sheringham Ganseys Rita Taylor, Lesley Lougher, Jan Hillier, Ken Holloway and Martin Warren. 
  2. Certainly from the late 16th Century. 
  3. Books  of Ganseys from Stella Ruhe: Dutch Traditional Ganseys: Sweaters from 40 villages; Traditional Dutch Ganseys for Children: over 40 sweaters to knot from 30 fishing villages; More traditional Dutch Ganseys: 65 Classic Sweaters from 55 fishing villages.
  4. Having learnt to knit with a knitting belt, I am surprised that more people do not use them for knitting nowadays. Knitting with one is very efficient and even more so if a Rapein  string  is used which helps stabilise the left needle too. (see ‘knitting belt’ under labels in the blog for more discussion of using a knitting belt and rapein  string and also  under hand knitting and heritage on my website
  5. John  Craske.... There is a book devoted to John Craske- Threads: The Delicate Life of John Craske 


Friday, 21 May 2021

Fine silk spinning


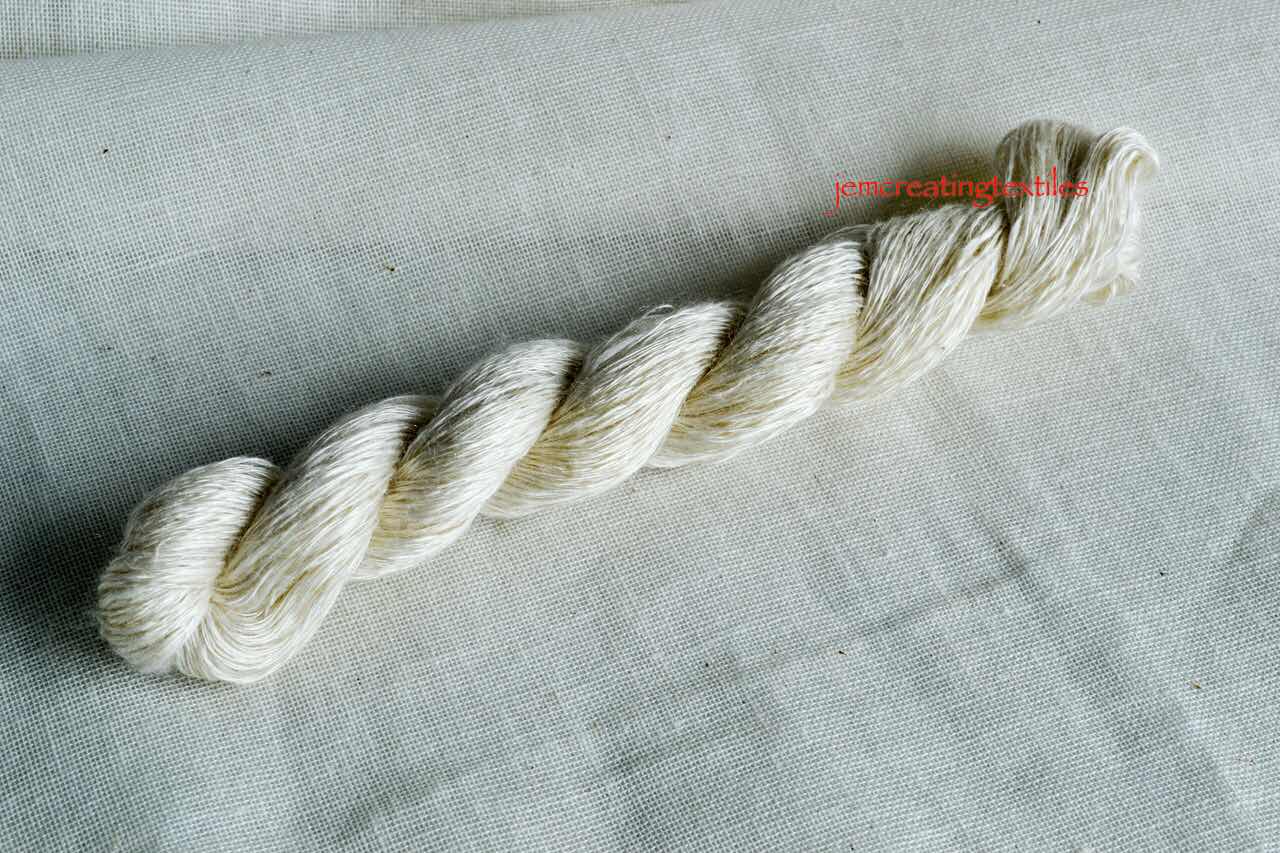
In 2019 I started spinning some ‘quite’ fine yarns for natural dyeing. For this I aimed to spin skeins of about 5g. My first spun skein of silk was  NM 2/49 and I have recently spun another skein of the same silk and was quite pleased that it came out as NM 2/53 so quite consistent. 

I used my Ashford Electric espinner with the custom bobbins which I used with the Ashford Joy wheel for the first skein. (See blog of 1June 20). This is the first time I have compared the product of two spinning mechanisms on the same fibre source  like this. I have also thought that more or less any yarn can be spun on any wheel and, for me,  this reinforces it. 

The skein with 2ply silk yarn, from the espinner.


The ‘spare’  singles


I decided to measure the diameter of the yarn with my digital microscope 

This sample on the card ready for the microscope


The yarn under the microscope with measurements added. 


I was pleased to see this coming out at a wpi of 149. (I used the mean of the four diameter measurements for this calculation.)


I love the skeins in their natural colour, however the point of spinning them was to have some fine silk yarn for natural dyeing! If you follow this blog you will know how ‘unfortunate’ I was when I bought what I thought was a merino and silk blended  yarn! (The blog mentioned above gives more details). We currently have stormy windy weather here, even though it is May, and I like to do my natural dyeing outside.  When we get some more summery weather  it  will be back to the dyepot. Tough decisions to be made about which of my many recipes to use for this much loved  yarn. 


Friday, 30 April 2021

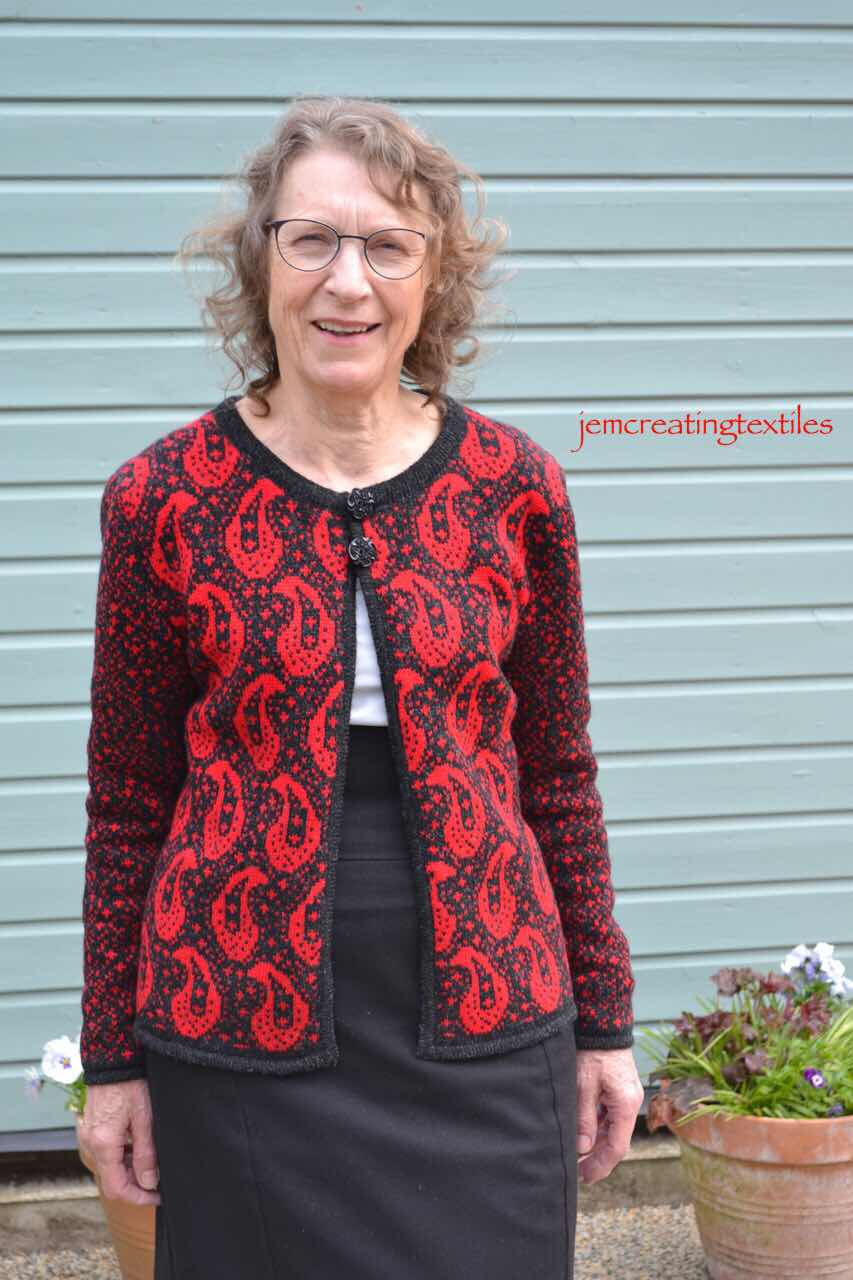
The Norwich Red Jacket (part two)


So it was finally time to start knitting the garment. The shape was drawn on my knitleader (shaping device) where I use my tension square to convert the stitch and row count for the actual shape of the piece. For this garment I will knit 2 fronts, the back and 2 sleeves with the different punchcard pattern. The front edgings and neck edging would be knitted later. In all the knitting with the finishing took 18.5 hours. This compared favourably with my 4 hour knitting of the ‘kit’ jacket start.

Once the fronts and back were knitted, I washed these and blocked them to the exact shape of the pattern (see blog 30 July 15 to see how I do this). Then I joined the fronts and back together using the knitting machine. At this stage I  tacked round the shape of the front and back neck where I needed to remove knitted fabric. I ‘cut’ out the shapes using the overlocker on a stretch stitch setting. 

Next up was the front edgings, I was using the technique taught by Tony Bennett an Australian designer who I have been fortunate to attend several workshops with. These are the hardest part to ‘get’ right in the whole of the garment.

This is the sample I did.


Each front edging took an hour, but this was well worth the time spent.

Now the front edgings were on I could do the next facing. I picked up stitches from the folded over cut edge. I did the equivalent to knitting the rows on smaller and smaller hand knitting needles and then increased the size again ending with waste yarn for about 6 rows, this gave a well fitting shape. The final stage of this is to backstitch the .live stitches down to over the cut edge on the public side to give a very neat edge to the front and back. Special care is needed at the outer edge of the edging  to get a smooth continuation with the front facings. 

The sleeves were set in and I stitched these in with my ‘normal’ sewing machine using a slight zigzag. Underarms seams were done in the same way. 

This just left me with joining the underarm seams and I had done a lot of planning to enable me to have an invisible  seam there, so now the stitching was crucial. I used both black and red and worked from the outside and was pleased with the overall effect. 

Final threads to weave in


The underarm seam


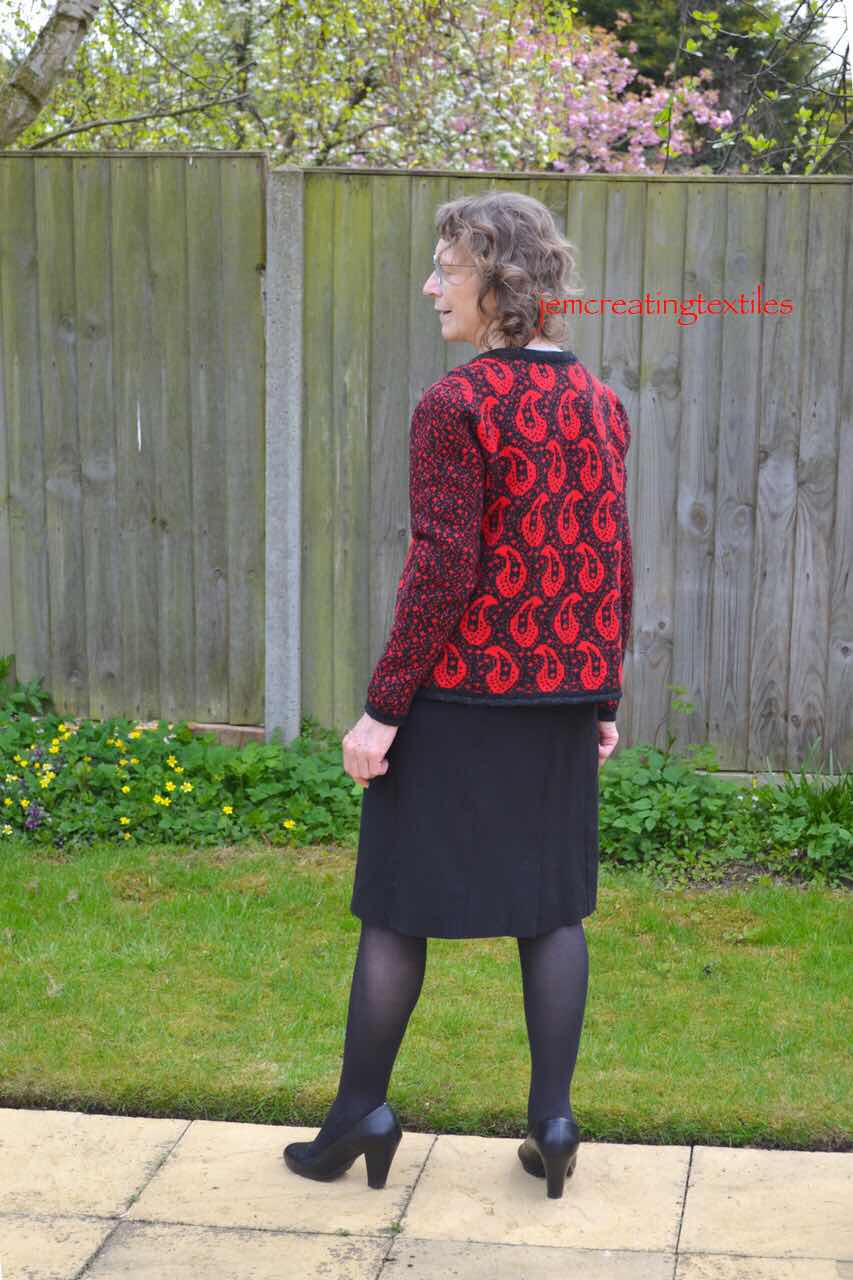
A final press was needed and then to get some photos with me wearing it that I was more or less happy with. Thanks to Michael for being so patient  taking these. 


Overall I am very pleased with this. Now hopefully as we come out of lockdown and get used to a new normal I will get a chance to wear it out. 


The Norwich Red Jacket (part one)

The Norwich Red  Jacket (part one) 


Those of you who read my blog posts  will know I am very interested in Norwich (1) shawls and in particular the Boteh design. (Boteh is Hindi for ‘flower’ it is also called pine cone and today is often known as paisley. ) 


In 2018 I knitted my Art School Jacket using mainly the technique of slip stitch. For yarn I used mercerised cotton and Jamieson jumper weight wool in charcoal. I liked the shape and thought something similar would be good and would suit  the proposed boteh patten. (Post about this cardigan is 15July19). 


I have been doing research into Norwich shawls, particularly their construction.  (This has still to be written up.) Part of the research involved natural dyeing and from this in 2019 I used  madder to dye some 3ply/thin 4ply yarn to be used in Knitting the planned jacket. However, I never got round to designing the motifs to be used as the pattern in the jacket. I was too interested in my controlled dyeing experiments! So the jacket idea got shelved. 

Fast forward to 2020 and Covid-19 and for some reason although I had all the time in the world I did virtually no dyeing. Somehow fine lace spinning and knitting were all absorbing and much better at occupying my mind and keeping it off too much worry about things covid 19 related that were happening in this country and the world. 

I saw and very much liked a knitting kit I saw by Sidsel Høivik. I had never bought a kit previously but I loved the greens. The kit came quickly from Norway and was beautifully packed. After much preparation, described in a previous blog post (9March21) I started the hand knitting.


The start of the hand knitting. I used the cool pink as the waste yarn and when completed I would pick up stitches from the red garter st row and knit an inner facing. The jacket felt very thick to me, but something was needed to pull in the garter stitches. I wondered about knitting a facing inn dinner yarn….but as it turned out I abandoned the project before needing to take that decision. 


This start took me two nights worth of knitting ( about 2 hours per night). I was not happy with it and also I found I could not knit this wool with these needles as it hurt my hands and the following morning my hands had seized up and needed forcing open. (This had happened to me once many years ago and surprisingly I have recently read about other examples of people having similar problems with their knitting (note NOT this kit) too. That was it, I was not going to knit the kit, I had spent a long time organising it to work for me in terms of colour, size and pattern placement and I did beat myself up a bit! However, I resolved to do what I should have done in 2019 and that was design my own jacket. I had the shape, I knew which yarns worked well and ‘all’ I had to do was work out motifs to knit! 


When I thought deeper about the problem with my hands I realised recently I had been using the knitting machine for knitting fair isle  and everything else except fine Shetland lace which I continue to knit by hand. This of course, is much lighter and a shawl can take only 25-50g in total. 


I now had some firmer ideas about what I wanted in terms of pattern and what I did not want. The motif placement vertically was important and because I would knit this on my vintage (or virtually so, date 1974ish) punchcard knitting machine I would be limited to a horizontal repeat of 24 stitches. For me the pattern would also need to match as invisibly as I could make it at the underarm sleeves.


Fortunately I had some charcoal wool left over from the Art School jacket, I decided I would use some finer red yarn that I had and that I could use this double. Unfortunatley the madder dyed yarn was too thin to use with the charcoal for this project.  This decision was based entirely on the hue of the red! 


So the actual design. I had 2 punch cards in my collection vaguely being ‘Boteh. I had knitted one  many years ago using black wool and Jade chenille as the contrast. Then I also had a much larger design in a group of cards that I bought as a job lot! I had some black acrylic and another red that I could use for playing with designs. 


These are how the punch card patterns  knitted up.

The one I had knitted previously hardly looked like a boteh design to me now. 


I liked the other design but it would be too overpowering for me. 


(I pinned these vertically on my samples block board and looked at them for a few days to come to this decision.) It was at this stage  that like I decided on the idea of trying a different pattern for the sleeves. The sleeves would be fitted and not drop sleeves, as this gives a better fit on me.


I was concerned about the length of the floats and at this stage tried out the slip stitch technique. In machine knitting 2 rows of the same colour are knitted, say the background and then the same two rows knitting the foreground (motif detail). I got the design working but decided not to pursue it as this design needs flowing curves which would not be smooth working on the 2 rows main colour, 2 rows background that worked so well in the geometrical design of the Art School jacket. 

Motif being trialled with slip stitch, I got a much better shape with fair isle due to the nature of how the slip stitch technique ‘works’.
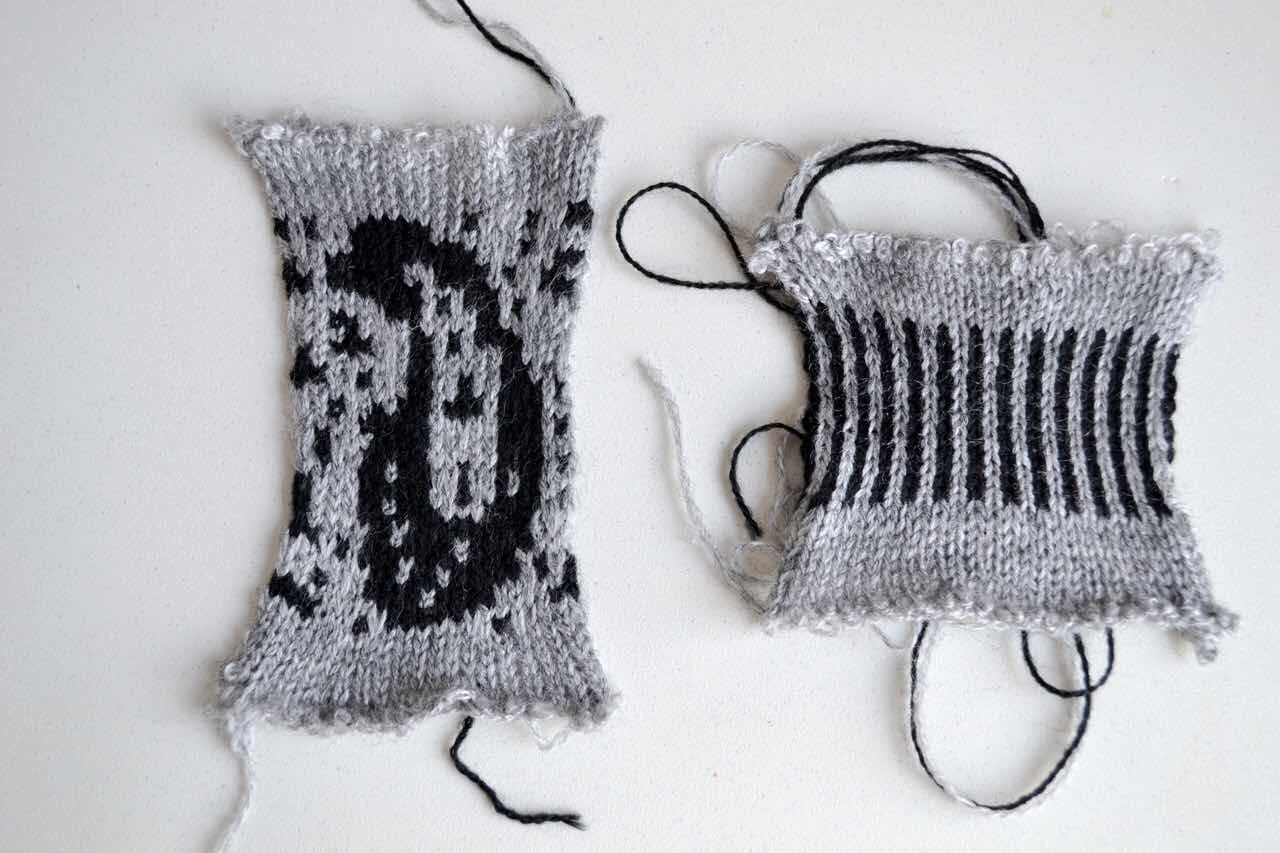


So I then set about drawing my own motifs but being mindful of float length. I knew that Shetland wool would cling to itself and not be too much of a problem with floats if I did not make excessive demands  of it.

These photos show my modifications  in the design process: 

This picture shows changing the punchcard to improve the shape of the boteh on the left hand side and knitting a small section to check.


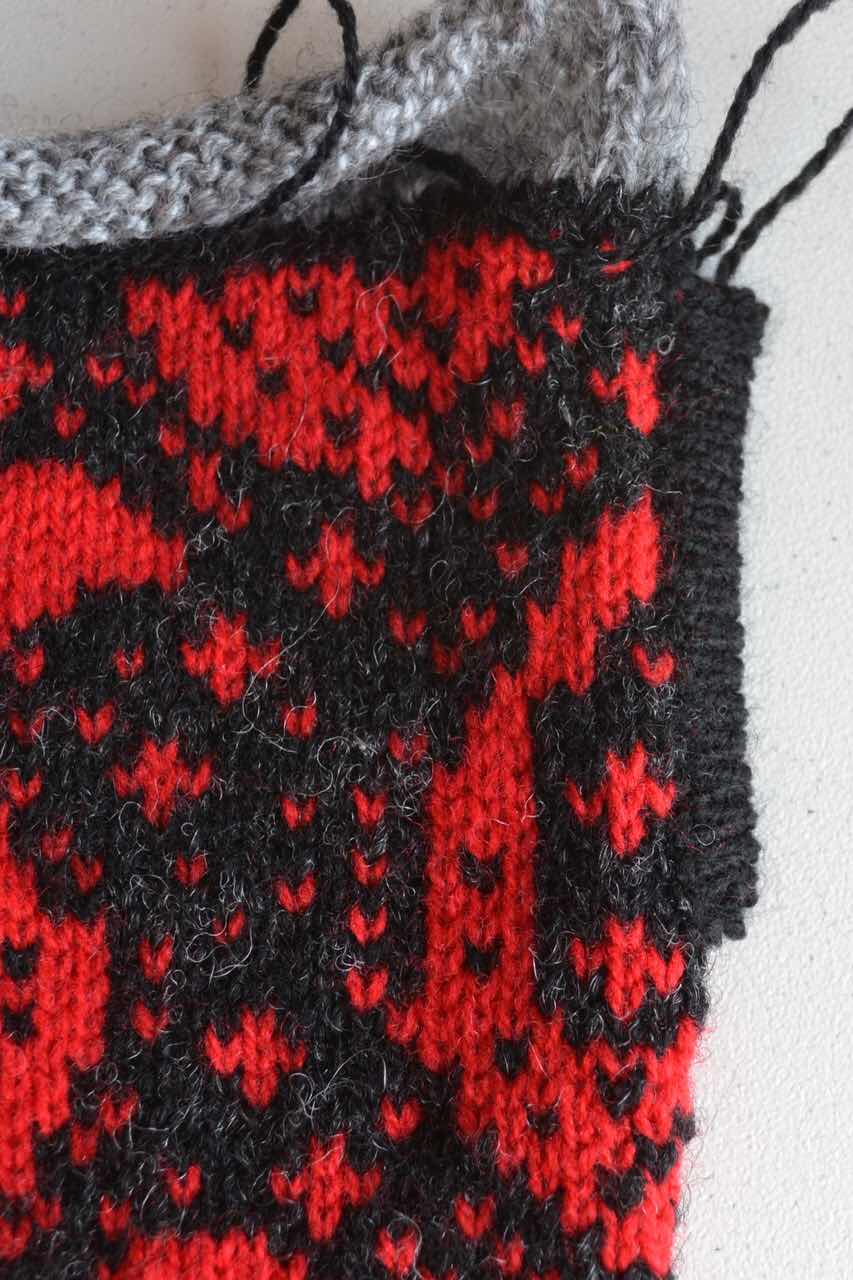
These show sleeve samples, the one above is the one I used as it had much shorter floats


This picture shows knitting samples to check the vertical placement and horizontal match ( side seams and front) of the motifs


Continued as part two.

  1. We are fortunate to live about half an hour by car from Norwich and more can be seen about the shawls on my website( link top right from blog)  by looking at Weaving  and then choosing the Heritage Weaving section.