In one of my favourite Vintage shops in Suffolk earlier in the year I came across a sad looking brown check skirt. So parting with £5 I rescued it and sent it to the cleaners. It was size 16 but I hoped I could make it fit me.
After the dry cleaners had done their stuff it looked very good, but on putting it on the mannequin it fell off as it was SO big. The other rather unfortunate thing was it had a side zip, so that had to come out!
Although in excellent condition the skirt was clearly several years old, it had real petersham at the waist and the back of the zip had material to protect underclothes or body getting stuck in the zip. It was of course fully lined too.
So over the course of 3 days I have spent several hours on this and am more than delighted with the result.
So this is the story of the restyling.
It turned out that 3 of the four waist darts had been removed!
So I took out the lining, removed the petersham and the extra material inserted where this was cut when the darts were removed, removed the zip, noticing the buttonhole keeping the zip closed was worn such that the buttonhole was detached from the wool material - this needed creative thinking!
This was my order of construction:
1. Reinstate the three darts.
2. Tack together the back and front at the side seams and try on.
3. Stitch up the seam below the zip.
4. Re- insert the zip invisibly - my favourite method involved the seam below already being stitched as it gives a perfect transition between zip and seam with no bulge!
5. Stitch the other side seam. Care needed to be taken to match the plaid exactly! ( I was impressed at the accuracy that Yves St Laurent achieved - blog post of 28 Sept 15 (can search under 'design') so I took extra care with pinning and tacking the side seams.
At this stage the skirt looked great when I tried it on but I noticed that by shortening a bit it would suit my legs better! ( It's bad news to have a skirt ending on a wide part of your leg!)
6. The next thing was to attack the waist. I realised that if I darned the buttonhole closed on the wool zip facing and turned it upside down I could make a new buttonhole that would not be frayed. So I attached the skirt to the petersham, then attached the lining and zip facing, this time stitching through from the right side of the skirt. It gave a very neat finish due to the stiffness of the petersham.
7. Unfortunately the lining was very worn where buttonhole had been so I decided to patch the lining with some similar coloured lining backed with iron on fine interfacing.
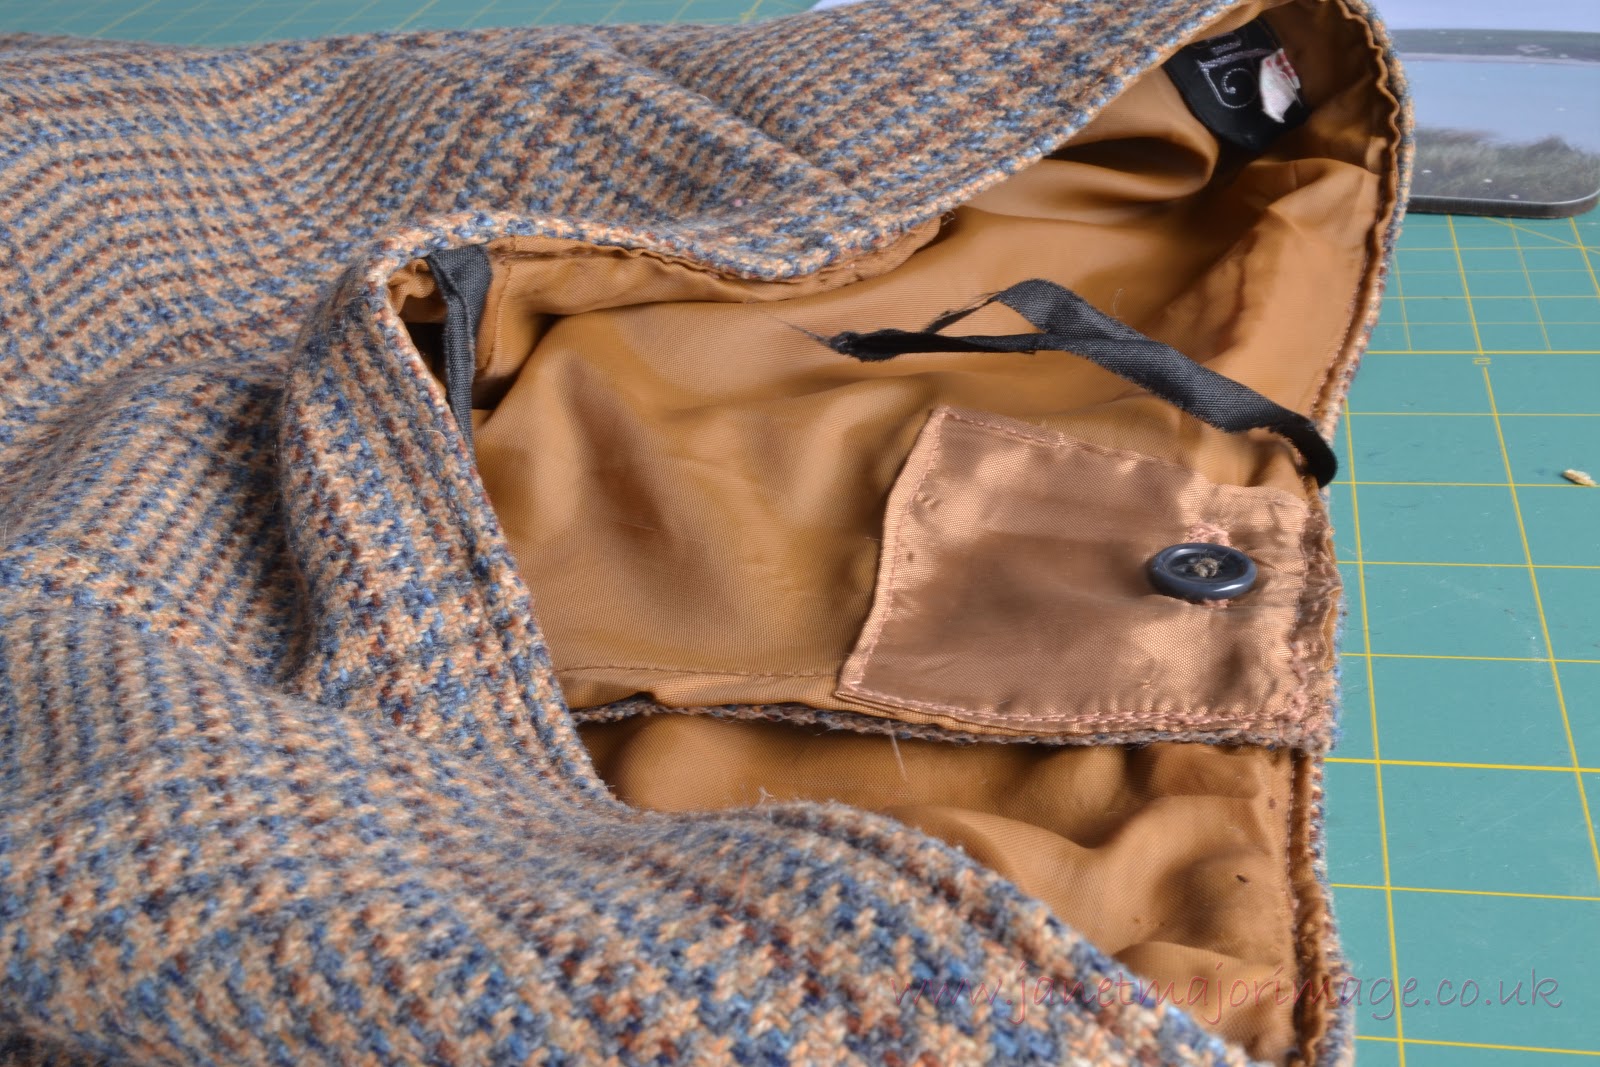
8. The skirt had been very well made when new and I wanted to keep the integrity of a professional finish so the only way to manage the buttonhole was to do it in two stages! The first buttonhole was in the skirt and petersham - this needed care as obviously the hole was already cut in the petersham. I used the automatic function on my Janome and so got a buttonhole I was happy with - after several trials on similar weight wool material. Then there was the buttonhole to make in the lining and this needed to match up exactly with the buttonhole made in the skirt zip facing!
9. Buttonhole cut and button attached. Wow, this has given a nice finish to the top of the zip.

10. Now to sort the length. This was pinned at a length of some of my other favourite wool skirts - it also meant the lining needed shortening. I used My Elna Overlocker to neaten the actual skirt material and then stitched the skirt using an invisible hem stitch on the Janome.
11. It appears that at sometime in the skirt's history both side seams were left open at the bottom as the lining had been shaped around them. This was not the best stitching in the skirt so I decided a bit of colour here to smarten them up - a great use for some turquoise vintage bias binding inherited from my aunt. There is a blue thread in the plaid of the skirt.

12. An inch of machine stitching to hold the lining to the skirt by the buttonhole and job done.
A 'new to me ' wool skirt which fits perfectly and I love! Unfortunately I forgot to take a before photo.
A 'new to me ' wool skirt which fits perfectly and I love! Unfortunately I forgot to take a before photo.

I love this complete outfit, the yoke
really ‘lifts’ the skirt and both are super warm.
Now to alter the black and white checked one that I found in Knaresborough, but this has a back seam zipper should be less work!
Now to alter the black and white checked one that I found in Knaresborough, but this has a back seam zipper should be less work!
Wow that sounds like a lot of work, what patience, maybe when I was younger.
ReplyDeleteYou look great!
ReplyDeleteYou've made your own sweater and altered the skirt! That's a unique outfit!!!
You have been busy. Both look great & fit beautifully.
ReplyDeleteThanks for the encouraging comments, my preference is to wear clothes I have made and that tell a story! Soon there will be the story of a dress made to match a jacket I made some time ago!
ReplyDelete