Showing posts with label machine knit. Show all posts

Wednesday, 2 June 2021

Sheringham to see the Ganseys


We had a day out last Wednesday, it felt something akin to normality. We had booked a morning session at Sheringham Museum. Sheringham is on the superb North  Norfolk coast and the sat nav tells me is 48 miles from our house. 

We had booked to go to see the display of  40 Children’s Ganseys and I was also particularly interested in the Michael Harvey collection recently acquired by the museum, as well of course as to see the Sheringham Ganseys. Currently going to a museum means booking in advance and we knew there would  be a smallish number of people and we would be able to be there from 11.00 to 13.00. The Museum would then be closed and sanitised etc ready for a fresh set of people in the afternoon. In terms of textiles, Sheringham is famous for the knitted Ganseys of the fishermen. The Sheringham ones used particularly  fine needles (‘old size’  16 or even 17) and 3 ply worsted wool. There is an important  collection of these Ganseys in the museum. As in Shetland nowadays the needles used were  called wires being double pointed and the Gansey was knit ‘in the round’.

Sheringham Fishermen wearing Ganseys and some knitting tools


A link with Shetland, the herring lassies
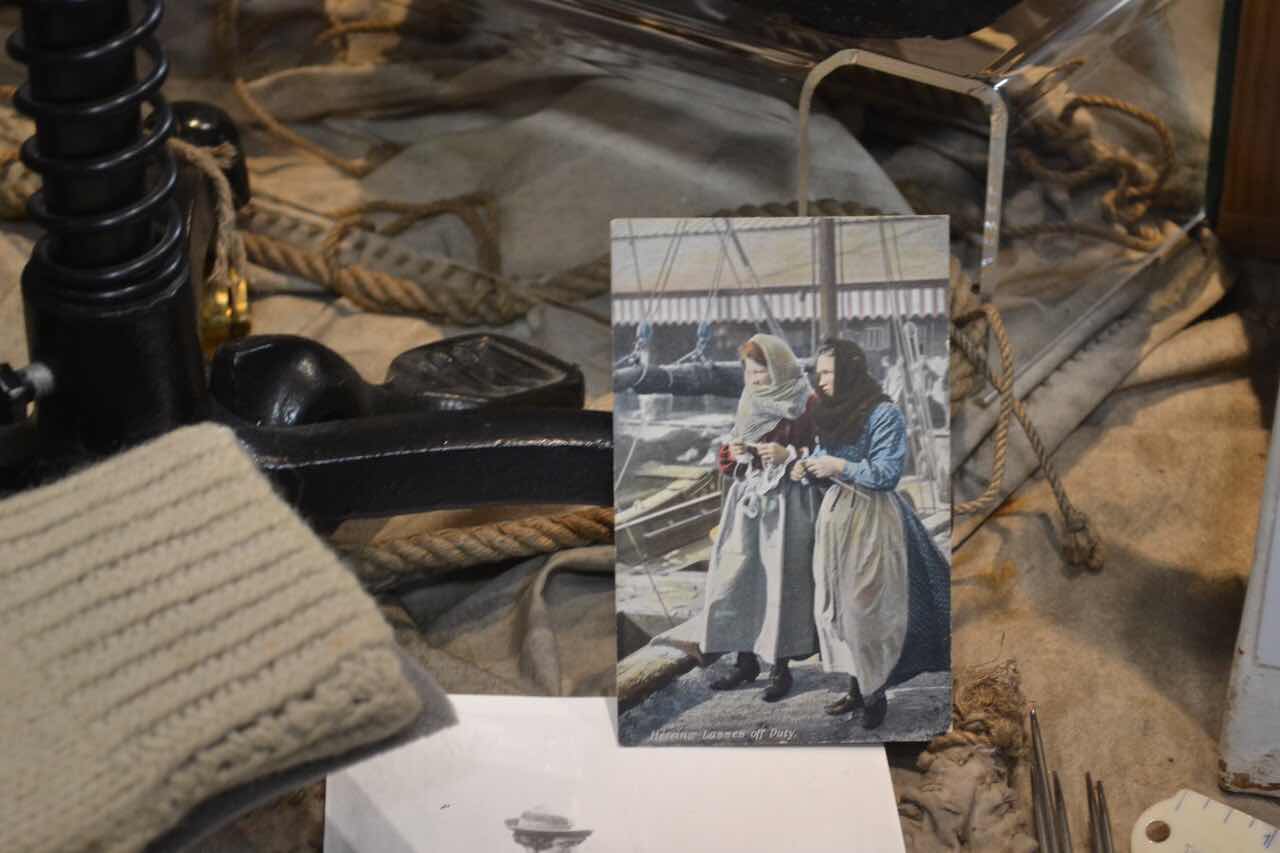


The museum itself is a ‘new’ building (opened here in 2010) and the room upstairs used to display the knitwear is very light and has a good view out to sea. On a  good day a large wind farm can be seen on the horizon ( the exception being when a sea mist prevents this as it did on Thursday morning. We had a very enjoyable time there and if you can get there  this summer, I would highly recommend it. 
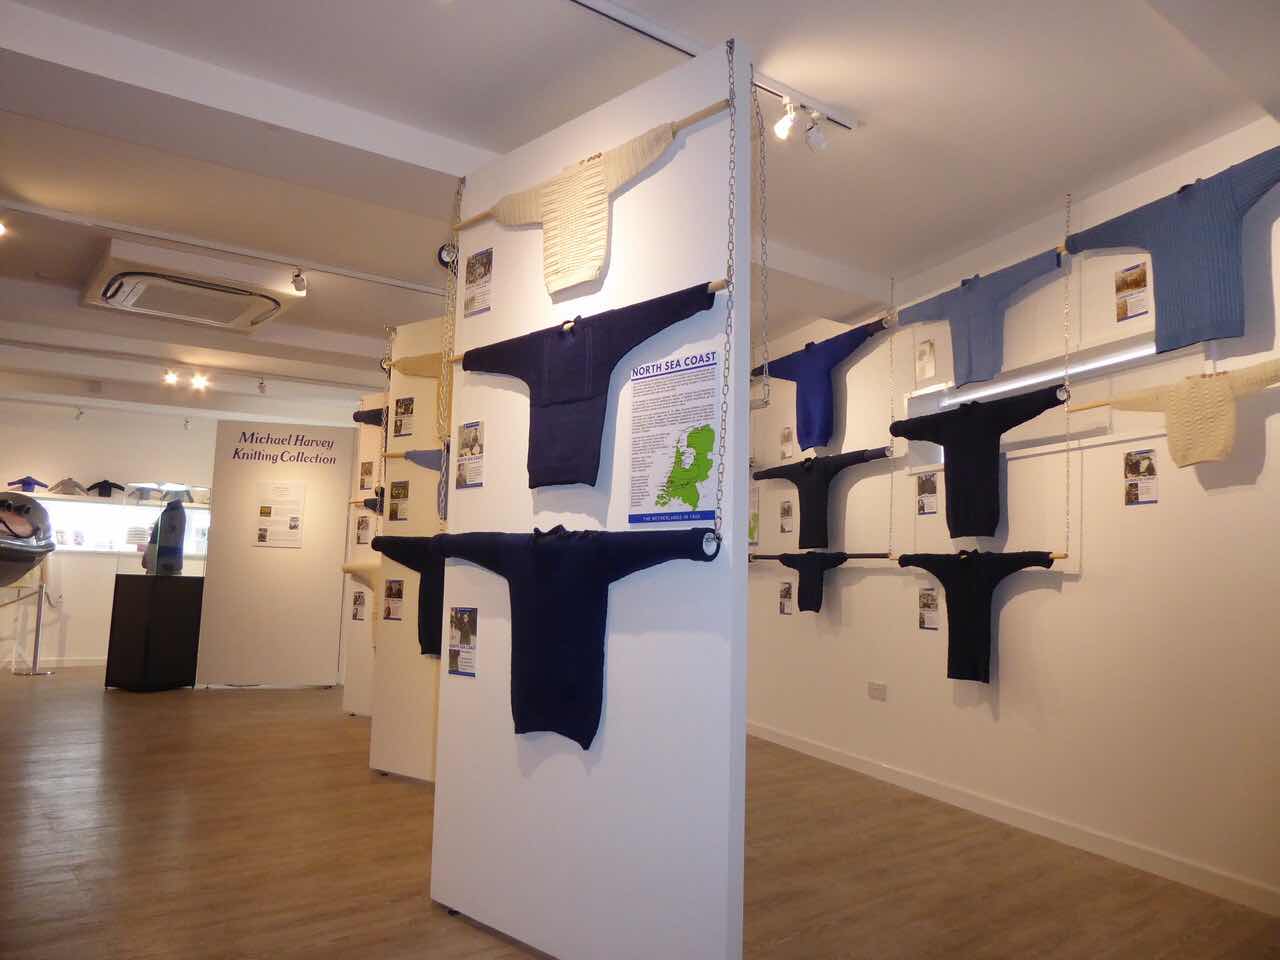


The local Ganseys  are well documented and the  museum ‘textile team’ are analysing the patterns and from my understanding their work in forming a recording template has been shared with other Gansey knitting communities, such as the Scottish Fisheries Museum in Anstruther (Fife). The glossary, also developed in this project is very useful too (1) 


The additional Ganseys to the local  ones this year have been put together by Stella Ruhe. I first heard Stella talk about Dutch knitting Ganseys at wool week some time ago, 2014 I think and since then she has continued her study of them and has now published 3 books. (3) I think it was in 2017 when I visited Sheringham museum to see the Ganseys in the Moray Firth Project


As I mentioned I was particularly interested in the Michael Harvey collection. I knew he had been a collector of Knitting Sheaths. I find it difficult knitting without using a knitting belt now, thanks to workshops during my time at Shetland wool week’s  with Hazel Tindall and also with Amanda Pottinger and Janet Irvine in Whalsay. It was great to see so many knitting sheaths , some very local and some from further afield. Norfolk was an important knitting area in the past (2) and having learnt to use a knitting belt I imagined that local knitters would have used a belt or the equivalent to increase their efficiency. I think my favourite was a cut down chair leg which had a drilled hole down the fatter end, making a tube for the end of a knitting needle. (4) it was good to see some leather knitting belts too.

A few of the Knitting Sheaths


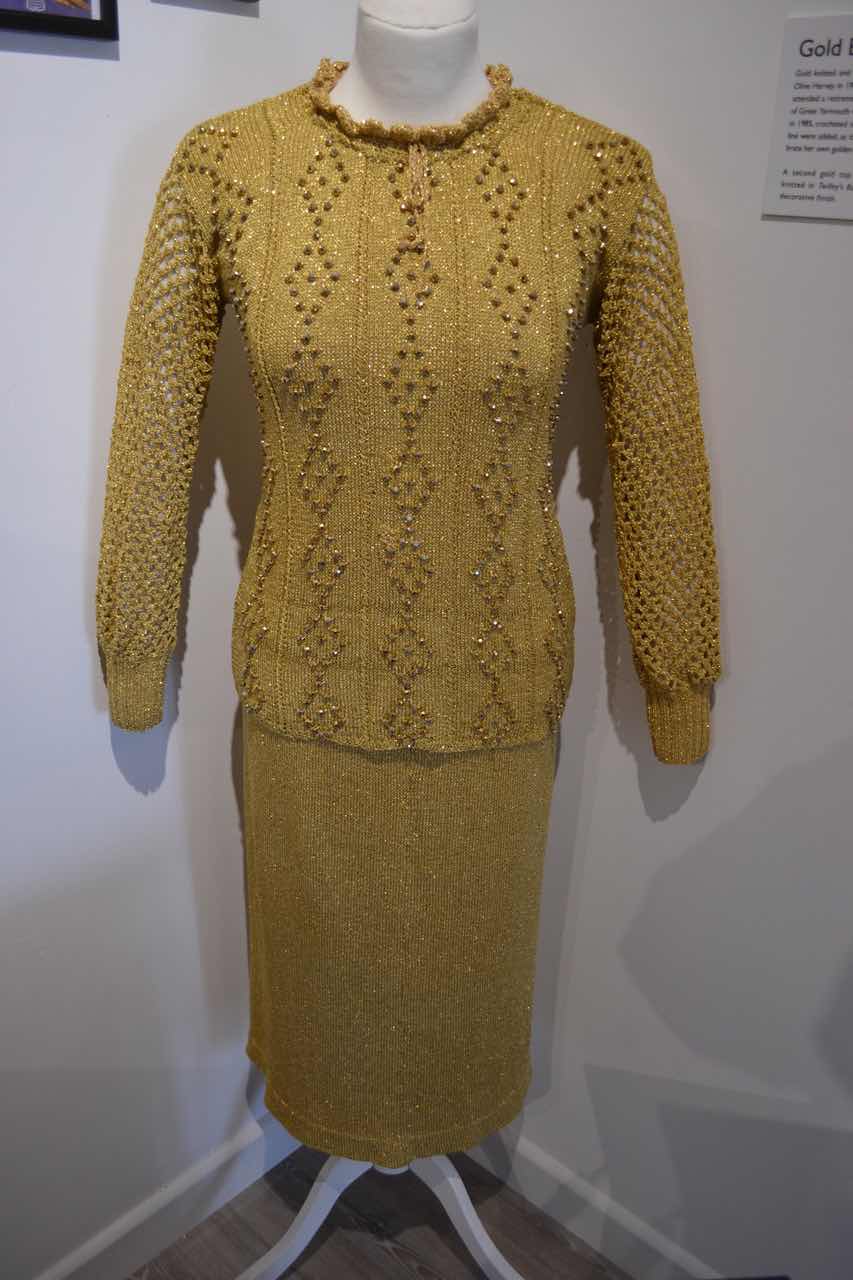
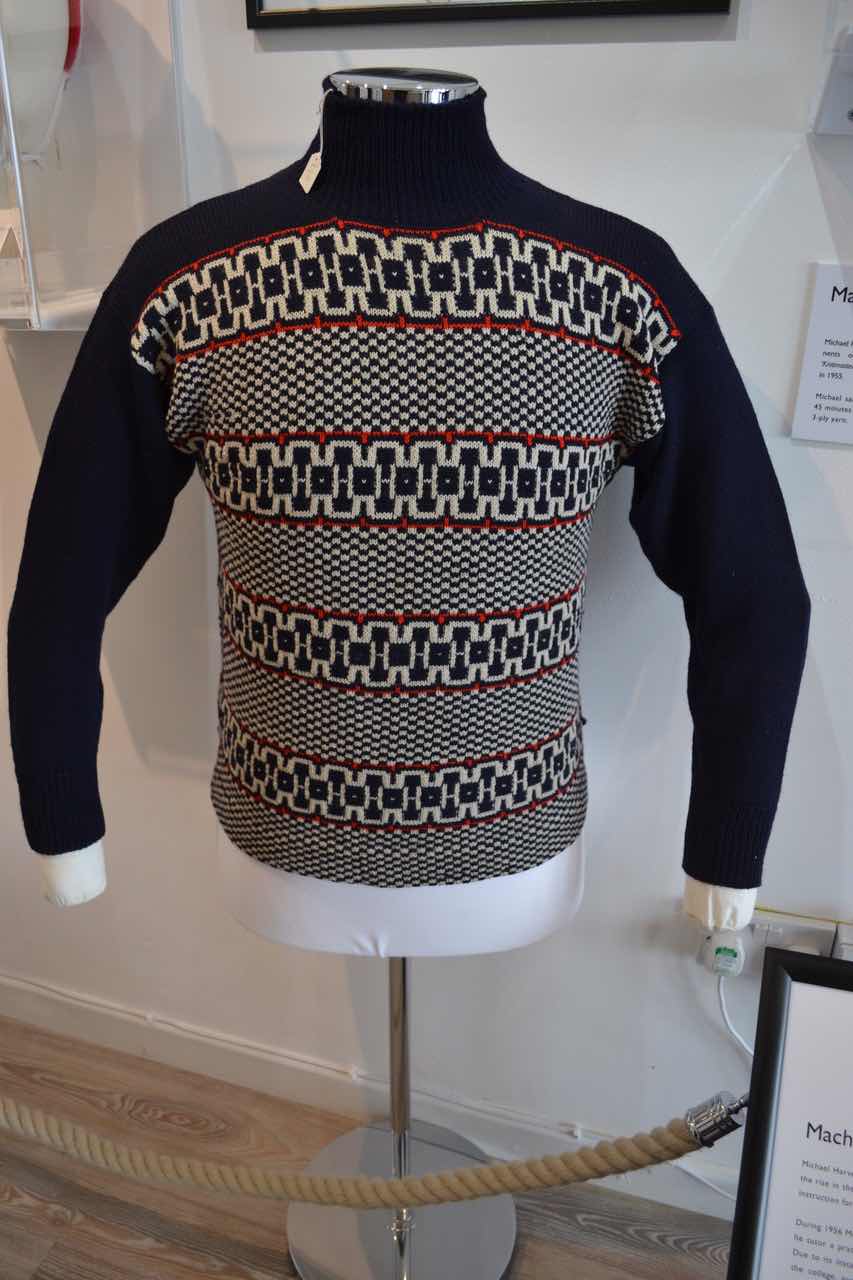
The Michael Harvey collection contains many more items that this. He was the son of a lady who ran a knitting shop, I think initially further south  in Great Yarmouth. As trade increased she had shops in other towns and even developed a brand of knitting wool. Michael himself has co-authored and written knitting books of his own. He promoted machine knitting and taught  Machine Knitting and Advanced  Machine Knitting in the county from 1950s. Some knitted items of his mother  and of his machine knitting were in the exhibition. Being an avid machine knitter myself it is very good to see Machine Knitting being valued. There is much more that I hope to investigate in this collection. 

Knitting from Michael Harvey collection, by Olive his mother


Machine Knitting from Michael Harvey collection, by Michael


Also in the exhibition room was case devoted to John Craske  and a chance to see some of his insightful needlework. (5)


What a great morning this was and it has opened up other branches of local textile history to explore further. It is worth more than one visit.


I will write another post more about the town (and it’s neighbour Cromer). Sheringham was in its heyday, in terms of tourists, when the railway first brought holiday makers from the Midlands in the late 19th century. Many of the buildings and shops come from  the late 19C / early 20 C period. 


Notes:

  1. Do take a look at the Museum website, under the Textile section. Here you will find a link to the glossary mentioned above as a short video about the Michael Harvey collection and information on the Craske Collection. https://www.sheringhammuseum.co.uk.  There is also a great booklet available from the Museum. It is researched and written by the museum textile group, this includes a chapter on pattern analysis and some patterns - Sheringham Ganseys Rita Taylor, Lesley Lougher, Jan Hillier, Ken Holloway and Martin Warren. 
  2. Certainly from the late 16th Century. 
  3. Books  of Ganseys from Stella Ruhe: Dutch Traditional Ganseys: Sweaters from 40 villages; Traditional Dutch Ganseys for Children: over 40 sweaters to knot from 30 fishing villages; More traditional Dutch Ganseys: 65 Classic Sweaters from 55 fishing villages.
  4. Having learnt to knit with a knitting belt, I am surprised that more people do not use them for knitting nowadays. Knitting with one is very efficient and even more so if a Rapein  string  is used which helps stabilise the left needle too. (see ‘knitting belt’ under labels in the blog for more discussion of using a knitting belt and rapein  string and also  under hand knitting and heritage on my website
  5. John  Craske.... There is a book devoted to John Craske- Threads: The Delicate Life of John Craske 


Monday, 12 September 2016

Crofthoose Hat for Shetland Wool Week


So with the book cover finished then I could turn to the Shetland Wool Week, Crofthoose Hat. 

I really loved this pattern when I saw it but it wasn't until I had the meadowsweet dyed colours together did I realise that they would look good as the houses, but that I would knit the background using one colour, not two as Ella had suggested. 


I have knitted the body of this hat with the help of my punch card knitting machine. The pattern designed by Ella Gordon (1) had a widthways repeat of 12 stitches so this was easily convertible to machine knitting - each punchcard  width gives instructions to 24 stitches. 


I had converted the tension given for the patten  and used the stitch and row count given to work out the size of the hat. This would be too big for me - a common problem with hats for me. I must have a very small head! So by using the stitches suggested and the rows suggested, the crofthouse design would work perfectly and the hat would be smaller and it is likely it would fit! 

I knitted the crofthouse part on the knitting machine with waste yarn at the top and bottom. 

I picked up the waste yarn first at the bottom using two needles and worked this in corrugated rib worked in reverse, ie purling on the 'right' side to give the purl ridges in dark olive. I worked single rows of the contrast colours to do the stitches between. I then fastened off this rib with a very stretchy cast off. As it turned out this ribbed section is my favourite section of the hat. 


Having completed this then I was able to pick up the stitches from the waste knitting at the top of the Crofthoose section and knit the crown on a circular needle. I used all 6 contrast colours of the meadowsweet jumper yoke and paired them as effectively as I could. 


Not long to when I can wear it now, with the coordinating yoked jumper and then also using my crofthoose covered journal.

The look will be  completed by a Harris Tweed skirt I have been making to remind me of my holiday on the Hebrides too. More about the skirt later. 

See The Shetland Wool week web page for the pattern 


Sunday, 10 January 2016

Fair Isle Yoked Jumper


I have been planning a yoked jumper for a LONG time, and this is in fact the first trial - but it has turned out better than I ever hoped.

So,the story of this. I wanted to machine knit the main (plain) part of the jumper and then add the hand knitted yoke. I aimed to do a traditional Shetland yoke with the decreases being arranged as a tree and not taking place between pattern rounds.

Sounds easy but add to that the fact that I am smaller than a 34" bust and I wanted a good fit. Patterns were few and far between but then Kate Davies published her book of Yokes in 2014. Of course I ordered a copy. It is a glorious book and given me much inspiration. I was even more delighted when there was mention of a machine knit version for the body of the garment.. This was just  what I was looking for. Ella  of Jamieson and Smith ) collaborated with Kate over this and Ella added more detail to her blog. (
www.ellagordon.wordpress.com – lots of ‘yokes post but the one of Nov 24th 2014 ‘machine knitting for a yoke’ explains Ella’s approach to this.) This again was helpful but not quite what I wanted in terms of getting a yoke to fit a jumper to fit me. Kate likes her necks much lower than I do. I decided a higher neck would upset the proportions of her garments rather.

 
So progress was being made but I hadn't got a pattern that I could start knitting. So I searched the knitting machine books I had and patterns in these were arranged so that both the body of the jumper and the yoke were machine knitted – I definitely wanted to hand knit a traditional yoke!

Kathleen Kinder wrote a lot about yokes and designing your own pattern, so I decided this was the way forward. I could make a jumper to fit me and then pick up the stitches on a circular needle and hand knit the yoke.

I decided I would start with a traditional Shetland Yoke from Ann Fietelson's book (The Art of Fair Isle Knitting) as these had the tree shaping I absolutely love. She also discusses in some detail the history of Shetland yoke knitting which proved helpful in my planning.

So the first stage was to make a yoke pattern block and then to make the block up in stretch jersey.

Then to try it on my body duplicate ( and me!). I had chosen to make the jumper with a higher machine knitted back than front. Many yoked jumpers seem to have an identical front and back but I decided with my back the higher option would definitely give a better fit. This was encouraging it appeared to be going to fit.


There were going to be two main problems, using knitting needles for the yoke that gave a seamless join between the machine knitted jumper stitches and the yoke stitches. I could work this out by making samples.

What I couldn't work out exactly was if the number of stitches I needed to pick up for the yoke was the number I needed for the yoke I intended to knit. The pattern repeat for the yoke was 46 stitches so this could be quite a problem.

So at this stage, having knitted my tension square I decided that I couldn't plan any more, I needed to start machine knitting.
This worked well. I had a brown alpaca, wool mix from my stash and some glorious colours, also in my stash - from Jamieson and Smith, that would match a skirt I had refitted. (More about that in a later post)

The machine knitting went well.


 I blocked the pieces and stitched them together just above the armholes so that all 4 pieces were joined. Most of the stitches to pick up were on waste yarn but the slopes were formed by decreases. In this method there are more stitches on the front than the back.

So lots of counting and planning at this stage, to establish how many stitches I had and how close this was to the number I needed. I was a few - about 10 short - so I worked out where I could gain these from. Then I used 3 sorts of stitch markers to mark the joins between sleeves and back and front and for the centre of everything. I needed to ensure that the centre of the pattern was the centre of the front and back!

Now to pick up the stitches I decided to have a brown pick up row, then work another row before launching into the pattern. I decided to start at the back of the left arm. I marked every 10 stitches to help with the calculations and all worked well.

Now there was even more counting to establish which pattern stitch to start on to centre the pattern on the centre front of the jumper. I checked and rechecked this. I was now ready to start the yoke. I decided to do a small border pattern to enclose the yoke; this nearly threw me off track. I had chosen a pattern repeat that would go into my total number of stitches but would not go into 46. I didn't realise this initially and thought the worst ... that all my calculations were wrong. Leaving it and letting it mull over in the brain whilst doing something else did the job!

After the edging pattern I decided it would be best to start the round at the start of one of the main pattern repeats so moved round a bit and moved the stitch markers to line up with the start of a tree and a star.

Knitting the yoke went really well, I had recharted it and added my colours which proved invaluable. The only hitch was that my total number of stitches did not coincide with the number in Ann Fietelson's at the end of the decreases. But this was no problem I could understand how the yoke was working and could adjust to suit me.

At the end of the yoke I tried the jumper on the mannequin and it fitted beautifully. So, all that was left in terms of the knitting was to finish the neck. I wanted quite a high neck so did a 2x2 rib to match those of the main jumper body.

There were lots of yoke ends to finish and I decided to try and make these invisible on the inside - this was going to have the best finish I could achieve after all the planning that had gone on.


So , now all I had to do was complete the construction of the jumper. As usual I did this by using a sewing machine with the ribs being joined by hand - again I wanted a join that no- one could see!

Next came the wet blocking of the yoke. I covered the manikin in polythene and this did the job of a jumper board.

So this is the finished jumper .....


Now, of course this is only a trial knit! Next up is to repeat using the meadowsweet dyed wool from the summer - see blog posts of 4-6 August 2015. However, I now feel I understand how a yoked jumper works and when the tension for the meadowsweet yarn is different I will try and enjoy the different calculations and changes this will mean to the actual yoke.

... Then I plan a yoked cardigan...


Thursday, 30 July 2015

The short jacket


For ages I have had a problem on days when it is a little cool in the summer. I have two great short linen jackets but none of my cardigans can be worn with them, as the cardigans  'show' by about 3 cm under the jacket! So I can decide to wear a cardigan or wear a jacket!  About 2 weeks ago I decided to do something about it and knit a cardigan that would fit under the jackets. The joy of doing this with the help of the knitting machine is that I can decide what I want and then achieve it in a fairly short time.
The jacket sleeves are 3/4 and I decided to knit a long sleeve cardigan - much more use but to make the sleeves interesting by adding a lace edging.
This is the lace edging I designed for another item (might make a blog post later!) so sampled this :


It looks good and I already have a longer cardigan in the same yarn ( 2 strands of Metropolitan fine crepe). I love this cardigan but decided also to reduce the width of the scarf/collar so it would sit under the jacket better.

So this is the story.
It didn't take long to do the actual knitting - I didn't time it but did it over a few days on my vintage Brother 830. It looks pretty grim when it is taken off the knitting machine.


So next for the blocking and I estimate that I took well over half the time to block that I do to knit. I have a pattern of each piece so block onto the pattern piece using my custom made blocking board.
Before the blocking


After the blocking


The seams were stitched with a tiny zigzag on my Janome sewing machine except for the beginning and end  of the seams that I always do by hand.

So the cardigan is constructed but not yet finished. I am a strong believer in ' details are what count' so I have edged the bottom of the sleeves and the bottom of the cardigan in crab stitch. This is VERY time consuming, longer than the knitting and spread over 3 days. Good light is essential but I just love the finished edge.

Crab stitch round the edging. This is much more professional.

The lace at the sleeve edging


The completed jacket.  Another great item for the wardrobe.


My only wish is that I had done this month's if not years ago!


Monday, 8 April 2013

A classic man’s jumper in WOOL


It’s not easy to find the ideal man’s jumper- especially if he wants it to fit (why not?),  to be wool & to be a colour of his choosing- not just the colours that happen to be in the shops at that time.

True you can find men’s wool jumpers in a bigger range than I think for women’s jumpers, but they are usually very fine knit and therefore lack warmth in wearing. Of course they also miss the fact that they are not a custom fit and may not have the ideal ‘neck’.

So, having got the fit right (this is not the first I have knitted in this design), the next step is to decide on the yarn. This yarn is Knoll Supersoft Nm 11.5/2 from my friend Sally at www.dewsnapswoollens.co.uk. It’s a great yarn for the knitting machine and I guess for hand knitting too. It comes in a lovely large range of colours too.

Then to think about the features that will really make it a high quality garment – fully fashioned decreases for the sleeves, my custom neckline to the right depth, virtually invisible machine constructed shoulder seams, side and armhole seams to match and more importantly to me seams in the ribbing that can’t be found. These details are a delight to produce and do make all the difference to a plain garment where there is nowhere to hide!

A stage in the construction of the perfect depth neckline


More about other features that I mention above can be found on my website www.janetmajorimage.co.uk under knitting (designer).

Monday, 4 February 2013

Camisoles


This is a bit of a cheat as there is one basic pattern, but 3 projects.

I initially knitted one of these in 2006 and it is still going strong and got lots of great comments when worn as a summer top. With the very cold weather I intend this current set to be under layers!

My aim being that they will fit perfectly, be something I have made and so hopefully will love, use up some of my yarn & not use up air miles as all the ones in the shops seem to come an awfully long way. To my mind they do not cost enough for the workers to be paid sensibly!

The original was machine knitted and I used acrylic which I steam pressed (on purpose) to ‘kill’ the yarn and make it very flexible. I hand knitted the ribs afterwards as I wanted a very loose edge. The picot edging at the top front is made by crochet. The side seams are using my custom finish on my Janome.

I decided to use acrylic again as I quite like the finish and there are no worries using a normal wash in the washing machine.

The first I knitted in this batch was cream. I used my previous pattern (drawn from my own body block). I decided to make it a slightly looser tension- to hug slightly less. To add a bit of luxury I added satin binding under the arms. Being a perfectionist I spent a long time getting just the right finish. It is nice but I am not sure I will repeat it.


I then made another in cream but without the satin. I like it just as much as the one with the satin. It does seem a bit wasted under the arm.  However, I have in my mind another project for the satin edging!

So then I moved back to the pink and made one in pink, a slightly tighter hug. So now I have three choose from, depending on my mood: cream but a bit of luxury satin, plain cream or tightly hugging pink!

Saturday, 2 February 2013

A creative month of January


January is just finished and what a creative month it has been due mainly to hibernating thanks to the weather- either heavy rain or snow.
The result being I have nine completed projects.

I am trying to follow my ‘philosophy’. The image shows this displayed in my studio above my ‘demonstration’ clothes! On top of this I am using natural fibres wherever I can; trying to use fibres and fabrics from my store ; using my design and making skills and only ending up with things that I really love and are special.
 
(It says retain, reduce, recycle, repair, repurpose, remodel, refit)
So the completed list goes:
Lace collar- hand knit in wool with cochineal naturally dyed yarns


Camisoles*- own design then machine knitted, three completed

Virtually new Oxford (cotton) shirt re purposed into pyjama jacket

My 'house' favourite cotton cardigan saved from landfill by a cunning repair

Slippers knitted (Icelandic wool) then felted - kit from a friend

Cream fine merino wool machine knit jumper - again to my own design & block

Fine lace cowl*- machine knit

The asterisked (*) ones are in synthetic materials – reasons explained later

The tenth project won't be completed until this month. It is a felt cloche hat that I need to work with in a workshop I am teaching. Let's hope for no snow this time so we're not disappointed again.

I will be summarising these projects in the following posts in an attempt to inspire you to pick up your needles and have a wardrobe you enjoy.