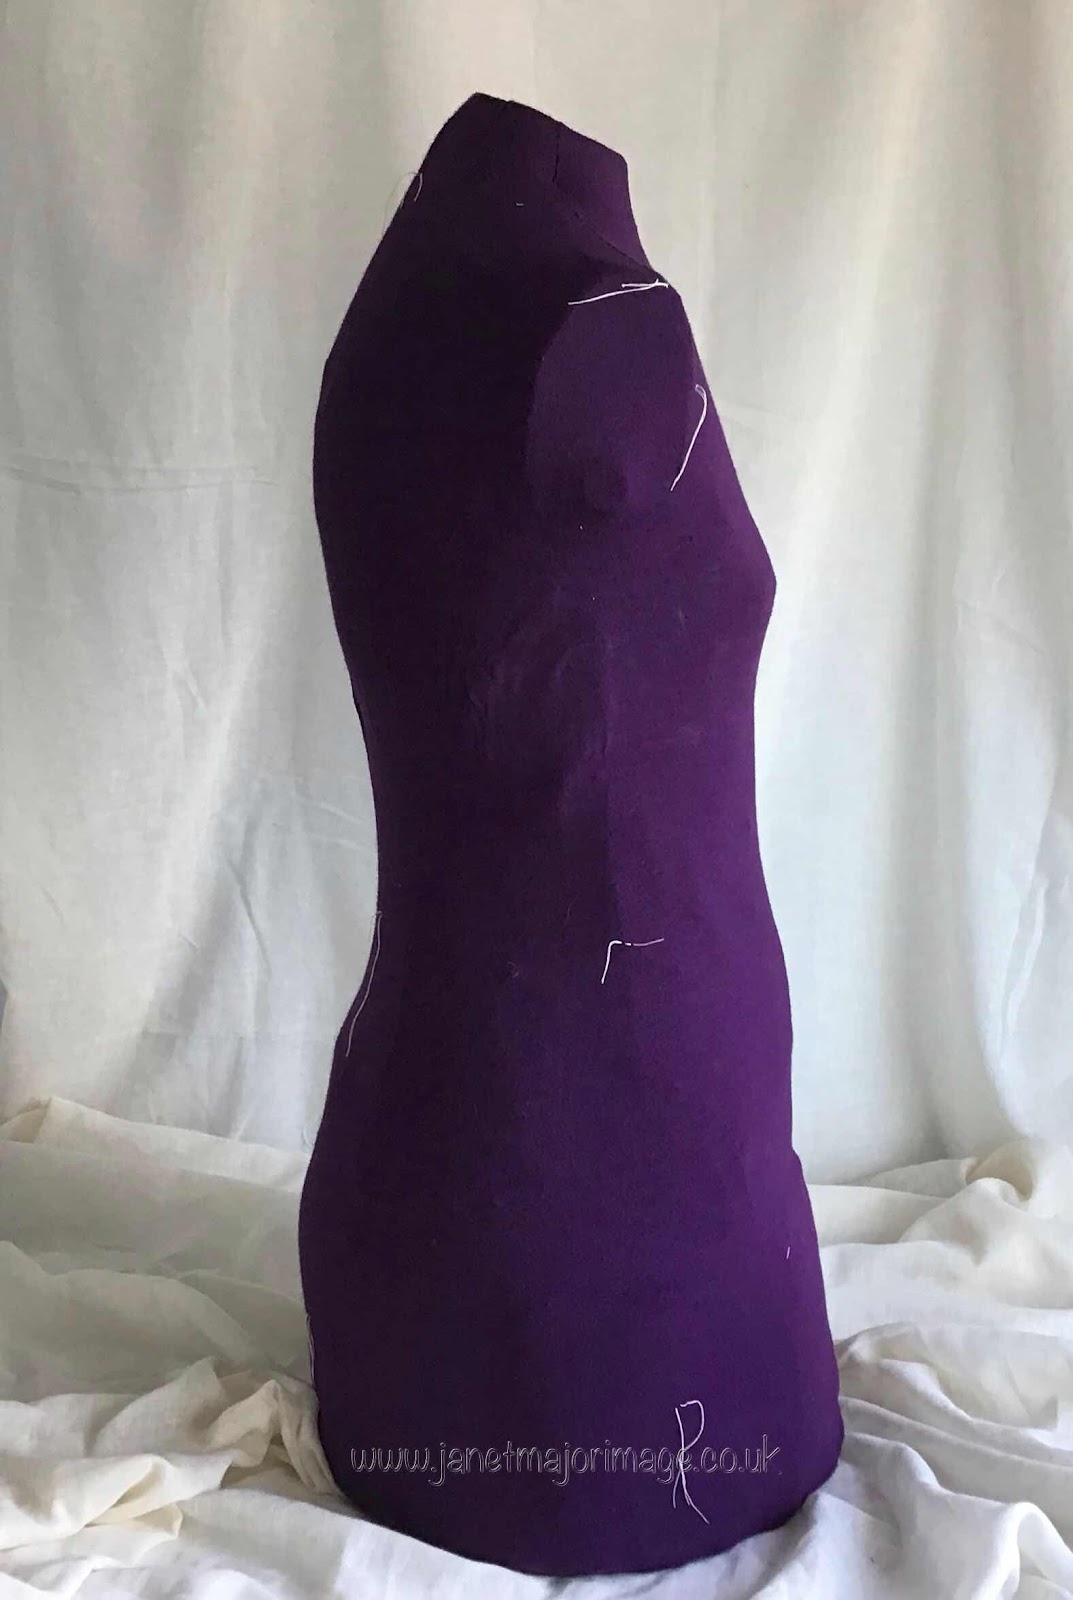
Some time ago, approximately 10 years, I made a body duplicate being unhappy with the fit of the commercial version I had bought. The duplicate that I made needed the help of a good friend and was made out of self adhesive paper tape. It has stood the test of time and now has some layers of wadding between the tape surface and the purple jersey covering.
Image of body model arranged to show my curved back, threads are place markings and should be there!
I use this often but as it is 10 years since I made this I thought I would work through a Vogue Fitting Pattern Bodice. The result of this should be a paper pattern that I can then compare to patterns I already have and those I might make. I have the Lutterloch system and am keen to make more use of it. (2) I also have a couple of dresses that I love but are just too tight to wear now and I would love to replace them using a modified pattern. Just doing the bodice part of this Vogue system had 8 pages of instructions. All that was needed was someone to help you take your body measurements accurately, some gingham, the ability to work through each stage in turn plus quite a bit of time. This was not something that could be rushed.
I did this during a particularly dull and often wet time during early February when gardening was off the agenda.
Throughout all of this I had a ‘working notebook’ where I tried to write down everything I did in terms of alterations and the reason for doing it.
After making some initial changes to the pattern, the idea is that you make the fitting pattern and then try it on. It is essential that you work through the numerous alterations in order once you have it tried it on and decided where the problems are.
The first version
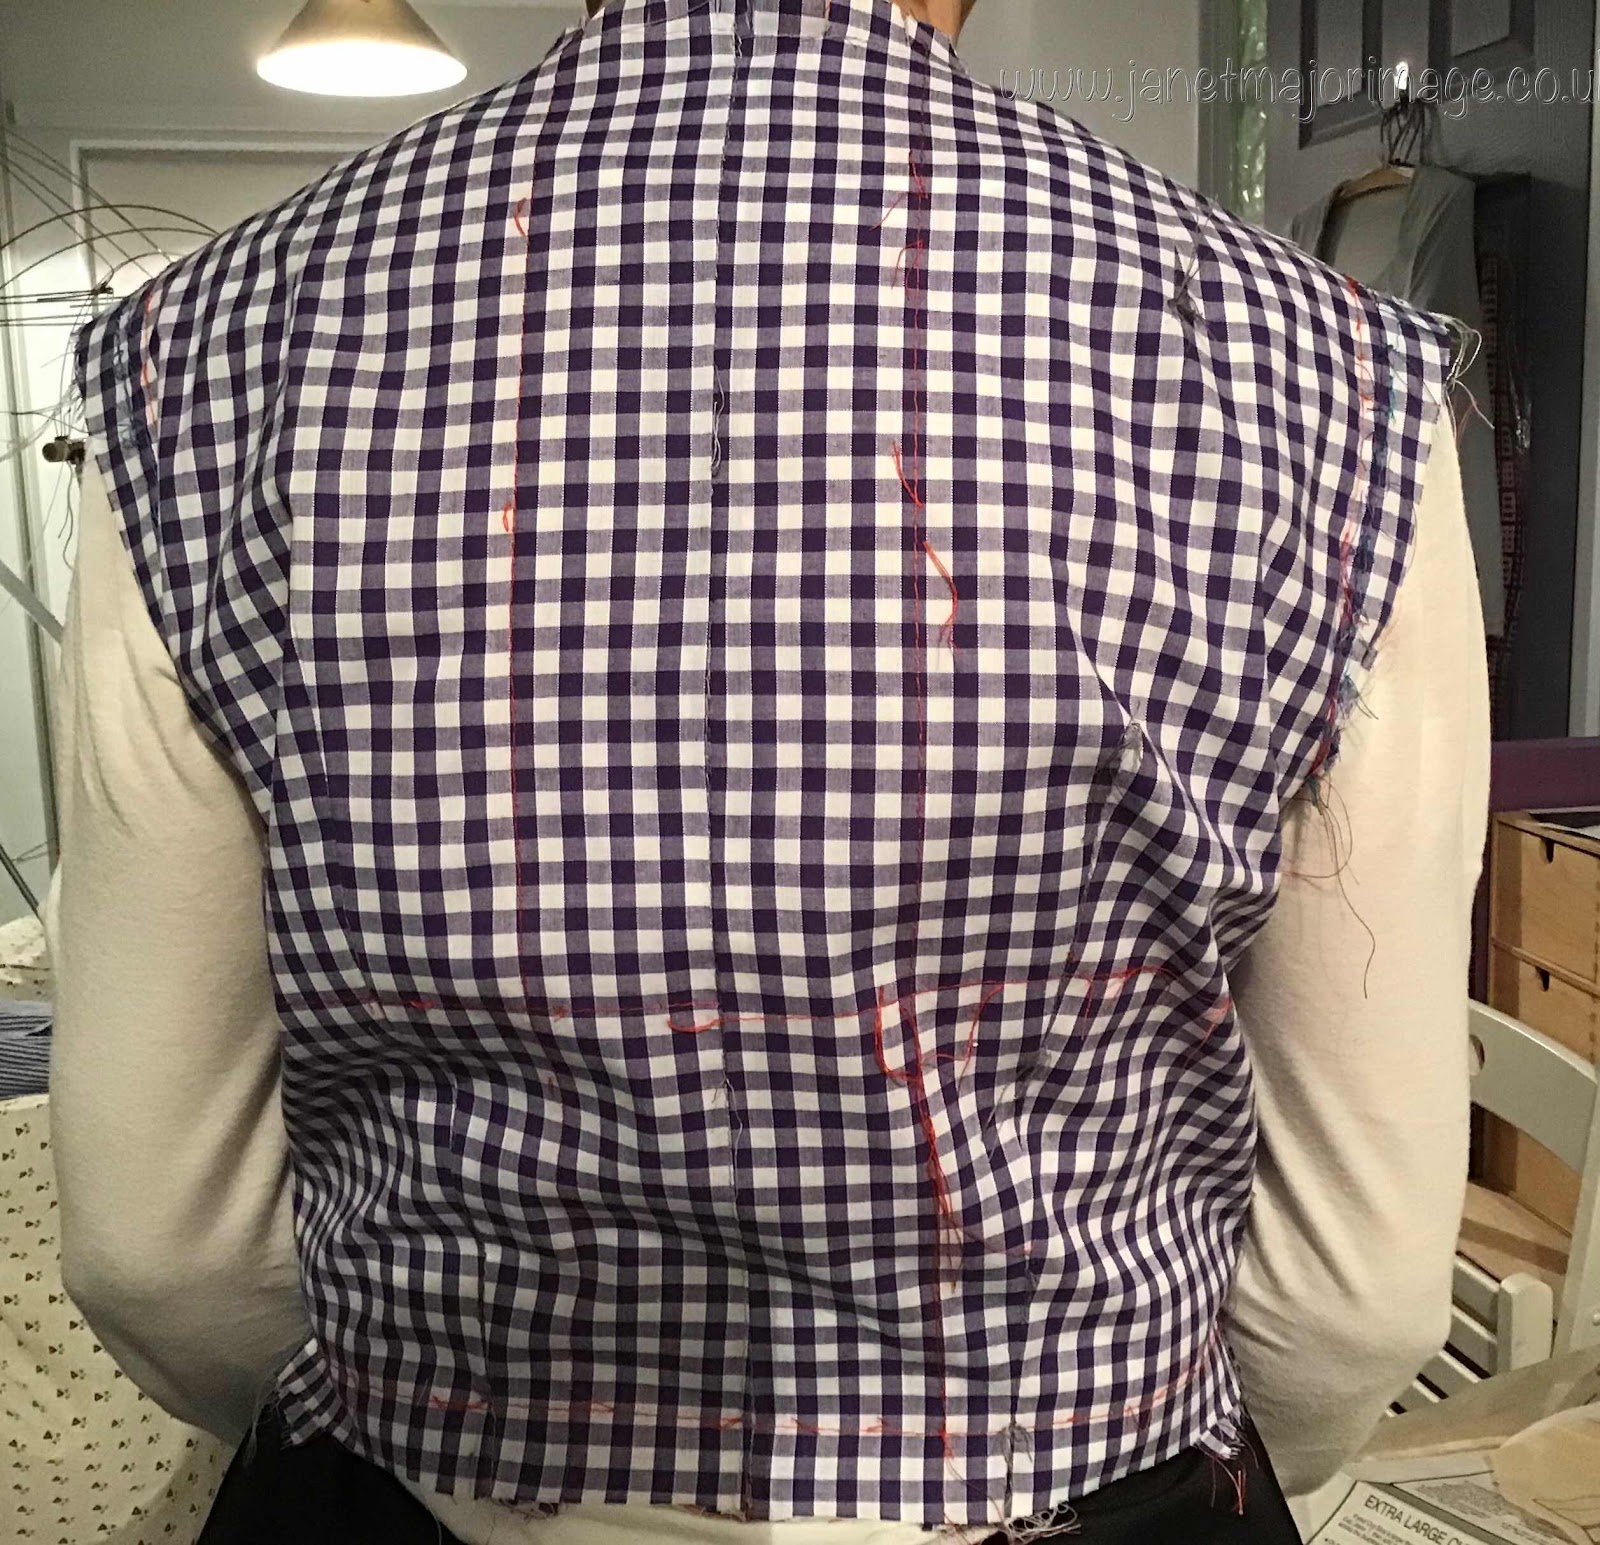
You can see I did lots of marking with different coloured threads. It is far too loose at the lower back - I do have a sway back as well, but this is actually showing the main problem to be that it is too tight across the top of the back and lacks the length needed at the neck. I only have photos of the back as I could see the front myself and thus didn’t take any photos.
I made minor alterations along the way but this was going to need a drastic measure. I consulted a whole pile of books too (3)and came up with a strategy.
First attempt at adjusting the back.
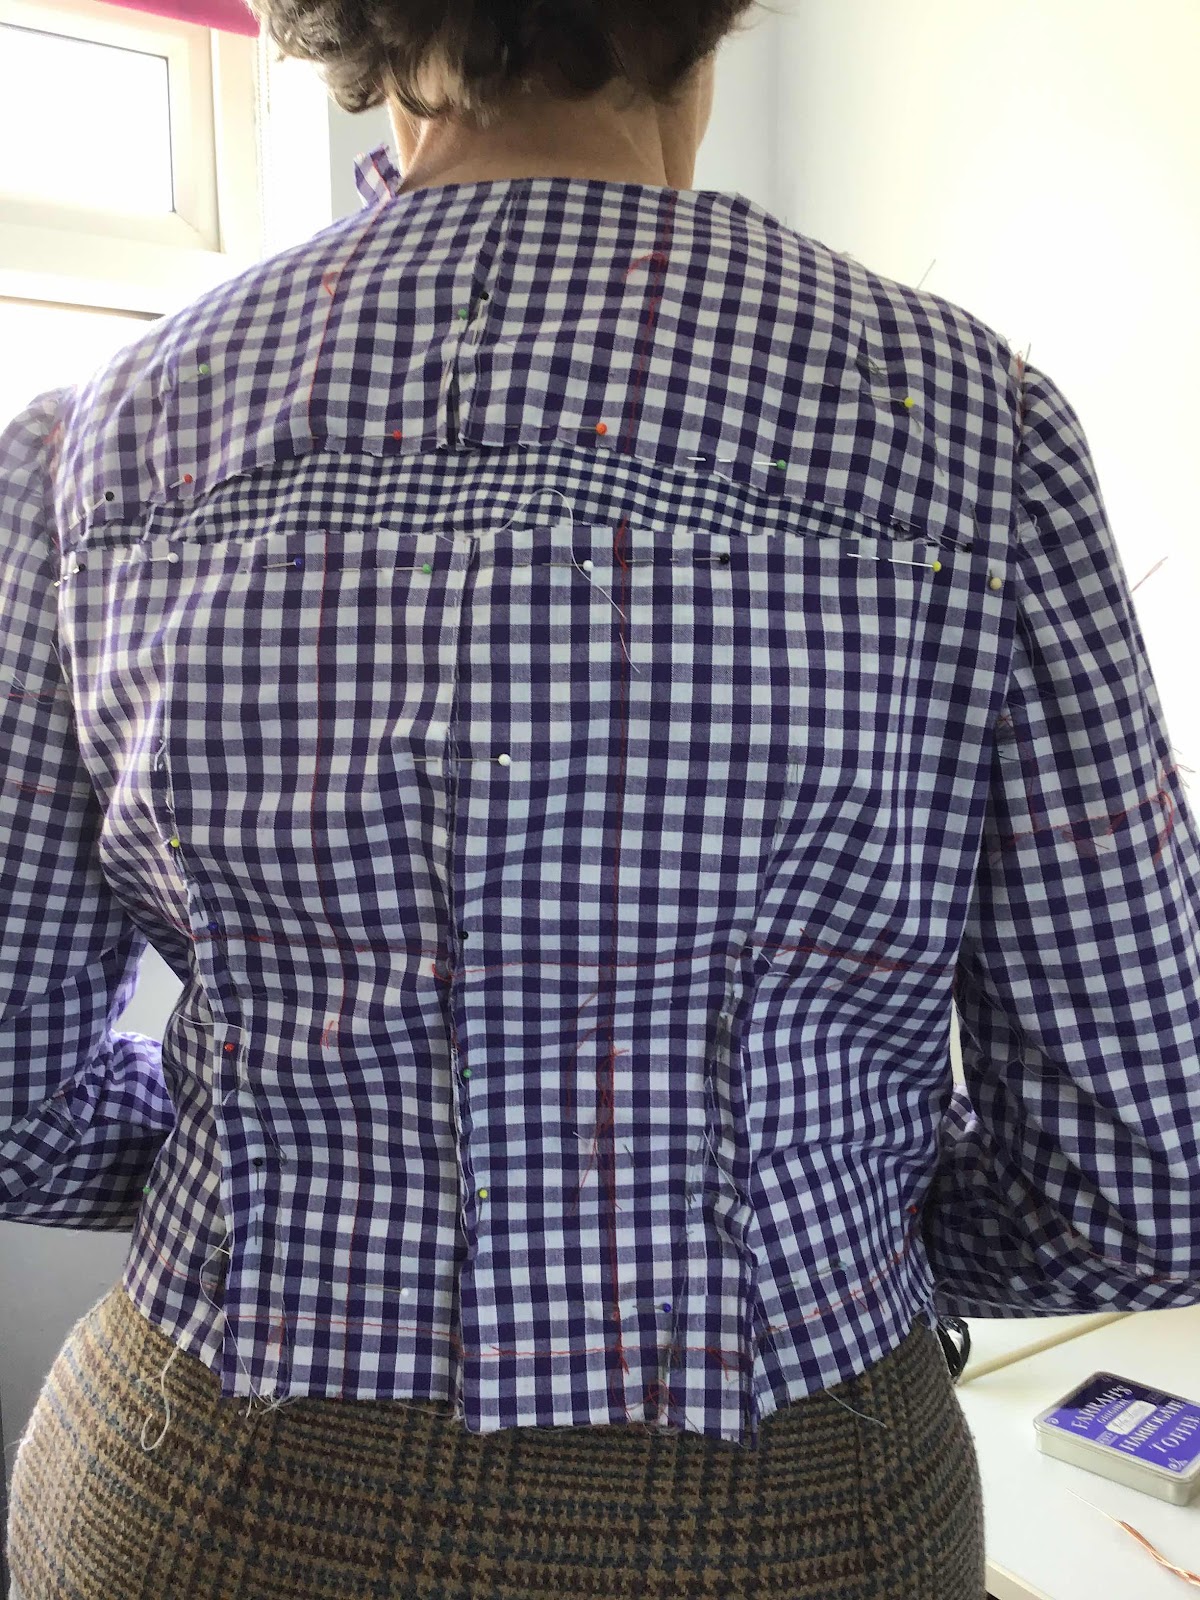
You will notice I have added the sleeves and that one is fitting better than the other, this was intentional as I used different should length seams on each side to see which worked better.
I realised the sleeves would affect what happened on the back. I will say more about the sleeves later. I pinned the darts outwards too. I know Each side of my body is not identical so trying the toile on inside out would not work!
I regard myself as slim built (mainly) and who would have known I have a large upper arm biceps. (4) This needed another similar slash and insertion in the middle of the sleeve cap where the pattern was cut and spread. I also needed a higher sleeve head than is normally given on patterns to accommodate this. I also noticed that my upper arm is longer than ‘average’ and I had to move the elbow dart down from the shoulder 3.5 cm so the dart would be at my elbow. This necessitated shortening the lower arm by the same amount.
Fitting the sleeve was problematic as I needed to balance this with there being extra fabric at the back across the high chest to accommodate the roundness of my back. I managed this by altering the shoulder darts. I also made the seam up the centre back curved to cope with the excess fabric in the top centre of the back above the bulge. This meant the back would fit at the neck and not stand away. This is something I had learnt to do when making my coats and doing a personalised ‘fiddle’ when I make stretch jersey tops.
I ‘slept on this’ and re read all I could before going any further. Much trying on, on both me and my body duplicate.
At this stage I decided I would put the alterations for the toile onto a new paper pattern that I would cut, then I would make the whole bodice again with fresh gingham. I had to go slowly at this stage and not cut any corners. After all what is the point of making a fitting bodice shape which is not accurate?
So this is the second attempt back
and front
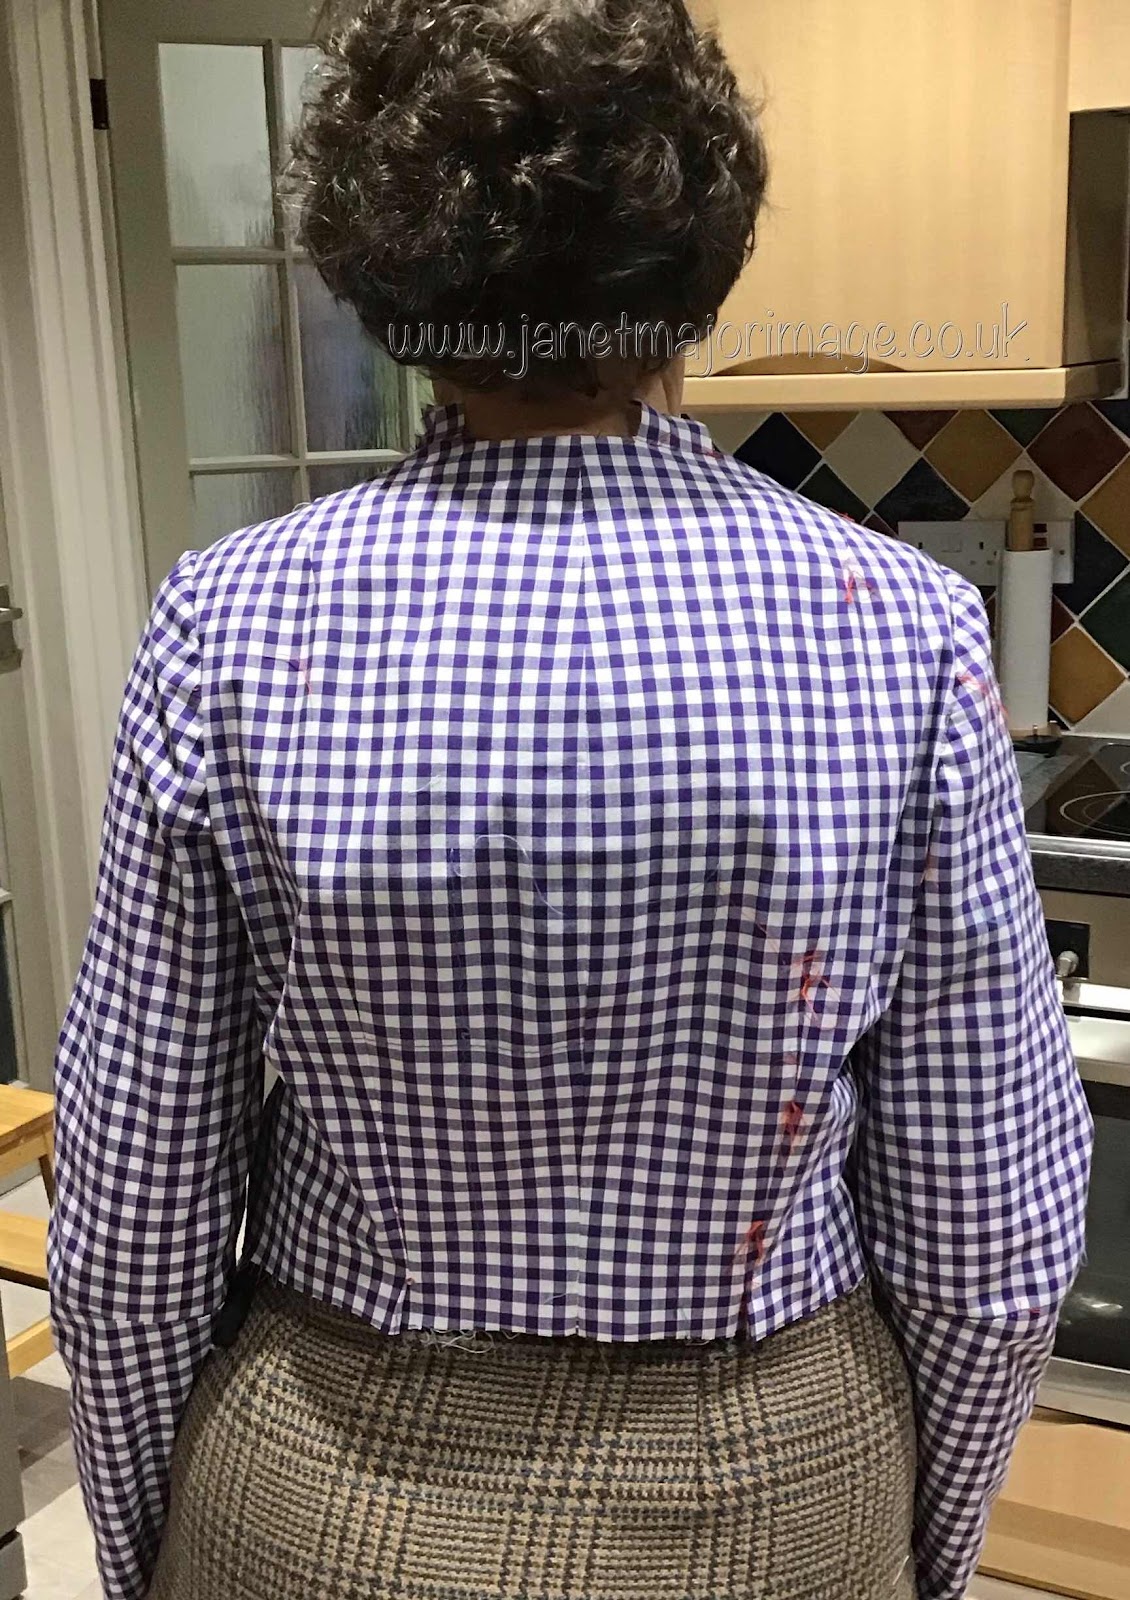
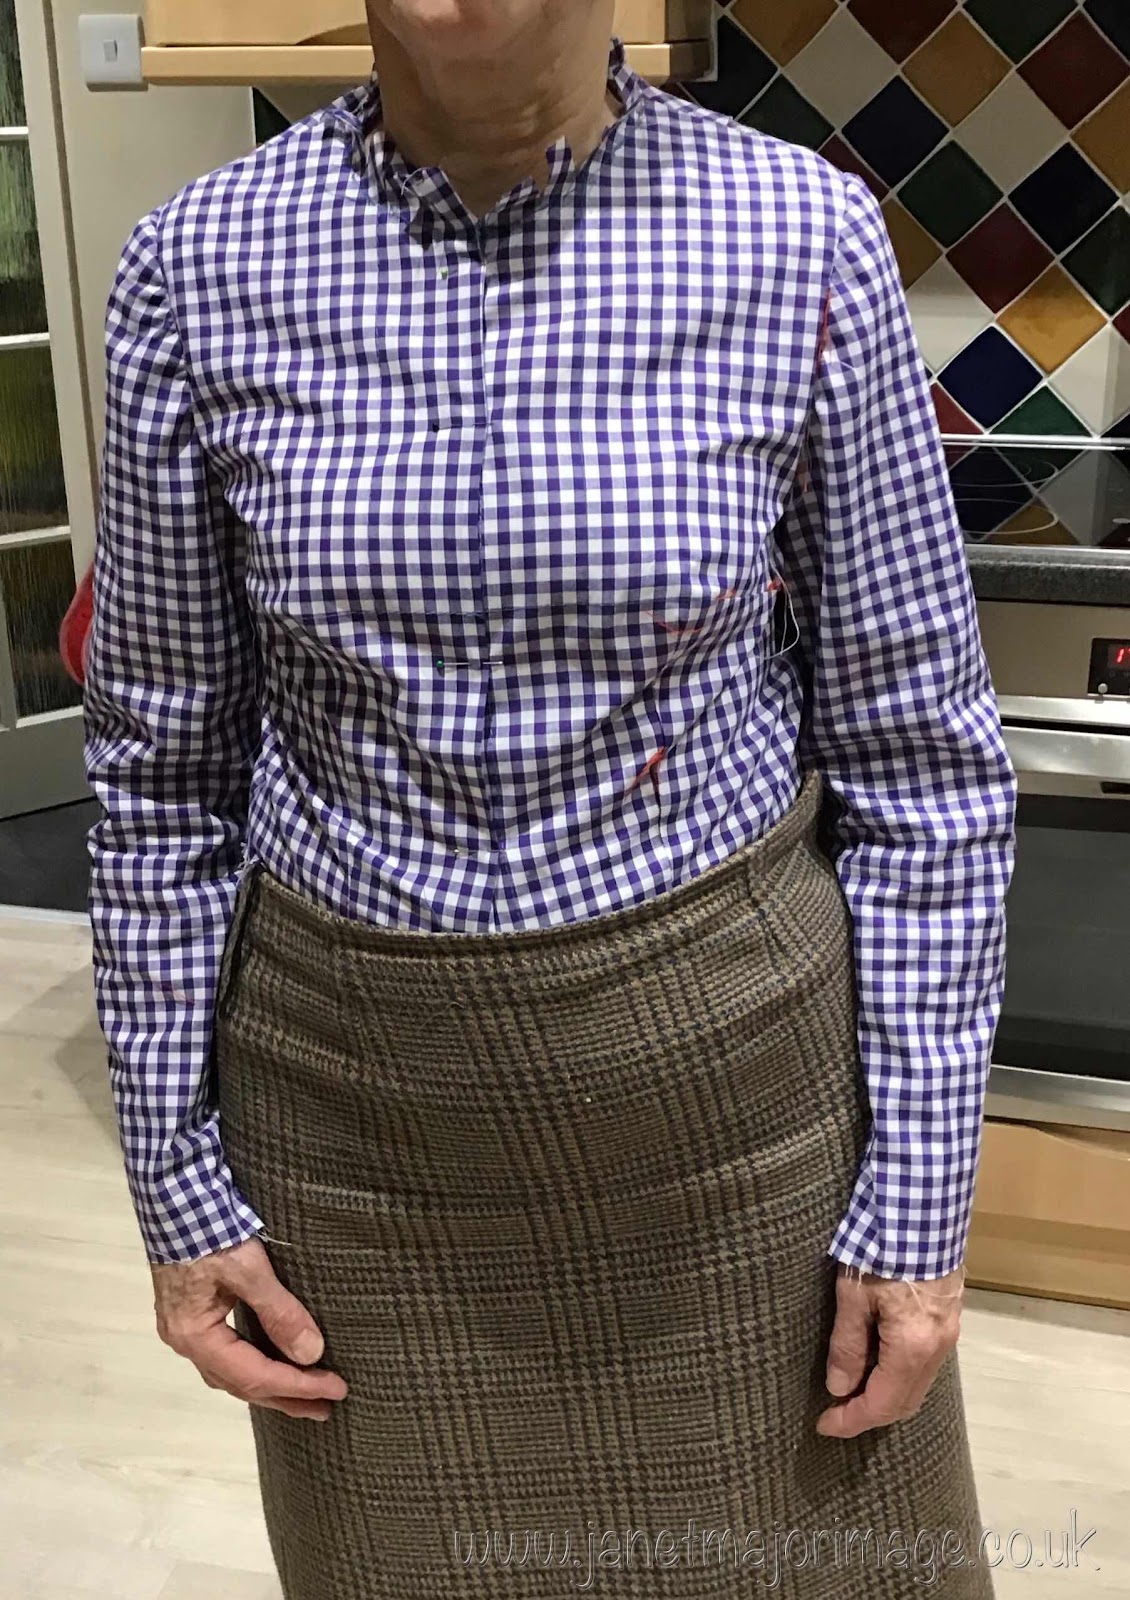
Please forgive the background and the lighting makes it look a bit loose but one thing I have learnt is ‘overfitting’ is to be avoided. There has to be room to move. The right sleeve fitting also needs improvement. However, I will never have a dress just like this. It is just to get the key measurements for any pattern I choose to make. I am in the process of making again one of my favourite patterns and will post that when it is complete.
All in all this is better than I could ever have expected.
- The post of 31Jan11 shows the comparison then of my body duplicate and the commercial one.
- the Lutterloch system is a pattern making system based on the Golden Rule. Basically you get a small pattern of a garment, take your bust and hip measurements and use a special ruler to draw out your own pattern. It is suggested that you make a waistcoat first. I was concerned how it would cope with my rounded back. I was impressed with the fit of the waistcoat, the only alteration needed was to narrow the front. Post of 10April19 gives more detail.
- Books used
10 used at some stage of the Fitting Bodice Project.
Aldridge Winifred Metric Pattern Cutting for Women’s Wear
Bray Dress Pattern Designing
Foster Betty Fashionmaker
Goulbourn Margaritha Introducing Pattern Cutting Grading and Modelling
Long Connie Easy Guide to Sewing Blouses
Margolis Adel P How to Design Your Own Dress Patterns
Palmer Patti and Alto Marta Fit For Real People
Rasband Judith, Liechty Elizabeth
Schaefer Claire B Couture Sewing Techniques
Singer Reference Library The Perfect Fit
- Lots of gardening, machine knitting and weaving possibly?!


