Tuesday, 22 November 2022

The journey to Shetland Sept 2022


During the early summer we decided that we would go to Shetland in the Autumn. We had missed not going there for Wool Week in either 2020 or 2021. Previous to that we always went before wool week and had time to ourselves and actually wanted more of this again. So I decided I would attend some of wool week but with some provisos because of covid. We were fortunate as neither of us had succumbed to Covid, we were still wearing masks when mixing inside and in general just meeting people outside. I was very uncertain about meeting large numbers in an indoor setting and decided I would not go to any evening lectures, much as I really enjoyed them. We did want to meet friends we had made in Shetland and also friends from around the world. Michael  had an additional booster in 2022 but I did not qualify for this due to my younger (?) age. 


(Those that know me well, are aware that this worked until nearly the end of our time away, when I went down with covid and this is partially why I am so late starting to post this journal. I like many others feel fortunate in that I have only suffered from exhaustion, I am much better but still look forward to the day when I can say I am fully recovered. In my book, life is too short to feel tired from even slight ‘overdoing it’! ) 

As always we would take the motorhome and live in that. So we planned to be away for virtually all of September, a longer trip then we had taken before but we were very much looking forward to it and we made arrangements to meet several friends there  before we left. 


We had put in place watering arrangements for the parched garden and crossed our fingers for rain here when  we were away as everything was parched and we didn’t want watering to be too big a task for our team of 3 who were to keep an eye on things. We had bought labels to put in the ground for plants to be watered but the ground was too hard for them to be used. 


So we left home on September 3rd. This was a Saturday and we had especially chosen to do the main travelling at the weekend when we hoped we would miss most of the lorry traffic! We packed up for a month, the first time we were going to be away for that long. It was our first trip to Shetland since 2019 too, so this had meant many lists! The day of leaving East Anglia was about checking the final list and we were pleased to be off for 10.00. It was very hot and even when we got to our stop for the night just off the A1 by Tuxford it was still 26 outside. 


This was a new campsite to us, convenient for the A1 but tired and a bit dated.  It did have some wonderful large colourful flower pots that I thought I had taken a photo of, but it seems I didn’t. We were going to have some hard landscaping done in the garden when we were back with some more shingle and pots but perhaps these are a little too big. They came up to my armpits! (1)


So on Sunday we got up and hoped our hunch that the A1 and A66 going across the top of the Pennines would be quiet. We knew the trick was to get off early and we managed that. The drive was enjoyable but we noted that everywhere, even up north was brown and dry just as at home. It wasn’t until we got beyond Penrith that fields looked green. Then as we drove into Scotland we saw our first rain for what seemed like an age. We drove on to Hoddam Castle by Ecclesfechan where we like to stay. A very spacious and quiet site. We planned to have a complete rest the next day. We were pacing ourselves and wanted to enjoy the journey as much as we could. 


On our day off we had decided to not drive anywhere, the point was to rest. Getting ready for such a big trip always has some stress! I still needed to finish Michael’s modified Wool Week hat so I hoped for time to do that. What we hadn’t envisaged was that we would have extremely heavy rain in the night. This was the first we had seen. We had remarked on how lush everywhere looked and that the summer here north of the border must have been very different from East Anglia, However, the rain cleared up first thing and we had a lovely pottery day and I learnt a new skill, taking a selfie and flipping it so that you can read any writing in the photo! 

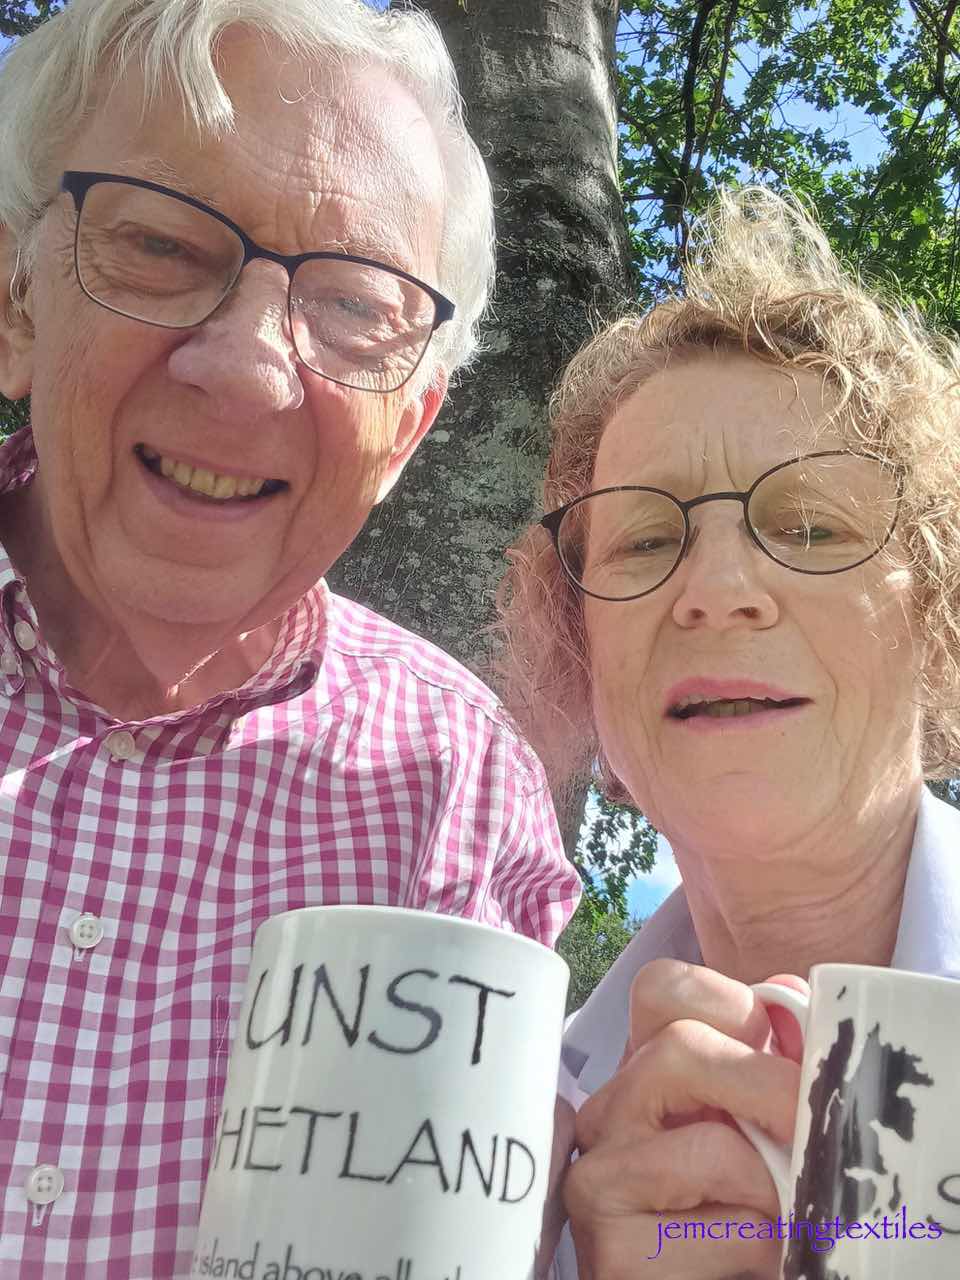
So, a quick shot of us, we don’t usually take selfies! 


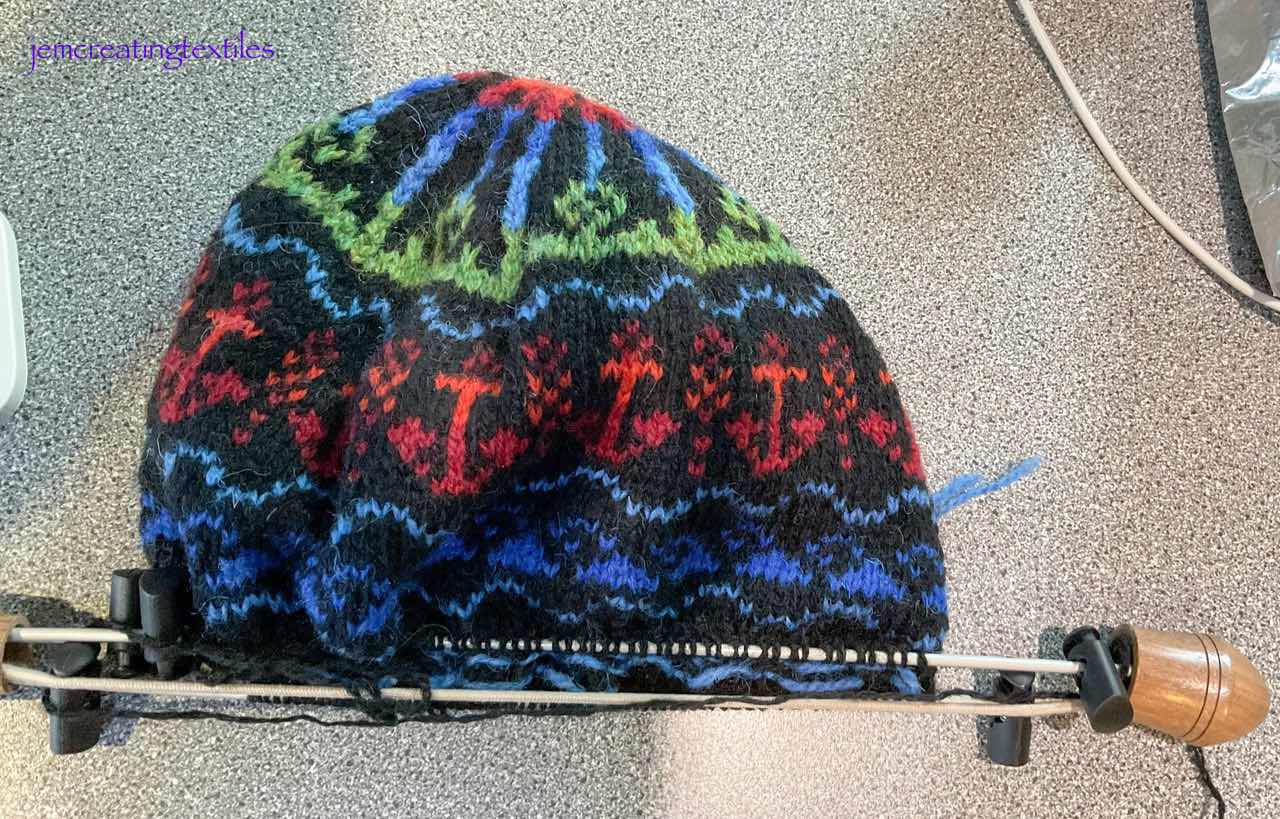
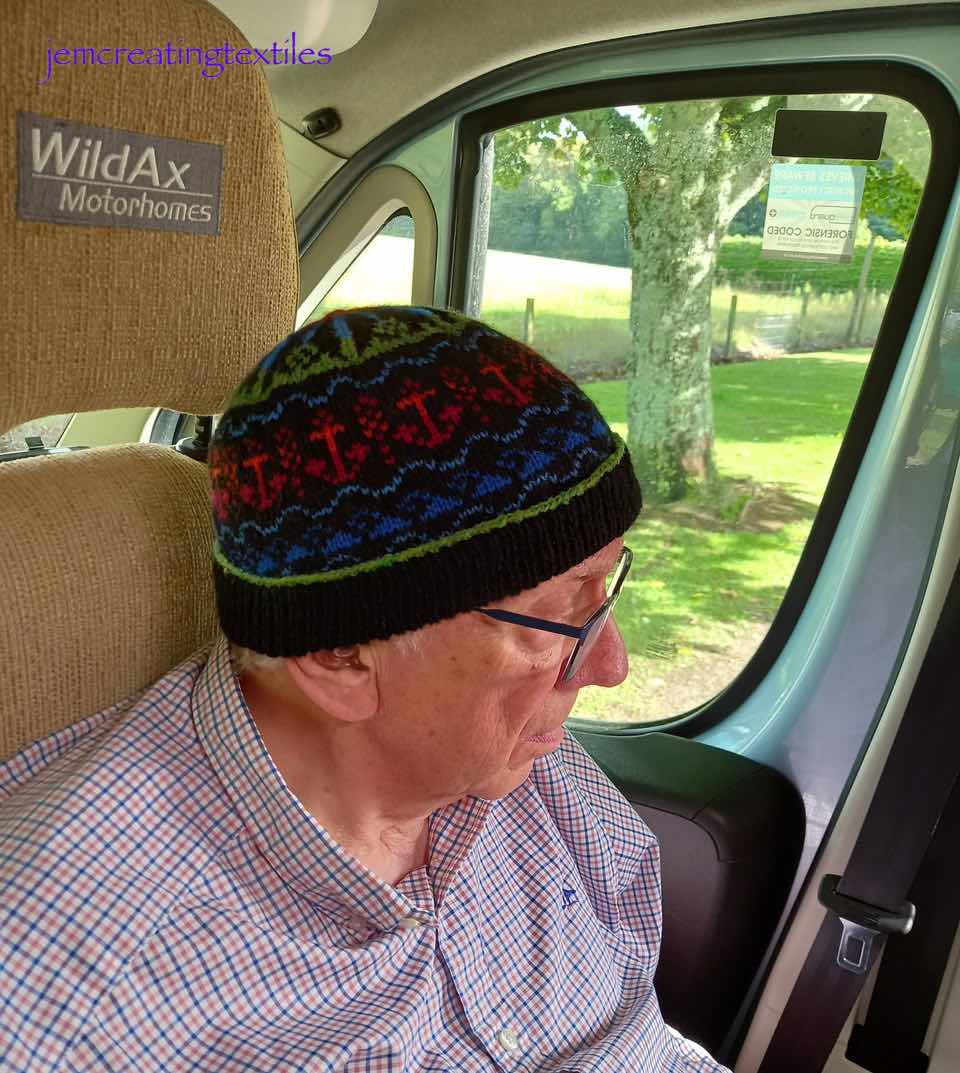
Michael’s hat is basically a shortened 2022 Wool Week hat designed by this year’s patron Linda Shearer from Whalsay. Michael likes  a hat to be close fitting, I also altered the anchor so I could knit the ‘around the head bit’ on the knitting machine. (2) He likes a plain brim….the actual hat had a very attractive chain in the rib. The colours are to match Michael’s padded gilet which is lime green and royal blue and is usually worn daily in Shetland. In the planning I thought there would be too much black so imported some wave type motifs  from a hat designed by Wilma Malcolmson when she was Wool Week patron for the ‘not in person’ Wool Weeks of  2020 and 2021. I have spared you the many photos of the wool wrapping and the sampling before we got to this stage! 


So after Hoddam Castle  there was one more stop and we had chosen to stay at Scone Palace which is actually at Perth Racecourse. We have found it one of  the best kept campsites we know and it did not disappoint this year. Eg there is no grass in the gravel of the hard standing and  everywhere is immaculate, flowers adorn public areas and the staff are very helpful  and friendly. Scotland is always much quieter on the roads and it was a joy to drive the route again. 

The next  day would be a much shorter drive to Aberdeen. As usual we stopped at Glenfiddick garden centre for coffee in the morning. Covid had changed the system for the better and it is now Waitress service. We then drive on to Crathes Castle to get the van ready for the ferry and check we have everything we need in an overnight bag. This we did and I managed to finish Michael’s modified hat. 

However, now being into Sept Crathes Castle was only open at weekends so no tea in the tea shop as usual (3). The  grounds however are beautiful. 

I took this photo a few years ago but it looked just the same this year, such a wonderful reflection. I struggle to find the water level! 
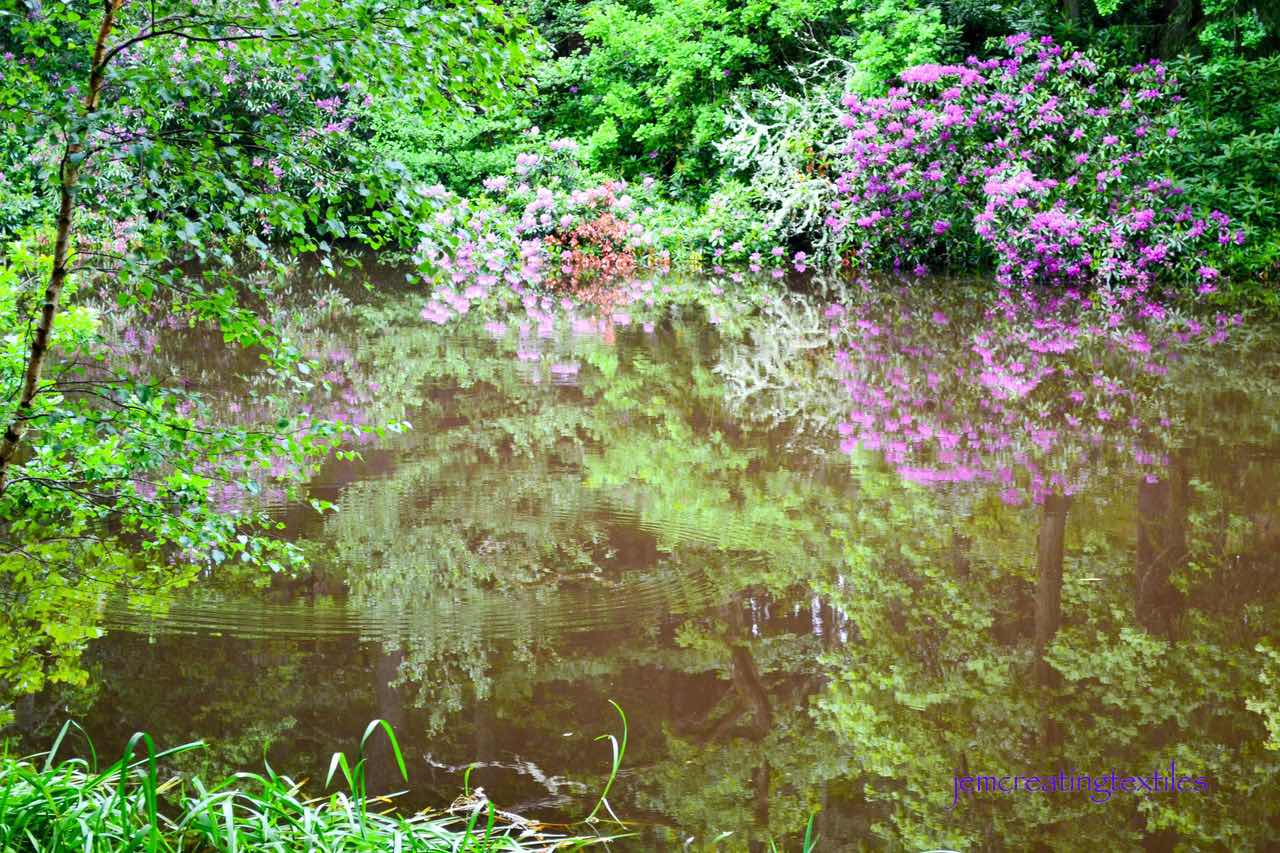


I managed to finish Michael’s hat there (and thus before we got to Shetland) and had to be inventive taking some photos of this. The main reason being the sun was so bright! I have to look hard to remind myself where the water level is. I just love the colours! 

The finished hat


The crown 


…and wearing it 

I suspect the expression is saying, ‘do I have to try this on again’ and a little advert for our much loved motorhome brand! 


Now I could work on the design that is in my head for another fine lace cowl in cobweb yarn or knit more socks. With me, I had enough yarn to knit a pair from Kate Davies’ book ‘Bluestockings’ for myself and Michael. We both liked the first pattern so these will be pair 3 and 4 from this book and I am using the yarn she recommended (4) 


I usually find someone from Wool Week to talk to in the lounge on the ferry but I was pretty sure I would not know anyone on the ferry this year as we were much earlier in Sept than usual. 

We waited literally hours to get on the boat as more and more freight was loaded, apparently no freight boat was running, not because of the bad weather fortunately. Hence as much freight as possible was being loaded, we were squeezed in and one of the last vehicles on. This would be good news as we would be one of  the first off the next day. 

Unusually I took some photos, I had to buy a new iPad just before we left as my previous one would not hold any charge. I was trying out the improved camera and pleased with the results. We had a nice meal in the lounge and I, for the first time, took some photos of Aberdeen beach from the ferry. Views from the lounge as we had dinner.


All was very calm crossing as we boarded but we were warned it would get fresh and more fresh during the night! 

I was completely wrong about not meeting anyone on the boat, as I sat enjoying my dinner I heard a familiar voice and it was a Wool Week friend, Suzanne from California with her friend! So for us the Shetland Wool Week experience had truly began. 

We slept through any ‘freshness’ ! 


Notes

1.I have now found a firm selling these. Rather out of my price range I think as we would like a few. 

https://bigplantpots.co.uk/products/biggie

2. I mainly use a punchcard machine (I had this from new in about 1976) and it works with a width repeat of 24 sts)

3. We usually cross on the ferry on a Friday night not on Wednesday as this year and see it is only open Thursday to Sunday in winter.

4. Kate Davies website.  https://kddandco.com/  Her books are delightful and far more than just books of patterns. 


Monday, 22 August 2022

East Anglian Churches


Norfolk, and East Anglia, has the most amazing collection of Churches, mainly medieval and mainly built on the wealth of wool. History tells us the merchants felt that giving money to the churches, the merchant would be prayed for and have a better after life. 

I live in a small village mentioned in the Doomsday Book and in 2011 having a population of 785. The village church is grade one listed! Going back Carleton Rode had two Churches, although no one knows exactly where the other one was, it was timber I understand. Today the village also has a Baptist Church which is beautifully ornate on the outside. 

There are over 650 Churches in Norfolk - this is the greatest concentration of churches in the world.  Whatever your beliefs visiting  the churches is a great way to glimpse the best of everyday art and hence life in the past. Many East Anglian Churches that are redundant or at risk structurally are cared for by the Churches Conservation Trust who aim to find novel ways of using the churches so as many people can appreciate them as possible. These churches are often open to the public. (1) 


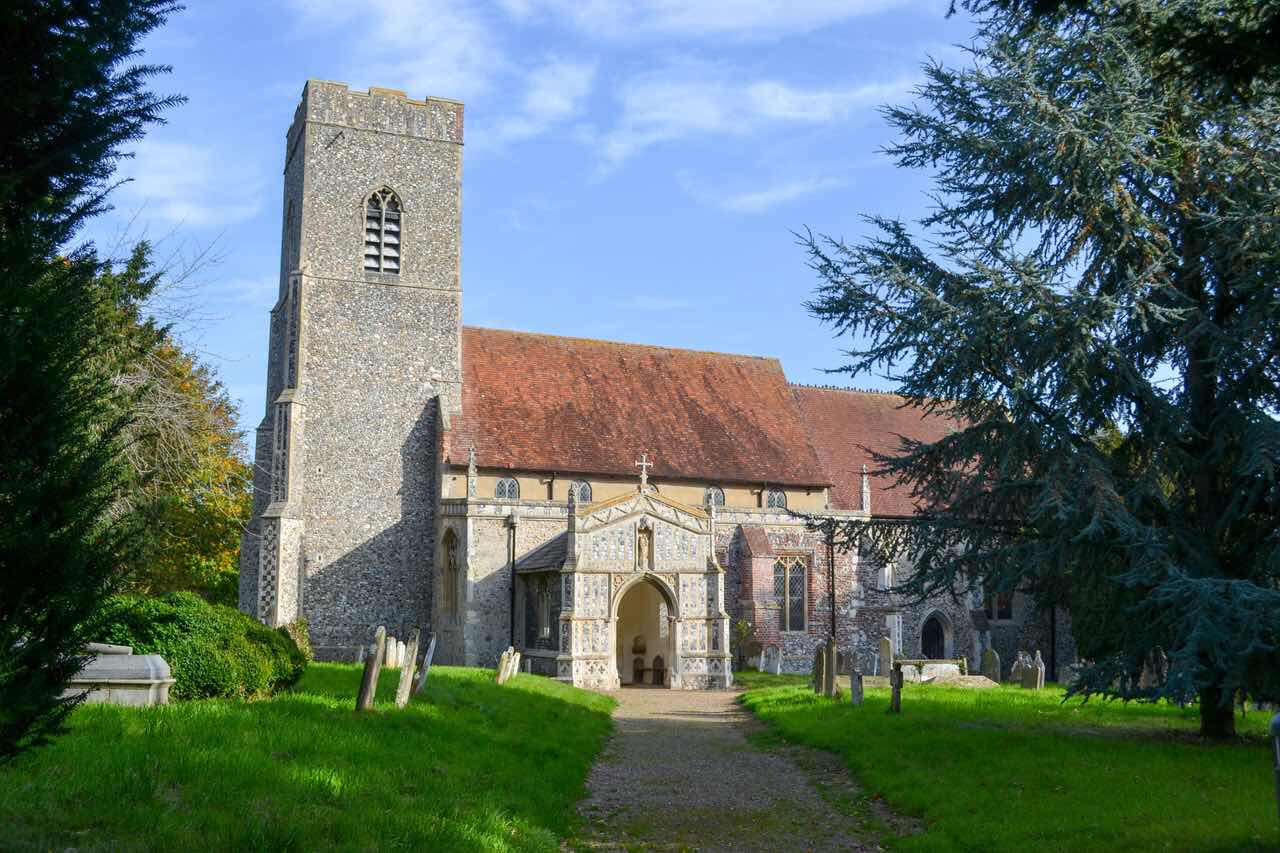
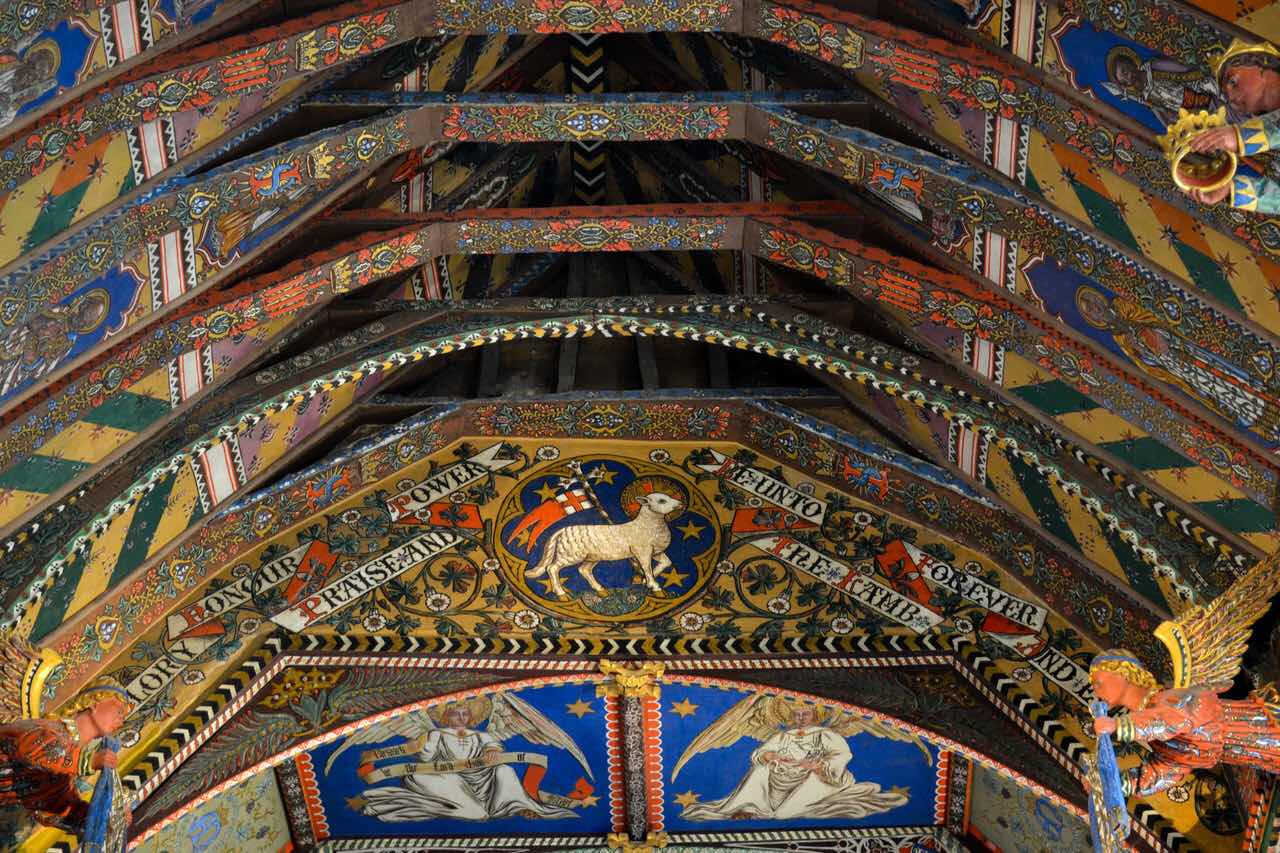
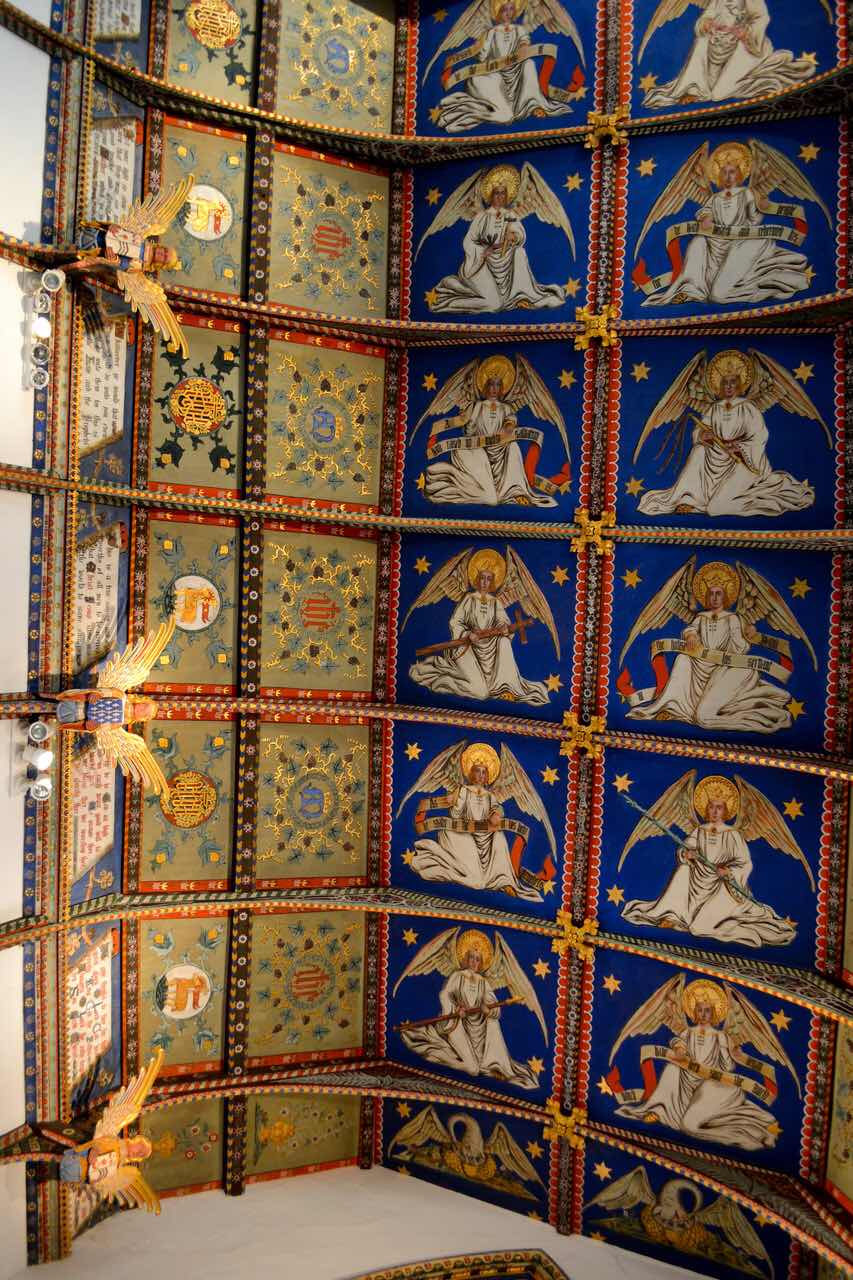
Following the interest  in Sandringham Church I though I would write about Huntingfield  Church which is in Suffolk. (2) 


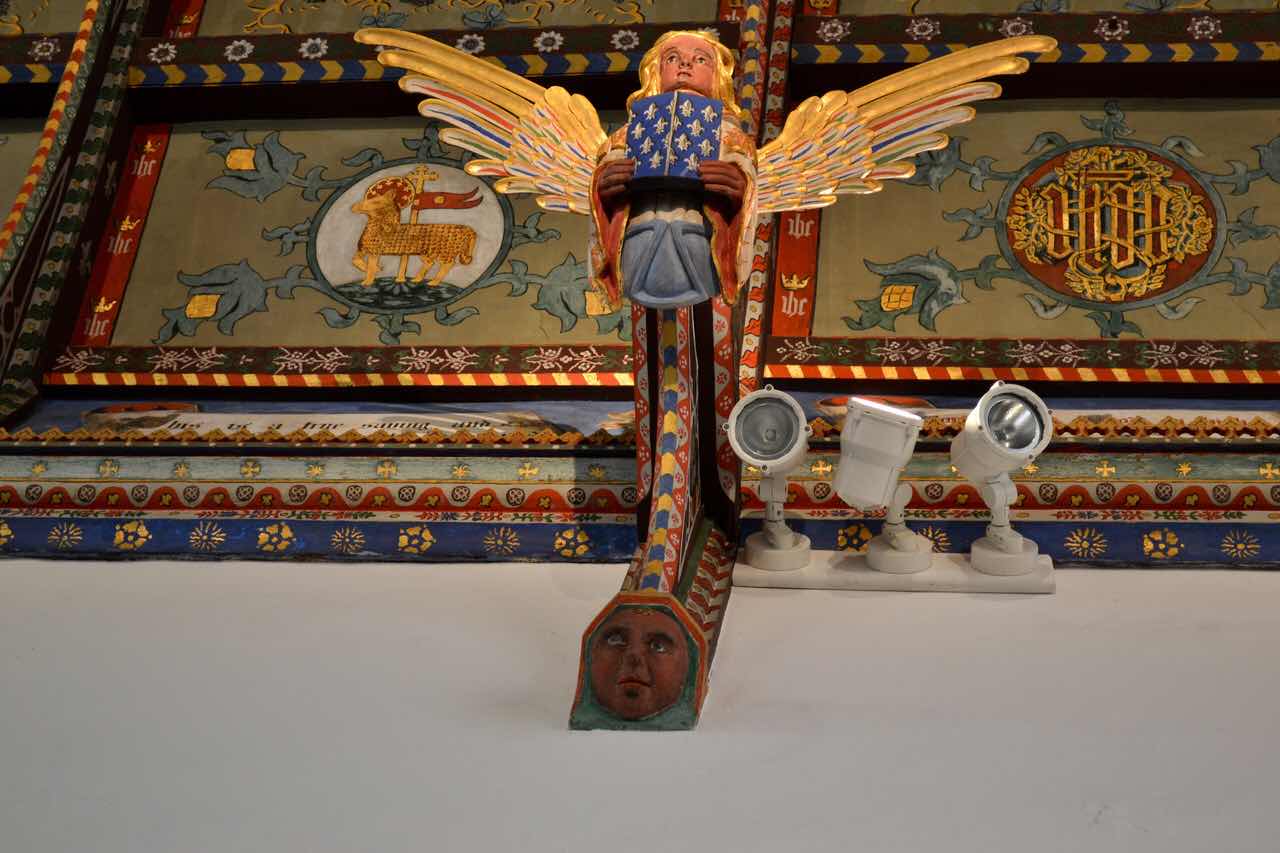
This is also in a small village and parking is not great but manageable. It has a remarkable ceiling and I thought I had written a post about it but have looked back through this blog and Facebook to no avail. We visited with friends in October 2017. We were just back from Shetland Wool Week and I would have been trying to write my journal from that, then I guess things like making the Christmas Cake got in the way! 


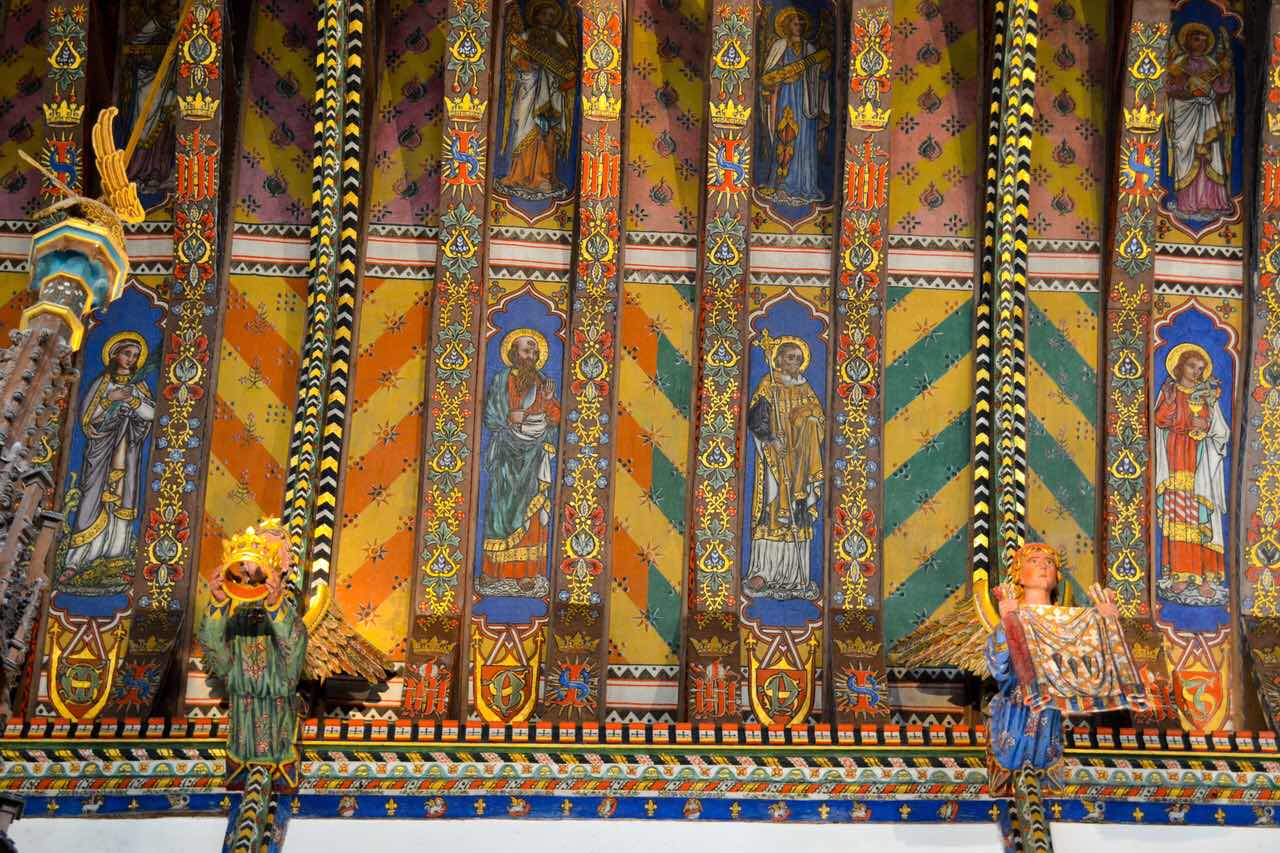
This ceiling is even more spectacular than the one at Sandringham, but then Sandringham does have the silver pulpit, altar etc and ceremonial cross! 

What is even more remarkable is that the ceiling in Beddingfield was painted by the vicar’s wife laying on her back, between September 1859 - April 1860, yes, just 8 months! Apparently after another three years she painted the nave ceiling. There is no record of her having help with the painting! 


I hope you will agree that this is an amazing ceiling and wel worth finding. The church is open 10-4.30 daily (do try and check before visiting) and a toilet has been sympathetically added at the back of the church. 


Notes 

  1. The Churches Conservation Trust  has a good website showing which churches they care for. Many have a walk in the local area too. Zoom sessions started on Thursday lunchtimes during lockdown with lectures from experts in their field. These are now available on YouTube. https://www.visitchurches.org.uk/
  2. Huntingfield Church can be found at IP19 0PR


Friday, 24 June 2022

Shetland Lace Knitting : ‘joins’ in a mini hap


I have mainly chosen to knit rectangular scarves/ stoles/ shawls. There are several reasons for this but  the three main ones are: more wearable for me; I first saw the very fine lace Unst examples and wanted to recreate these; their construction with invisible joins appealed to me a lot! I also found that as I became more skilled in the construction and techniques I could personalise these by using my own chosen combination of motifs. 


During one wool week I took a mini hap class (outside to inside)  with Donna Smith so I could become more familiar with the construction of a square hap….. I quickly learned that there were many ways of constructing a hap and doing the joins! It took me a long time to get round to finishing this hap. 


I am a firm believer in trying out a technique first, often using larger needles and yarn and then when I am happy with the different techniques I can scale down the yarn and needle size to suit my preferences for something very lacy. Eventually I finished the hap but was not proud of what I had achieved. 


I continued to knit fine lace and more recently use my own naturally dyed yarn for this. Then I became very fortunate, Elizabeth Williamson, daughter of Betsy Williamson from Shetland, moved to Woodbridge and started teaching lace knitting! This has really broadened my horizons as I have knitted in different yarns, learned to knit different shaped shawls, learnt many more Shetland techniques, many that I did not know I did not know and generally had a great time! 


The most recent project we have been doing is a mini  square Shetland lace hap, again outside to inside. Illness got in the way and I needed to wait for the next stage (we are fortunate in meeting with Elizabeth in person, although her workshops can be taken online wherever you are in the world.) It is a very clever and lovely design. I have posted about it here on 15 June  22. 


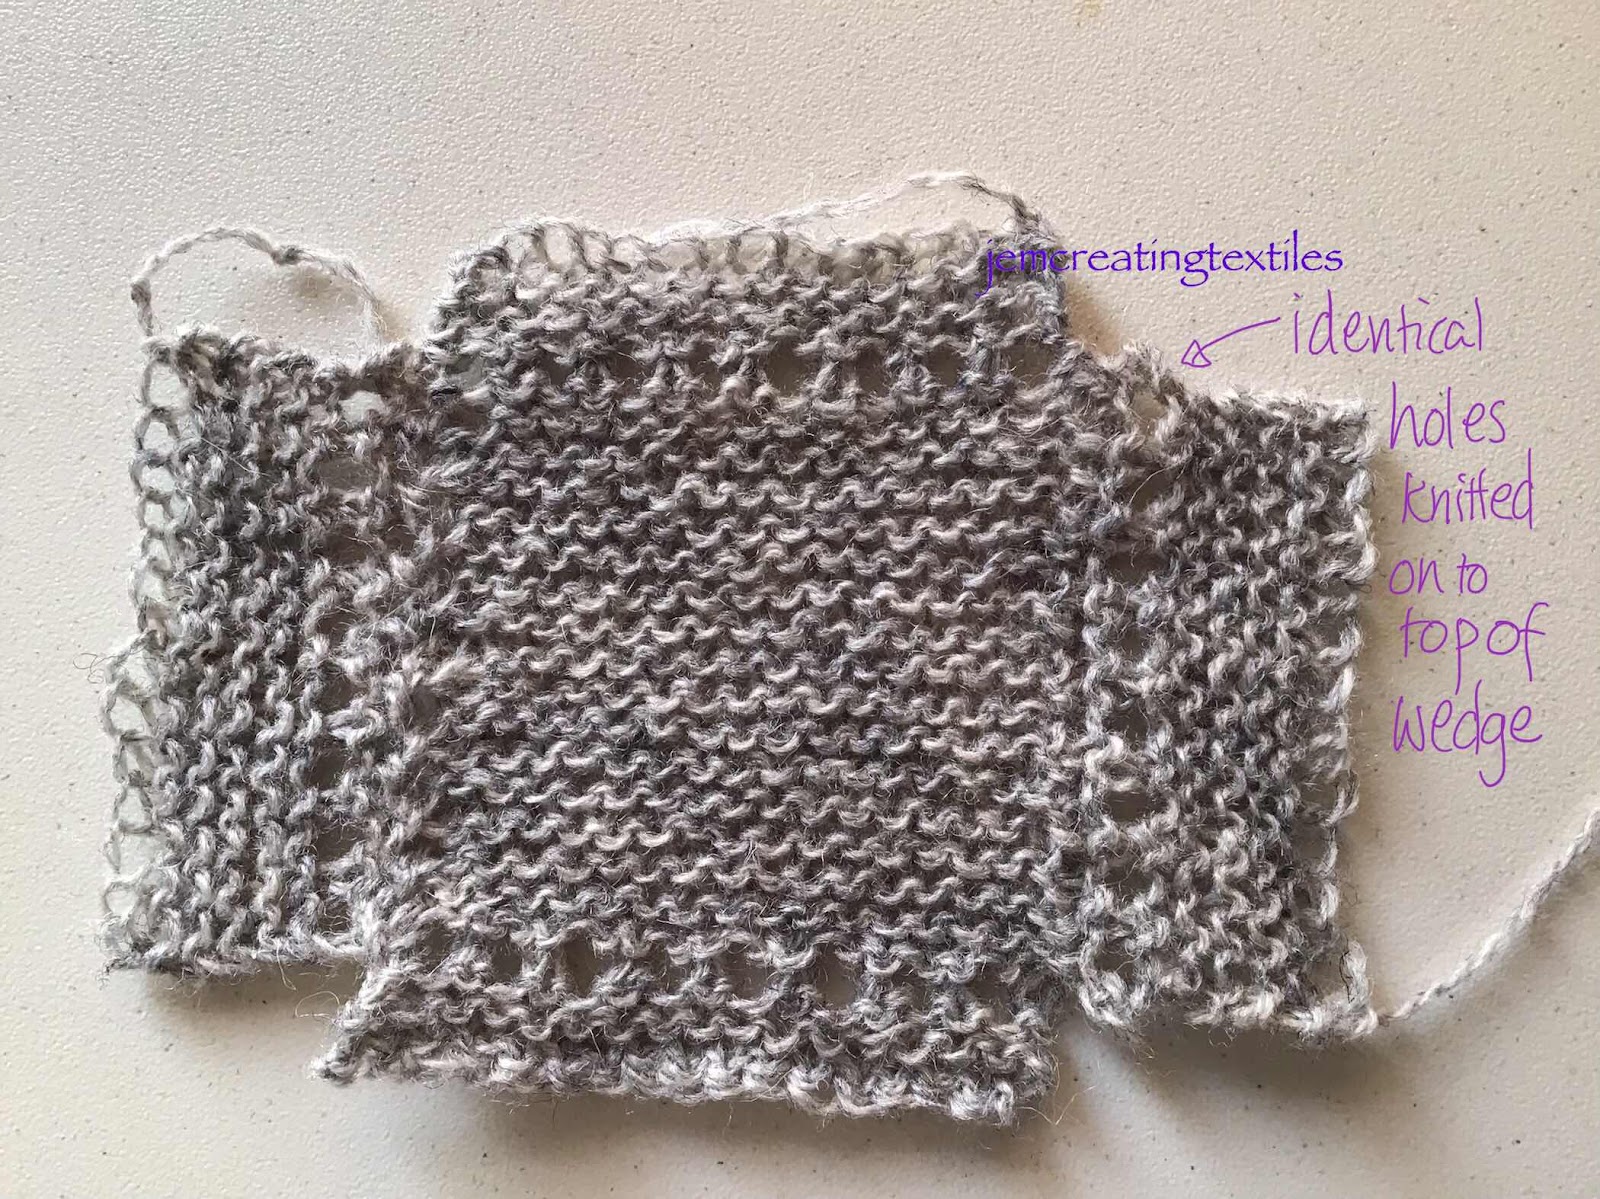
I decided to return to the hap I had knitted many years ago whilst waiting to finish ‘Elizabeth’s’ hap. I wanted to try different ways of joining the mitres where the wedges meet  and also joining on the sides of the centre to the two wedges (trapezoids). I ignored the outer lace at this stage and just knitted in garter stitch. Some of the wedges I did the decrease on the outer stitches and some one stitch in. I wondered if I could even tell the difference. One wedge would be knitted first,  before the centre and the one opposite would be grafted on. (I love grafting since I have improved my technique due to following methods given for grafting, including two sided lace grafting, by Joni Coniglio documented in some recent  posts here in this blog). 

The other important consideration to me was the holes around the centre of the shawl, I aimed for the holes to be identical and the same number on each side. 


Sample one

Hap  with holes on each side and the garter stitch graft on the side opposite where I started.

In this instance I am happy with either a herringbone stitch or whip stitch join for sides 2 and 3 to the centre 


Sample two 

Knitting another sample to see how slipping the first stitch and then doing a whip stitch join can look. I like the neatness of the holes formed and one to add to my repertoire but not for joining the edges of the centre square when I have already knitted the holes around all 4 sides of the square. 


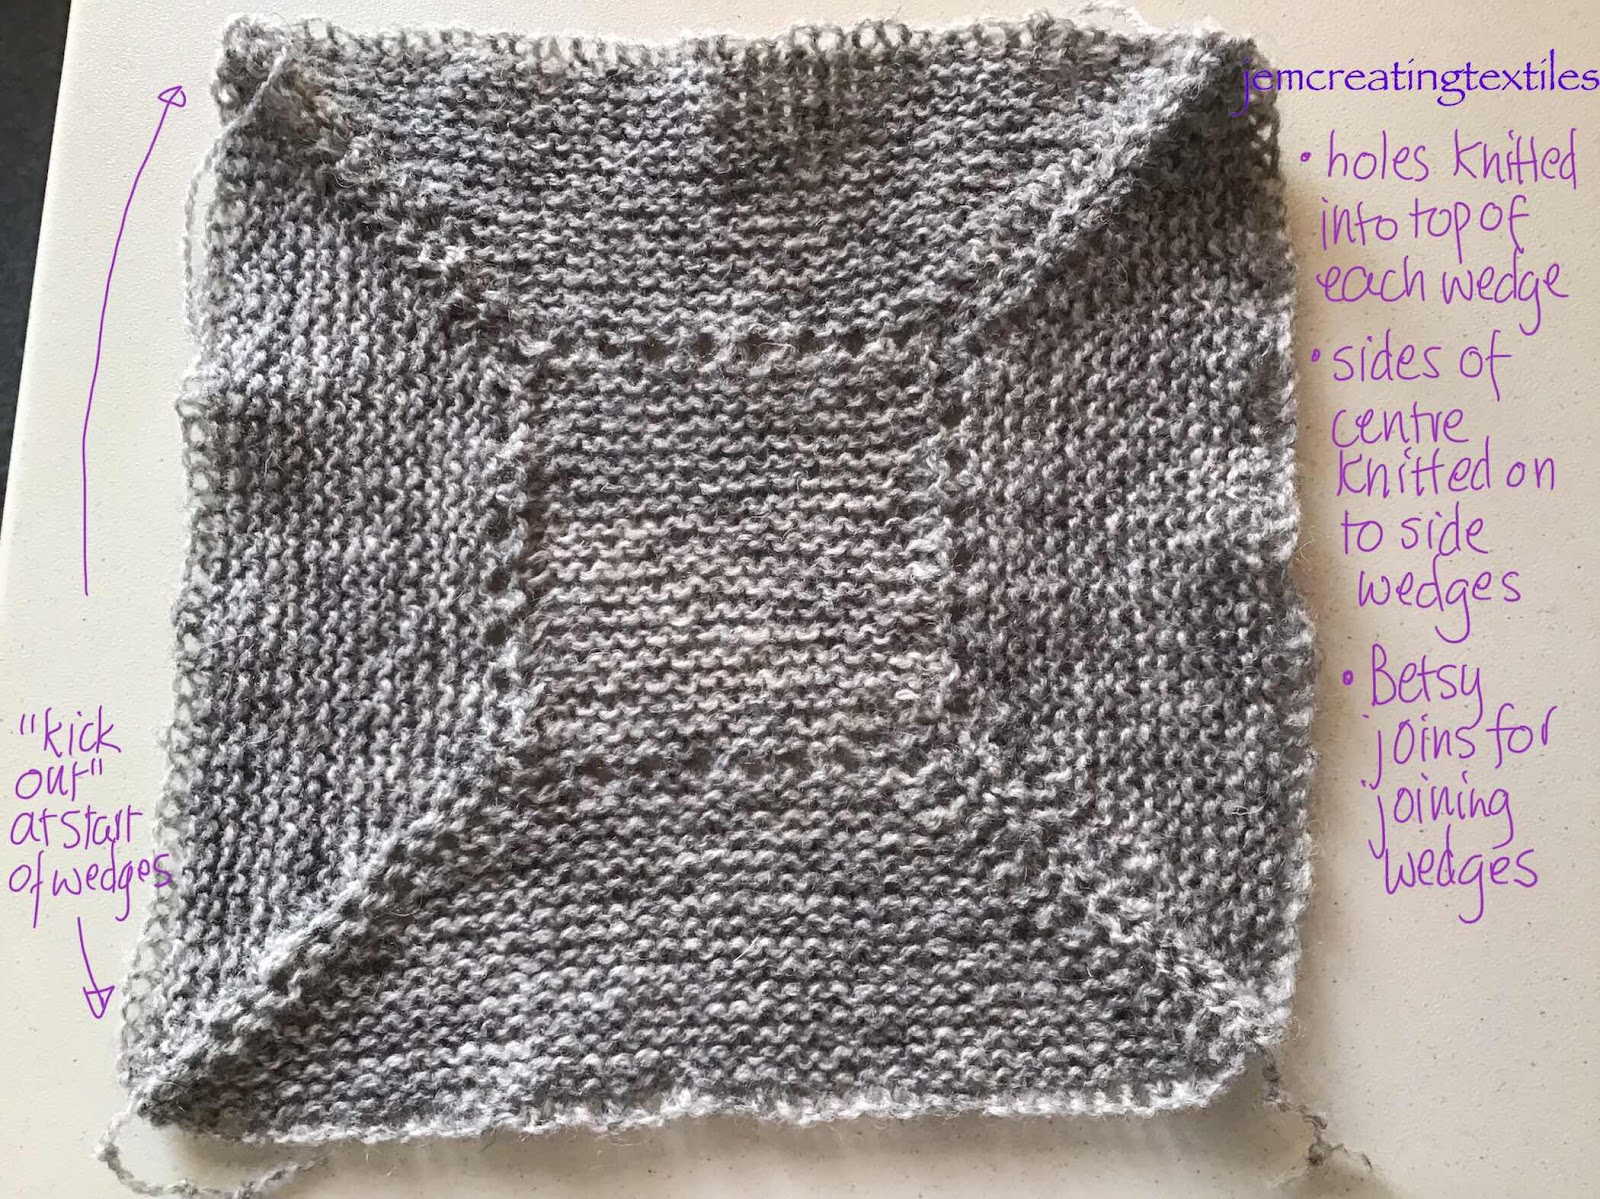
Sample three 

Bigger and with proper wedges. However, I shaped these by decreasing on every  other row from the start, outer edge, and look how they kick out at the outer edges! This must be why Shetland Hap Knitters often / usually  have some straight rows before starting the decreases to make the mitres! 

Happy with the holes and happy with how I joined on the side wedges by joining  them on as I knitted the centre 

Each wedge forming the mitres is  joined to two other wedges with versions of the Betsy join as I interpreted it in 4 different ways based on Hazel Tindall’s  demonstration in the 50 tips from Shetland Knitters  DVDs which she did with Elizabeth Johnston (3). I was waiting for my personal tuition of the Betsy  join for Elizabeth’s hap, which explained and clarified  the method. (The equivalent wedge joins after my personal tuition are shown in a previous blog post Elizabeth’s  Mini hap)


So onto a much changed version of Donna’s knitted hap from the earlier workshop. 

I used Shetland Supreme 2 ply yarn, which I naturally dyed with Alchemilla and Madder. I used size 3.25mm dpns. 

Image of the modified hap 


This has benefited from workshops and discussions with the following Shetland Lace Knitters ( I hope I have not missed anyone out, apologies if I have): 

Kathleen Anderson 

Anne Eunson 

The late Ina Irvine

Elizabeth Johnston 

Donna Smith 

Betsy Williamson

Elizabeth Williamson 


And also Tessa Lorant for the Buttercup Edging in her book  ‘Lace Edgings’ and Joni Coniglio for enabling me to graft lace invisibly


…..but basically the interpretation is mine and I now have managed to work out a variation of the 2017 Mini Hap that I am happy with. 


Order of construction 

Lace edging knitted first, graft completed the Joni Coniglio method

Stitches picked up along a quarter of the peaks, then board/ wedge knitted including the row of holes and return row

3 more boards  completed by picking up stitches along a quarter of the outer peaks for each one,finishing as the first one. 

Returning to the completed first board the centre is knitted picking up one stitch from boards 2 and then 3 on every other row but finishing 2 rows short. The remaining stitch left from each side board is placed on a separate yarn holder. 

The centre is then grafted to the fourth side board including picking up the remaining  st from the side boards to complete the centre section. 


This leaves four  gaps at the mitres which are closed with herringbone stitch after dressing the hap. I felt the herringbone stitch complimented the Buttercup Edging of the lace border.


At last I feel I understand how I can knit a full sized hap, the many alternatives for knitting an outside-in hap and the effect of the different choices made. Planning and making swatches of the motifs and techniques payed off for me. I like to fully understand and be in control of all that goes on in making a knitted item. Perhaps the late Elizabeth Zimmerman should be added to my list above. She certainly encourages this approach! 


Sunday, 19 June 2022

Fethaland Shawl


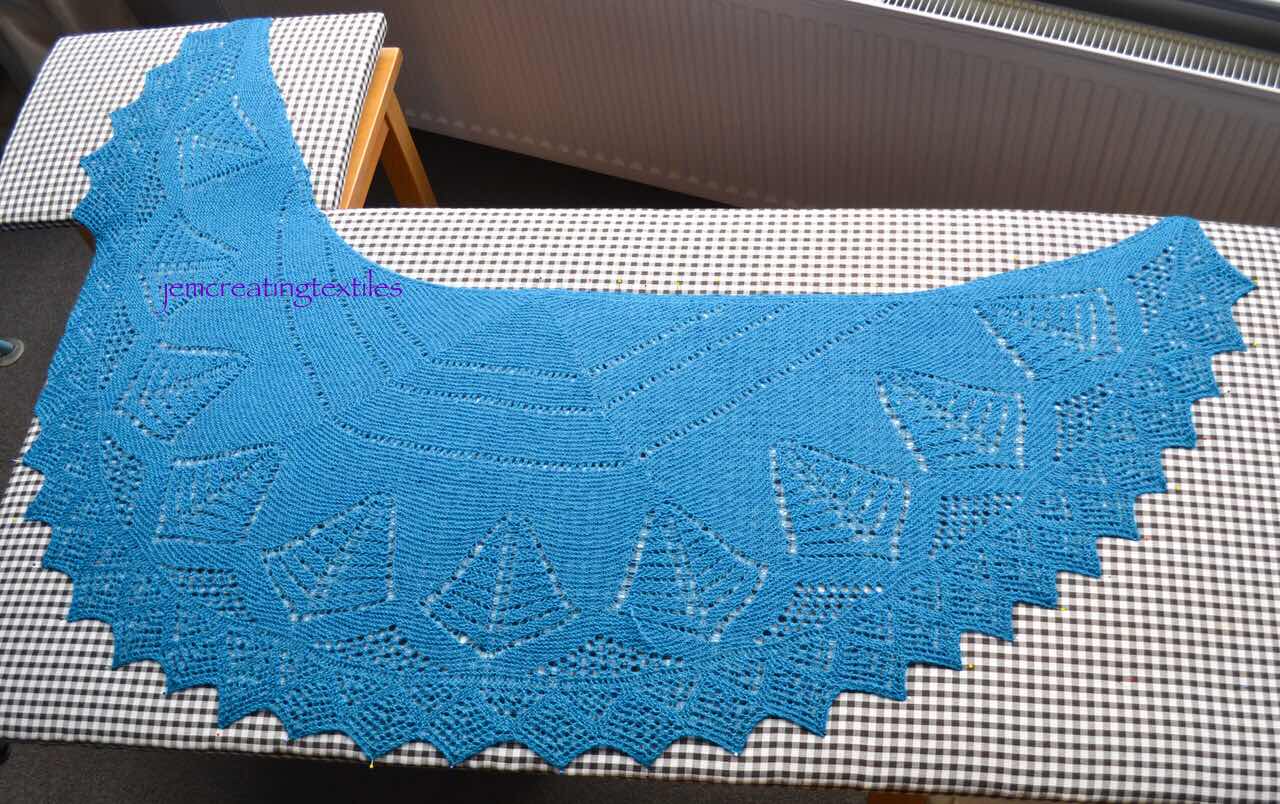
When I saw this pattern, by Anne Eunson in the Shetland Wool Week Annual 2021 I knew I just had to knit this.

I had been doing a series of in person ( luckily) classes with Elizabeth Williamson (1). My usual shape for Shetland lace knitting was a rectangle! I liked how the Unst (2) ones were constructed and I could by now follow the techniques and use my own motifs, proportions etc and have some items I really loved. With Elizabeth I had been exploring a variety of different shapes as we knit mini versions - the idea being we could scale up. I had cheated for the first one, ie not designed my own,  and knitted Elizabeth’s Fladda/Alchemilla and used Jamieson and Smith supreme 2 ply that I had naturally dyed. (3) 

The one Anne had designed was this same crescent shape, although the construction was different which was great for me, the more ways I know how to do a shape the better! 


What I also liked about Anne’s design was the fact that she had taken inspiration for the main motif from the Lace Assessment project she had been working on at Shetland Museum and Archives with her sister Kathleen Anderson. What to me was even better- the fact that she had ‘combined aspects of different motifs found among the collection, creating something new yet still rooted in tradition’. This I am sure is what Shetland Knitters from Shetland have been doing for generations, not just trying to copy a motif exactly but making a motif of one’s own. 


I liked the colour Anne had chosen and this sparked in me an idea. I had bought a ‘poncho’ in a similar colour from a local machine knitter. However I loved the colour but every time I put the poncho on I moved it around and ended up taking it off and wearing something else. The poncho was I guessed in Yeoman’s 50/50, not a yarn I normally use as it was 50% wool and 50% acrylic. However, I guessed it might work for this. So I pulled out the poncho, and washed the yarn. Then I set about working out the length I had (I used the weight of my blue yarn to work out the length from the manufacturer’s yarn details  and used this to cross check the length I had in my skeins. 

By looking at the information Anne gave in the pattern I would see the length she had allowed. I would have a bit of yarn spare but not as much as I would have liked. 

The next thing was to knit a tension square. I did as Anne suggested and knitted the tension swatch  using the same needle size she suggested. I stopped myself memorising  the numbers for the tension swatch and blocked this as I usually do on my sample blocking board. 

When dry and left on the blocking board and the pins removed, I was pleasantly pleased with the fact that the measurements were as near as would make no difference to the pattern tension, as it was a shawl. 


Tension sample. 


I liked how the main motif looked and decided that even though there was acrylic in the yarn besides wool it would be worth knitting using this yarn. 


So I set about casting on. I like to knit with double pointed needles and a knitting belt as I know it gives me better tension. The edging went well, but then I needed to  pick up stitches from this and had 509 sts to juggle with. Several of the dpns had to be employed with rubber bands on the ends until I got the stitch count down a bit. I was using 40 cm long needles and soon got so I could have all the stitches on 2 needles. I had done this before and the resulting shawl worked out fine (a pattern from Donna Smith.) Checking the pattern as I was going along  was tricky but as it is so important I made sure I did keep checking on progress. The only tweaking I did was at the very end where I did an invisible grafting that I have been learning from Joni Coniglio’s methods and this worked very well. 

The final graft


From the grafting, there was  not a raised area in the middle or a noticeable dip where the two joined. I hoped  for this and managed to avoid either happening. A previous shawl I knitted many years ago, before I learnt how to avoid it, still bothers me as it is not flat and forms a V at this join. 


Blocking was tricky as my door sized blocking board was not big enough! I added my sample board next to it and that worked ‘well enough’. I could not tell which end of the shawl had gone off the edge when it was finished. 

Dressing 


I started this in November and the final dressing was done in April, however, this wasn’t my sole knitting and turned into my TV knitting as I became familiar with the pattern. 


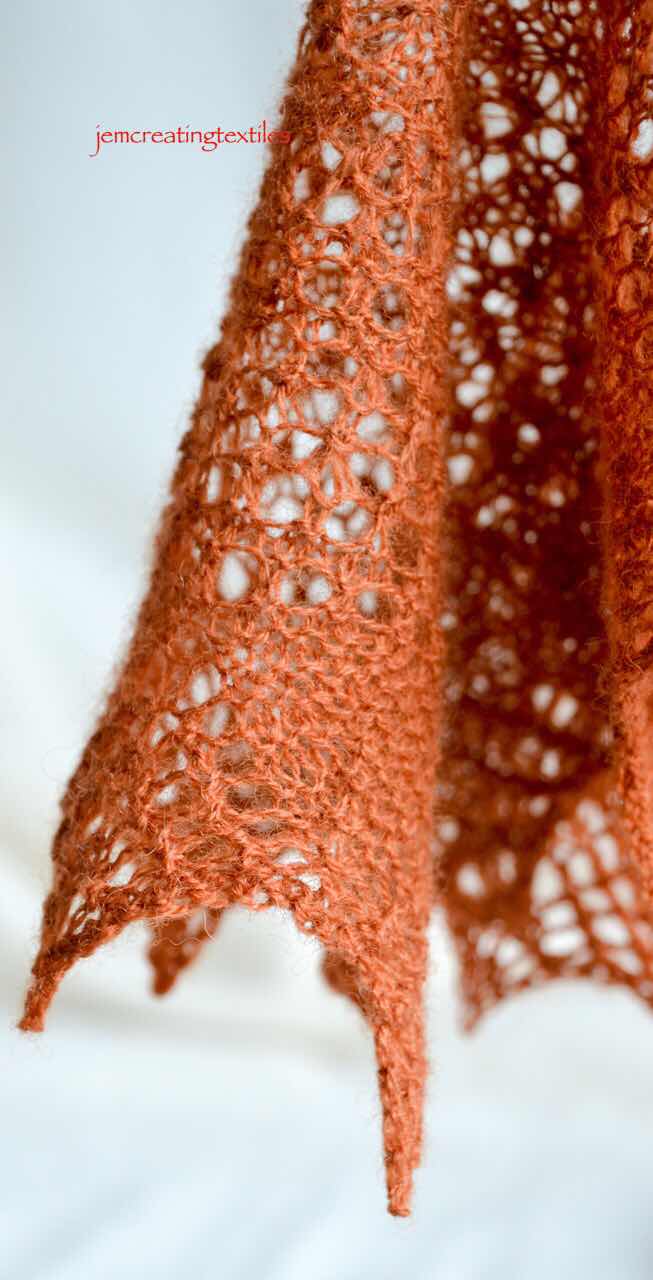
So this is the finished shawl ( see initial photo) and a far, far superior use of the yarn than as a poncho! 


Some details: 

Size 135cm x 48 cm approx, as pattern

116 g of yarn used

Yarn Yeoman’s 50/50 as mentioned above. It gave a lovely soft finish! 

Plyed  the yarn was 20 wpi ….not a good way to measure yarn as wpi means the single in the yarn usually,  but it does give an indication of the diameter. I would call this a ‘3ply’ in vintage knitting terms.

Needles used 2.75 mm dpns with a knitting belt 


Notes: 

  1. Elizabeth’s website shows her work and workshops


https://www.elizabethwilliamsonknitting.co.uk


  1. Unst lace is some of the finest, if you get to Shetland  do try and get there to see it. Some more details here http://www.unstheritage.com/web/unst-heritage-centre/unst-lace/
  2. Details and photos of Fladda can be found in this blog post of 14 Sept 21 


Wednesday, 15 June 2022

A Shetland Lace Hap


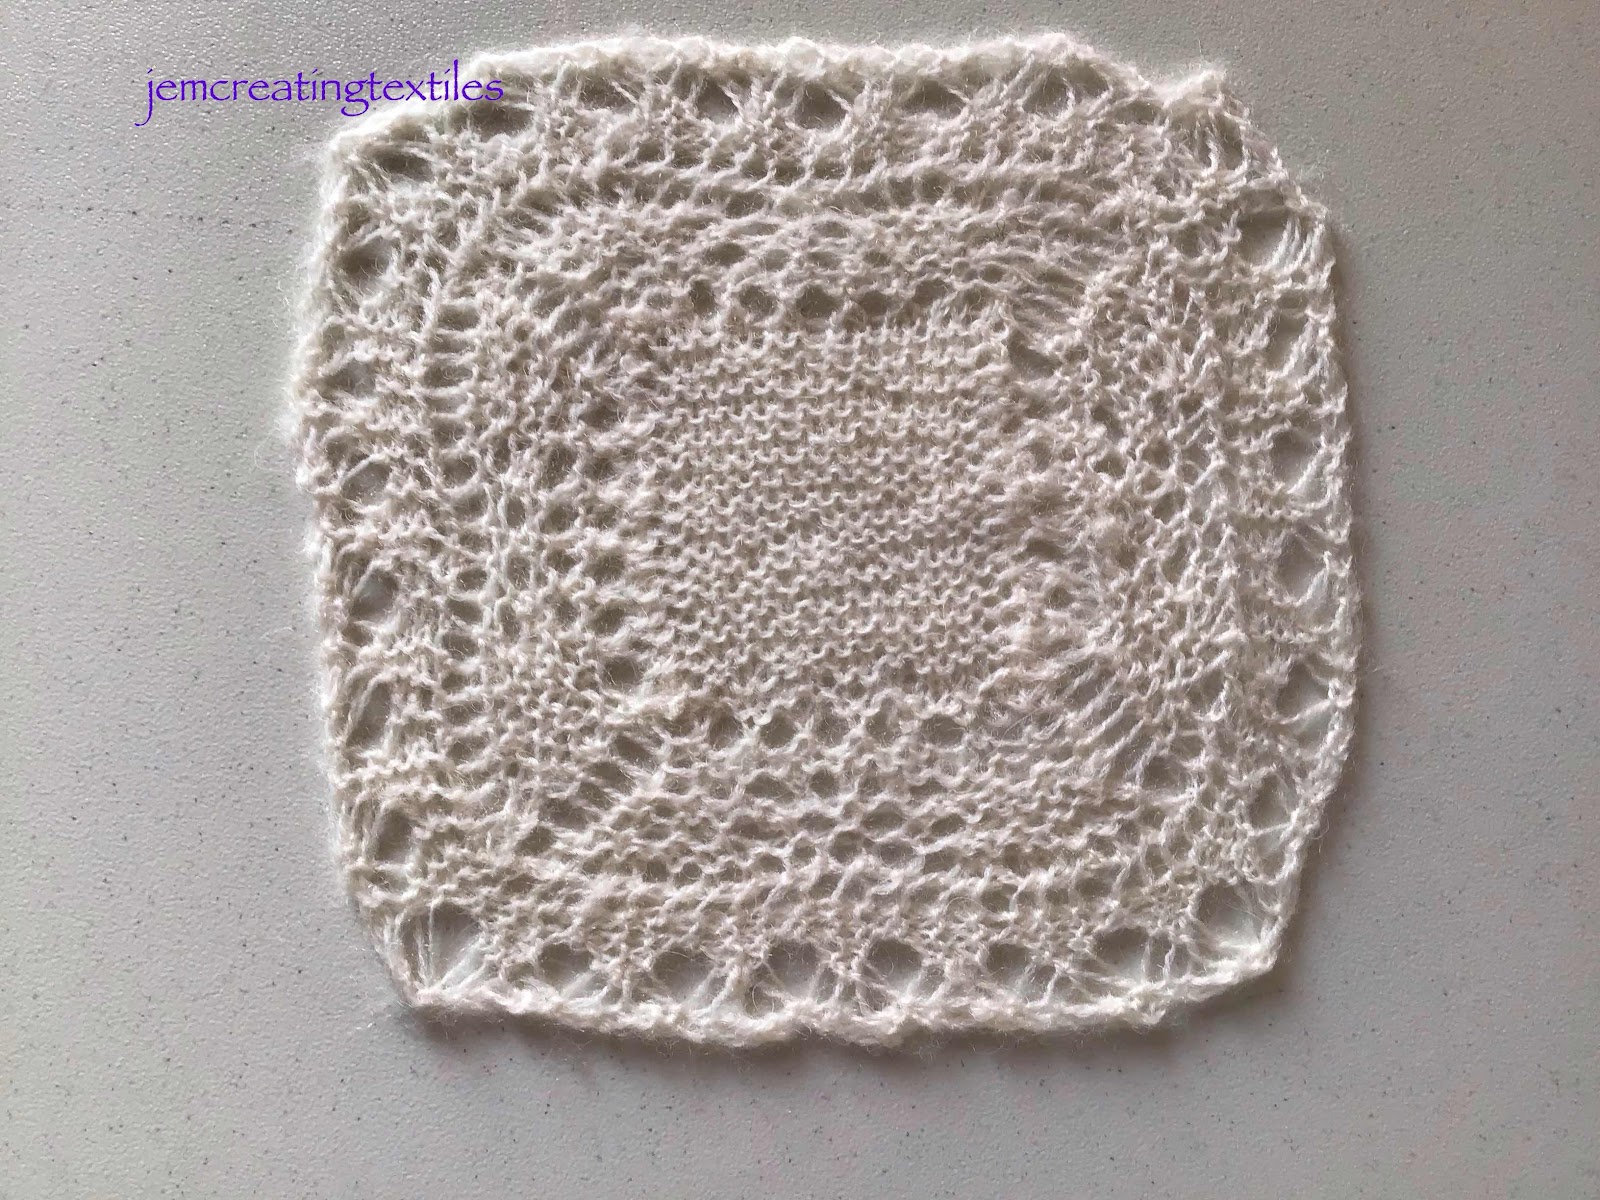
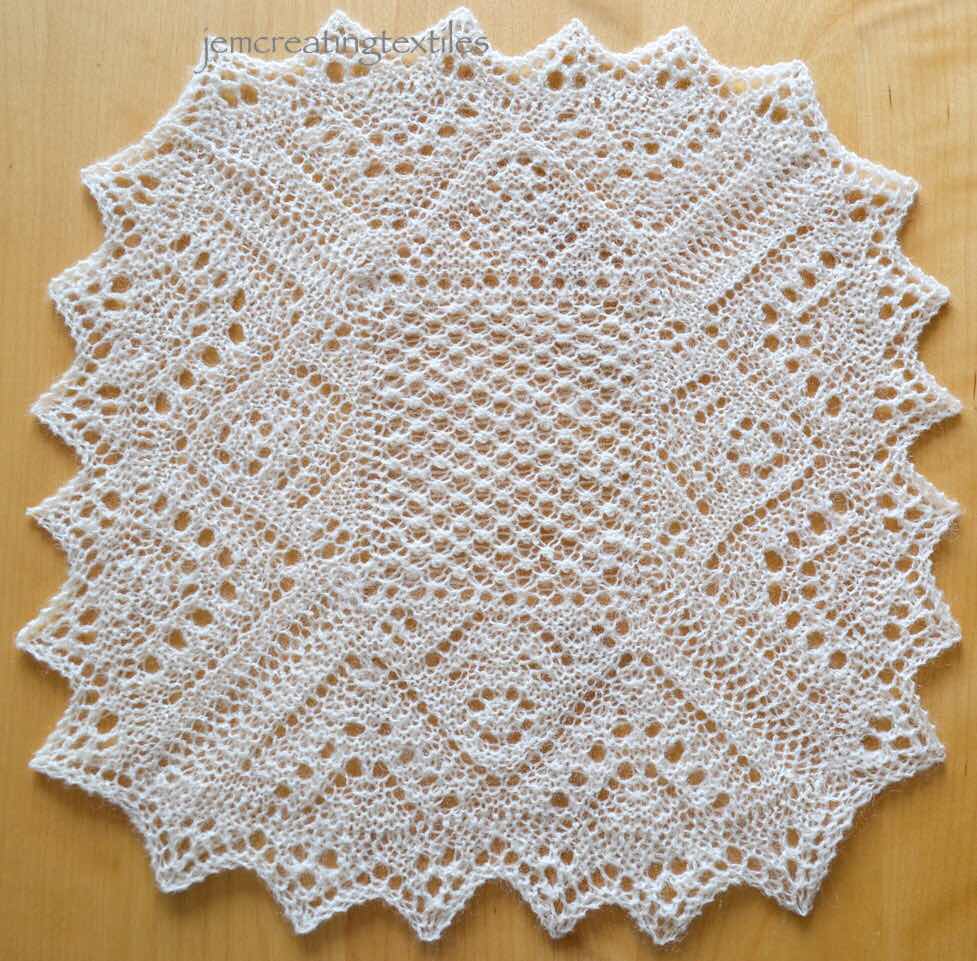
At last my completed Shetland Mini Hap.


I am really pleased with how this has worked out. 

Details:

Pattern (and tuition) Elizabeth Williamson (contact for online classes for this and other lace see https://www.elizabethwilliamsonknitting.co.uk )

As followers  of my blog will know I, and 2 other Shetland and Shetland Lace Knitting Lovers have been been privileged to meet up with Elizabeth for lace knitting tuition for nearly a year now. Examples of what I have been doing are in earlier blog posts. 


Needles - 2.75 double pointed (and used a knitting belt) 

Yarn - James and Smith Shetland Supreme 2ply

Size when dressed- 32 cm x 32 cm 

Finished weight - 14.8 g 


Construction is a traditional Shetland method. Knit one lace edge, then the corresponding border, then the centre. The 3 other lace edges and corresponding border are knitted separately. These are then grafted together and make use of the ‘family’ graft, which has become known as ‘the Betsy join’. 


A big advantage of doing a hap this way particularly a full sized one, to me, is that you don’t have to carry much with you until you get to the construction. I read about people picking up hundreds of stitches and having the whole hap on their needles as they knit but this is not the case with this pattern. I think knitting a hap from the inside out, means mordanted e and more stitches as you knit but this is not the case here due to the construction. 


I love the well designed individual elements of this hap and the way they fit together. The boards (borders) being my favourite. I also learnt new ways of knitting stitches, including ‘holes’ with added definition. 


I had knitted one large scale hap previously. This was early in my Shetland Lace Knitting Career, in 2001. This  was the Brora Black Shawl, although I knit this in natural coloured 1 ply cobweb from Jamieson and Smith, pattern by Gladys Amedro. This was done from written instructions as no charted ones were available then. It was given to my son and his wife on the birth of our first  grandson in 2008. I have a ‘ post it’ on the pattern noting 95 hours! That sounds about right. It looks as if I knitted for about 1 to 2 hours at a time on it, by the crossings out on the post it! 

Unfortunately the photos are pretty poor….I’m glad my photography has improved too! 


This mini hap gives me another way of constructing a hap and I like the way the centre is not divided by ‘joins’. 


Thursday, 3 March 2022

Knitting round a corner


Before I start I would like to say have struggled to get the colour of the piece the same in all the pictures, although I have spend hours trying to do so and am usually pretty good at managing this, so apologies for that. However the post is about technique and process and I think these are clear. 


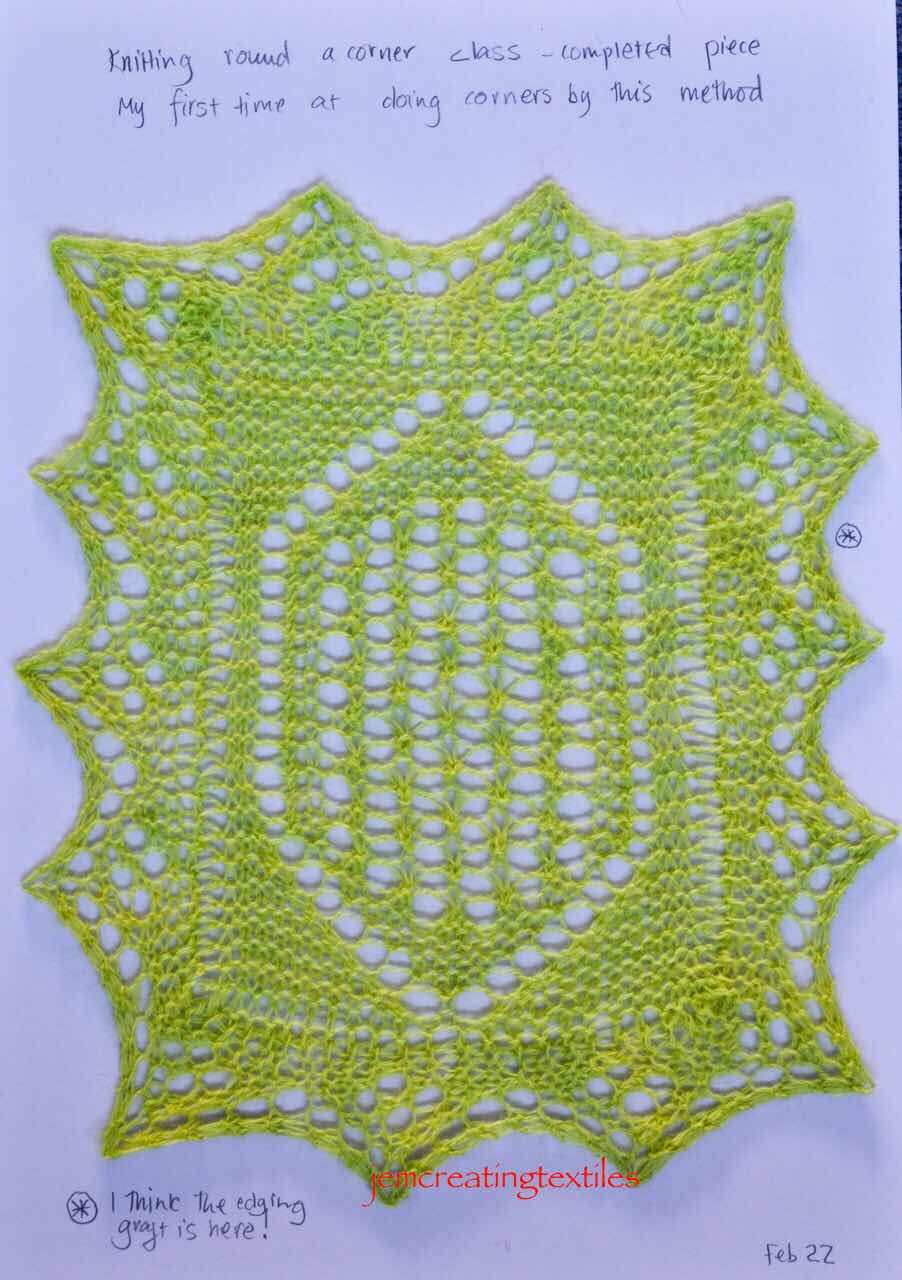
The completed piece


I have knitted several rectangular Scarves/Shawls based following patterns from Unst Heritage Centre (1). All these have what I would call ‘good’ corners where you can see the detail of the outer lace as fits ‘like a glove’ at the corner. 

An Unst corner (more details of Burrafirth  and  a sibling Hinneywaar  6Jan21 and 26July20)


I have also studied edgings of Shetland Shawls ( over many years of visiting Shetland)  in 4 museums in Shetland and the shawls on display at Ollaberry during wool weeks and talked to many current Shetland, by that I mean from and in Shetland, lace knitters who have ‘family’ histories of lace shawl knitting. 


However, what I had not done before was to knit the inner section of a shawl and then add the outer lace by knitting on and getting the lace to fit the corners perfectly. By ‘perfectly’ I mean no bunching and no guesswork and juggling. The way I learnt in this workshop was precise and accurate and every stitch had a place. This is the sort of design and knitting that appeals to me. (2)


Again for this shawl I dyed the wool. I am using Jamieson and Smith Shetland Supreme 2 ply and 3.25 needles. This time I used yarn that I had dyed with Genista Tinctoria to give me a ‘strong’ yellow and then I over dyed this with indigo. I loved the richness of the colour and the vibrancy, just right for February Knitting. I have described more about the set of greens in the blog post of 6Feb22  and the colour I used is the one on the left of the series shown there. 


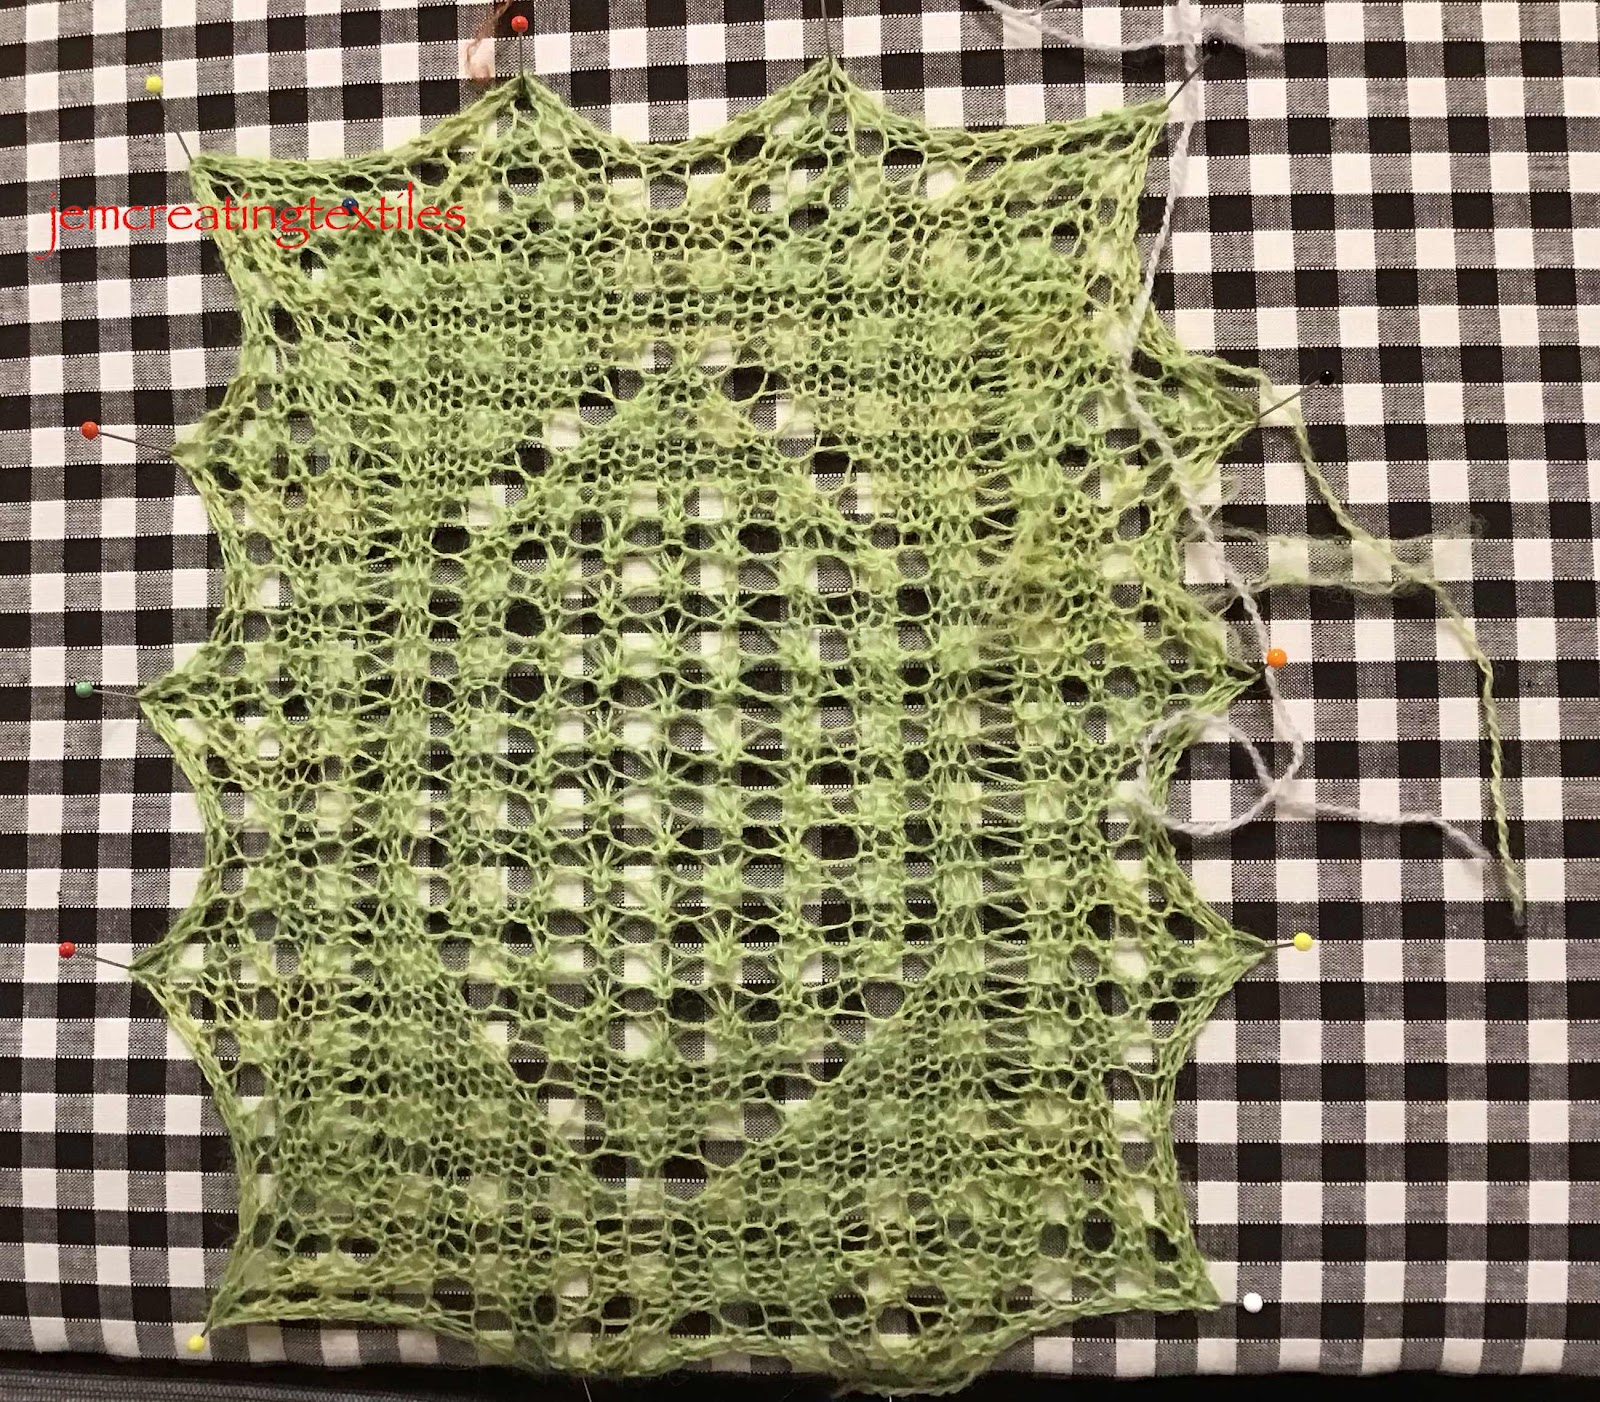
We knitted the centre rectangle first and once this was complete all that was left was to pick up the stitches around the centre as we knitted the edging. As I was going to do more ‘invisible lace grafting practise’ I had done a little waste knitting before I started the row and ended doing the lace edging with more waste knitting too. Then for the invisible graft which is in here. I am pleased with it and finding I needed fewer looks at my hints and tips sheet I have devised now. 


The whole being ‘being dressed’ 


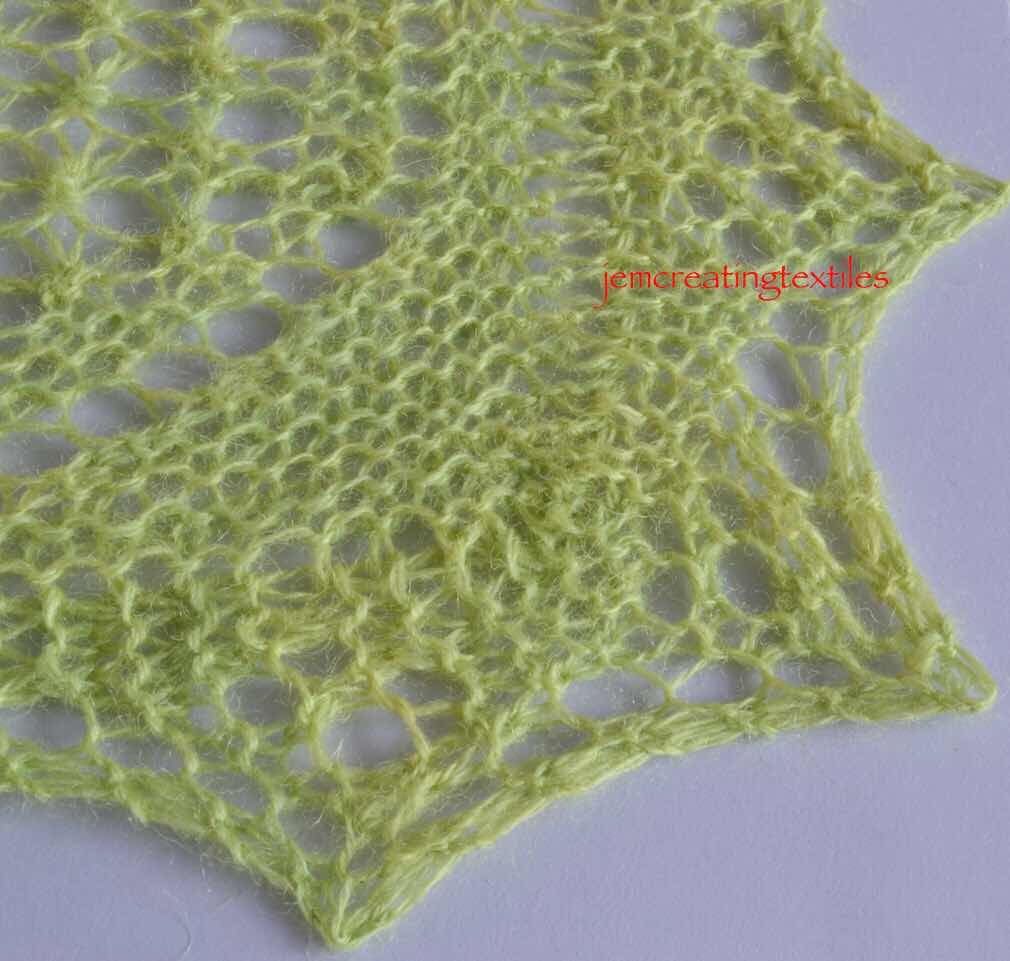
Detail of a corner


 Grafting - I have gone into some detail here with the samples, and also written more extensively about it elsewhere in my blog. 


I honestly could not find the graft when I looked as I had turned the sample round so many times ! I have marked where I think I must be. 


Card with finished piece (this is far too vivid!) 


I am very pleased to have learnt how a native born Shetland Lace Knitter goes about designing  for and completing a corner. I will definitely be using these techniques again. 


Thank you Elizabeth. 


  1. Many, if not all, of these have been devised by Hazel Laurenson, and some of the patterns have been worked out following actual shawls found in Unst from knitters who are no longer with us. These are available from Unst Heritage Centre. 
  2. This class was with Elizabeth Williamson, her online classes can be found at https://www.elizabethwilliamsonknitting.co.uk/

Tuesday, 1 March 2022

More Shawl shapes for Shetland lace knitting


I have combined a couple of shawl shape workshops here, this photo is from the second one. 


The first one was a mini triangular shawl. It is worked in garter stitch, making it reversible, and uses traditional Shetland lace patterns. As the circular pattern ( details in previous blog post here) it is designed so that once the techniques are understood then it  could be made bigger to suit the knitter. (1) 
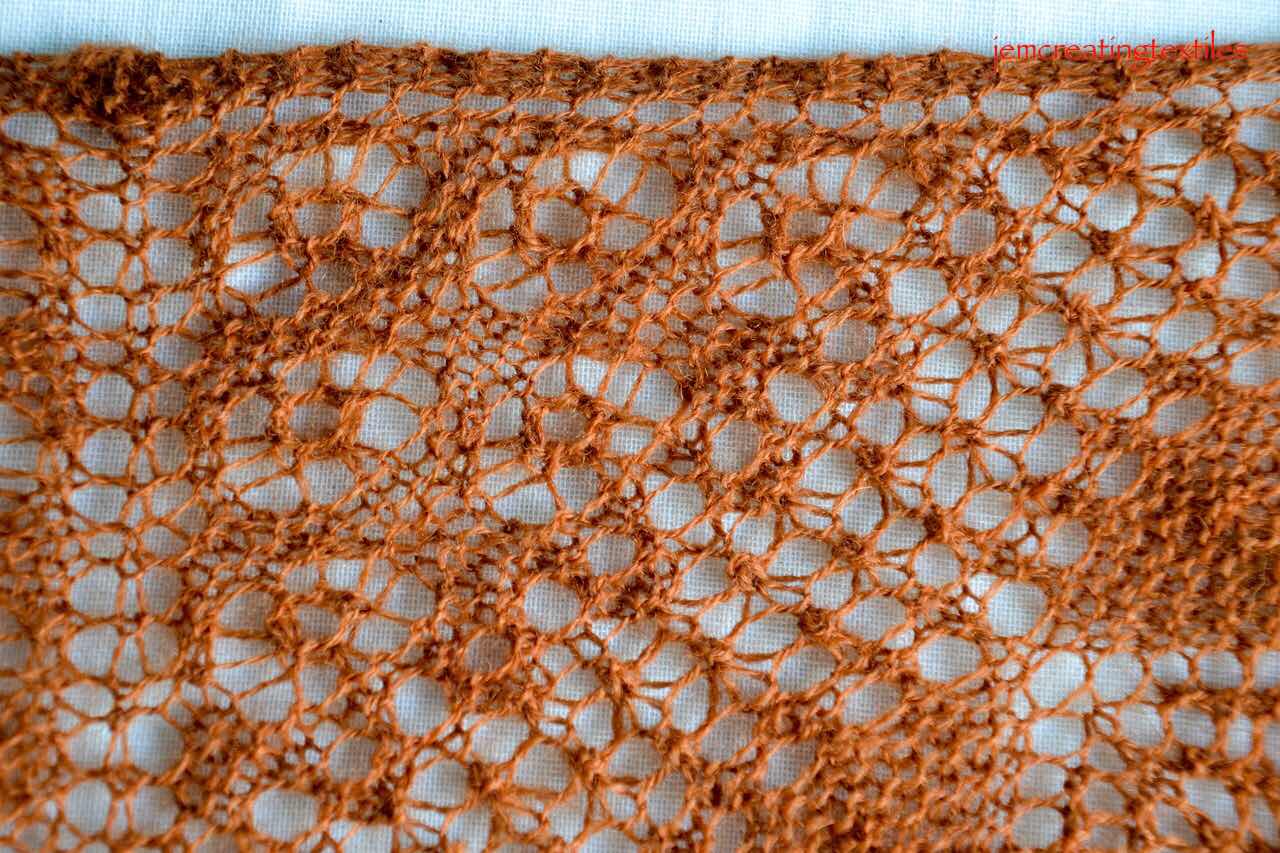

For this shawl I used some spare Jamieson and Smith Supreme 2ply that I had naturally dyed  with Alchemilla and Madder. 


The knitting starts at the centre top with a few stitches and gradual increases enable the centre section to be completed, the edging lace is then worked and the shape ‘appears’ after casting off. This one, as all the others, was dressed by pinning out when damp and allowed to dry fully. 

I really enjoyed this pattern and it was very interesting to see the shape form. I felt that the combination of this yarn and 3.25 needles gave just the right combination of ‘knitting and holes’.


I have already described the second workshop of the circular mini shawl (post of 18Feb 22)


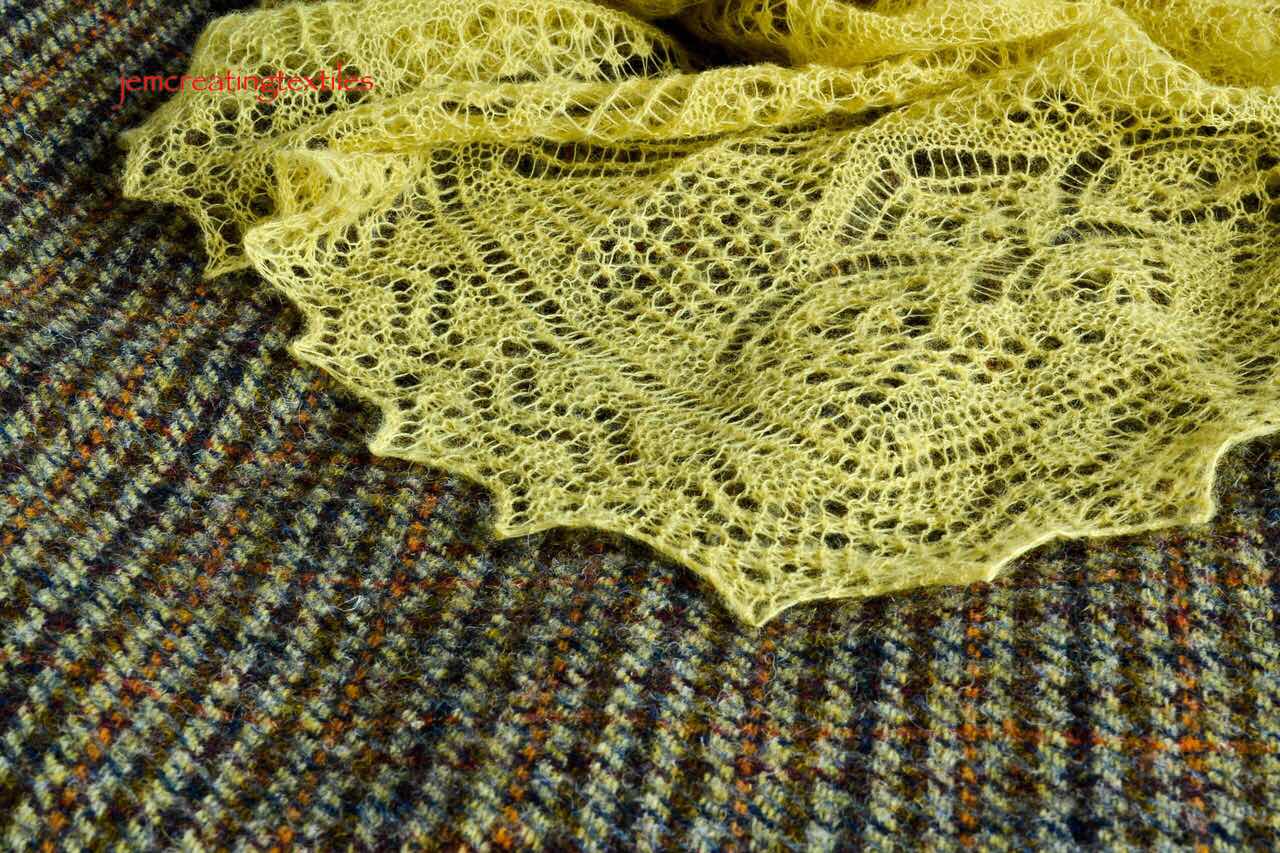
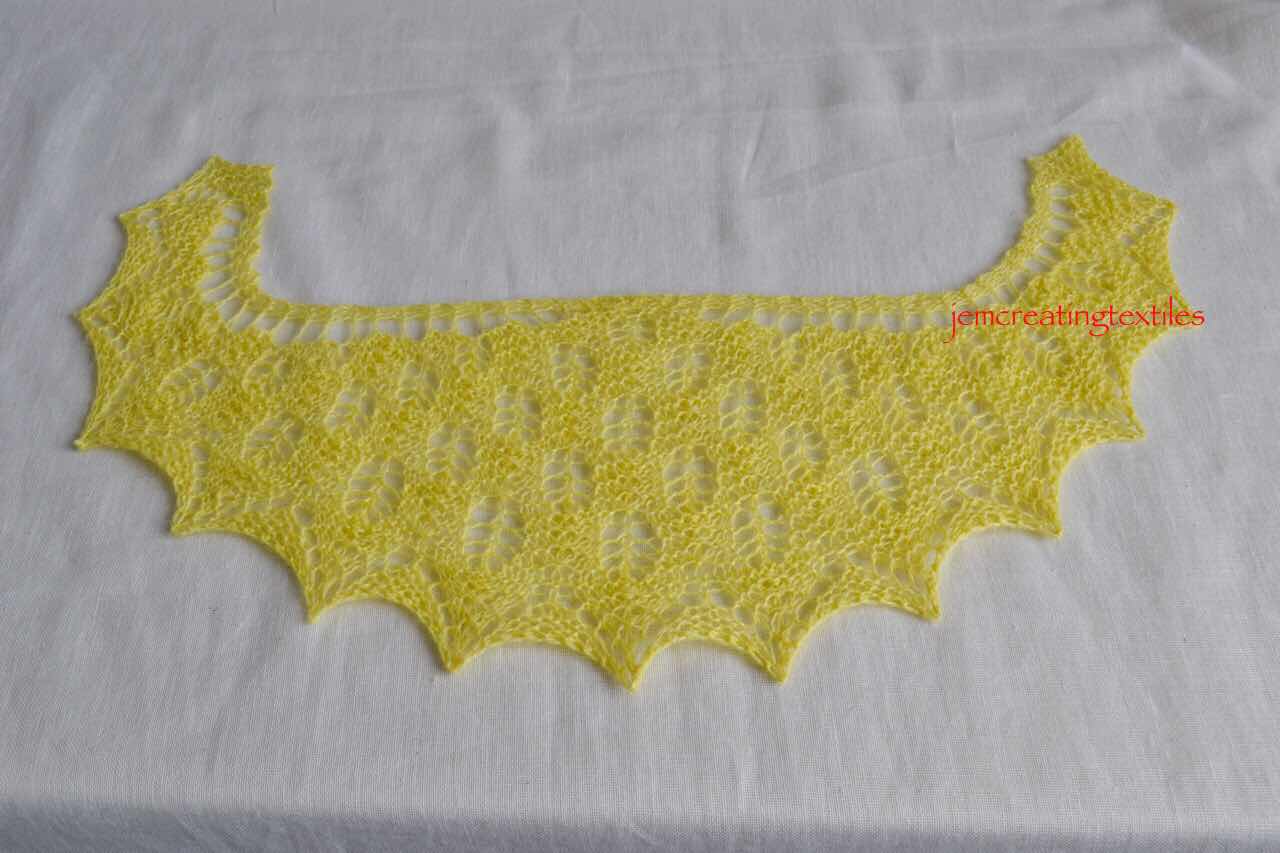
The third workshop was for a Mini Crescent Shawl. This also starts in the centre of the top and the pattern of increases gives the lovely crescent shape. As in the first workshop described above the outer lace is knitted on once the required number of stitches is reached. 

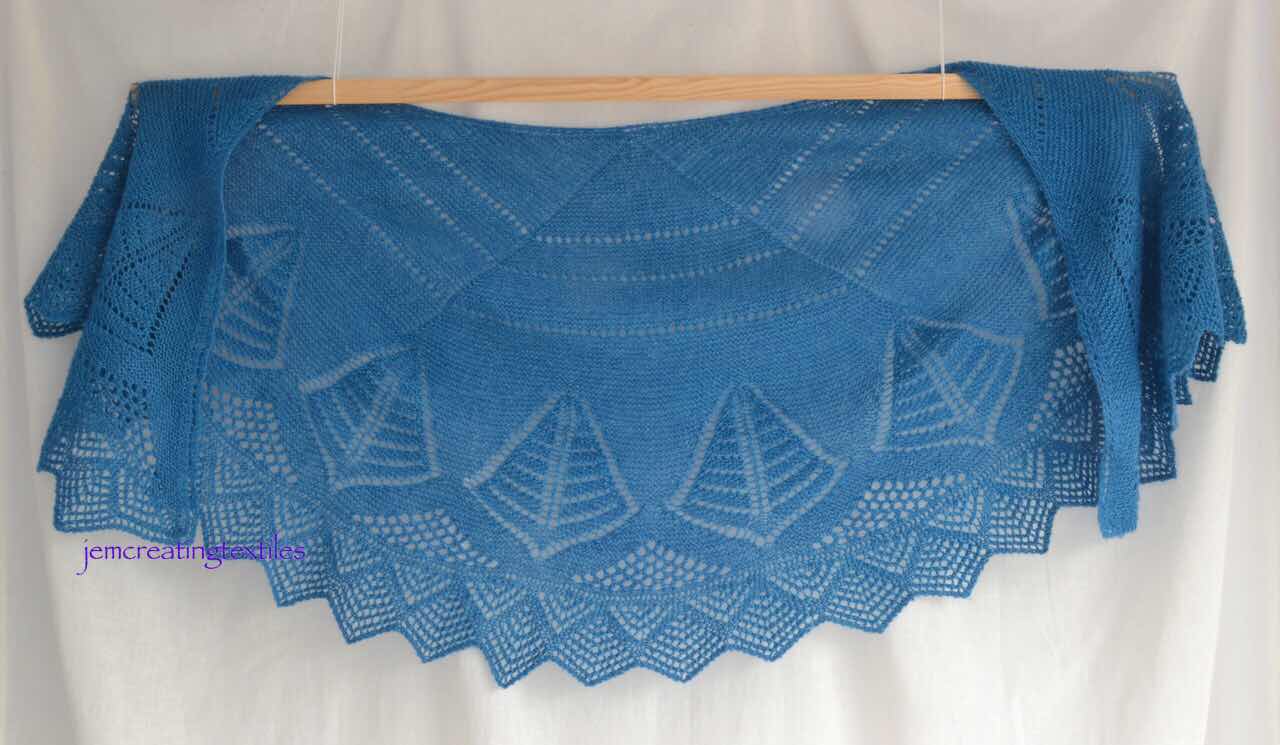
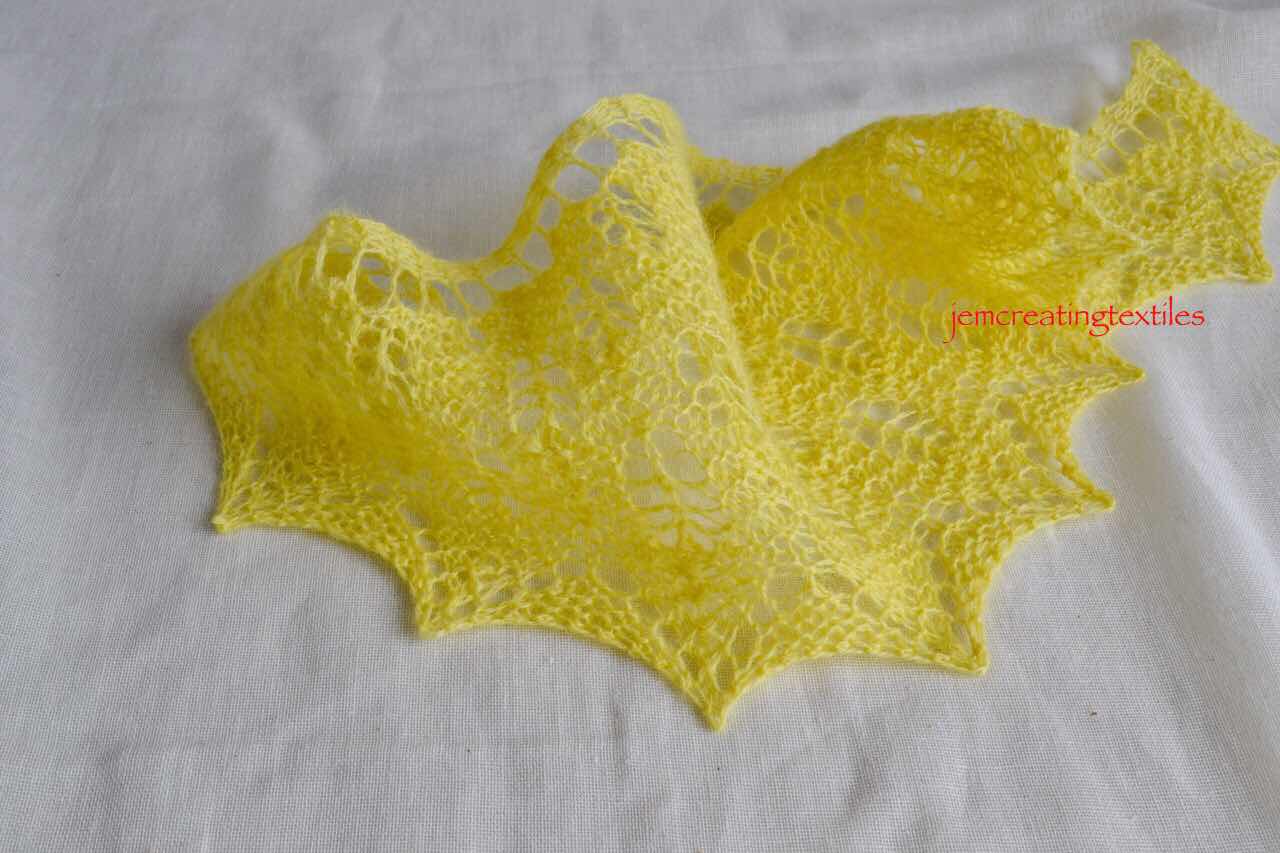
Completed shawl 


This time I decided to modify the cast on as I had never done a ‘tab’ cast. I decided I needed to do some samples. 

In the three samples below: 

The top one shows the pattern, cast on the small dip would be closed invisibly by a few stitches, as in the Fladda shawl

The middle one shows a tab cast on with the same sized needles, I thought this gave a slight upward protrusion 

The bottom one - I thought I would try the tab with smaller needles, so used size 2.5

Tab trials 


In the actual knitting I used the bottom method of these three above and am pleased with how it turned out. 


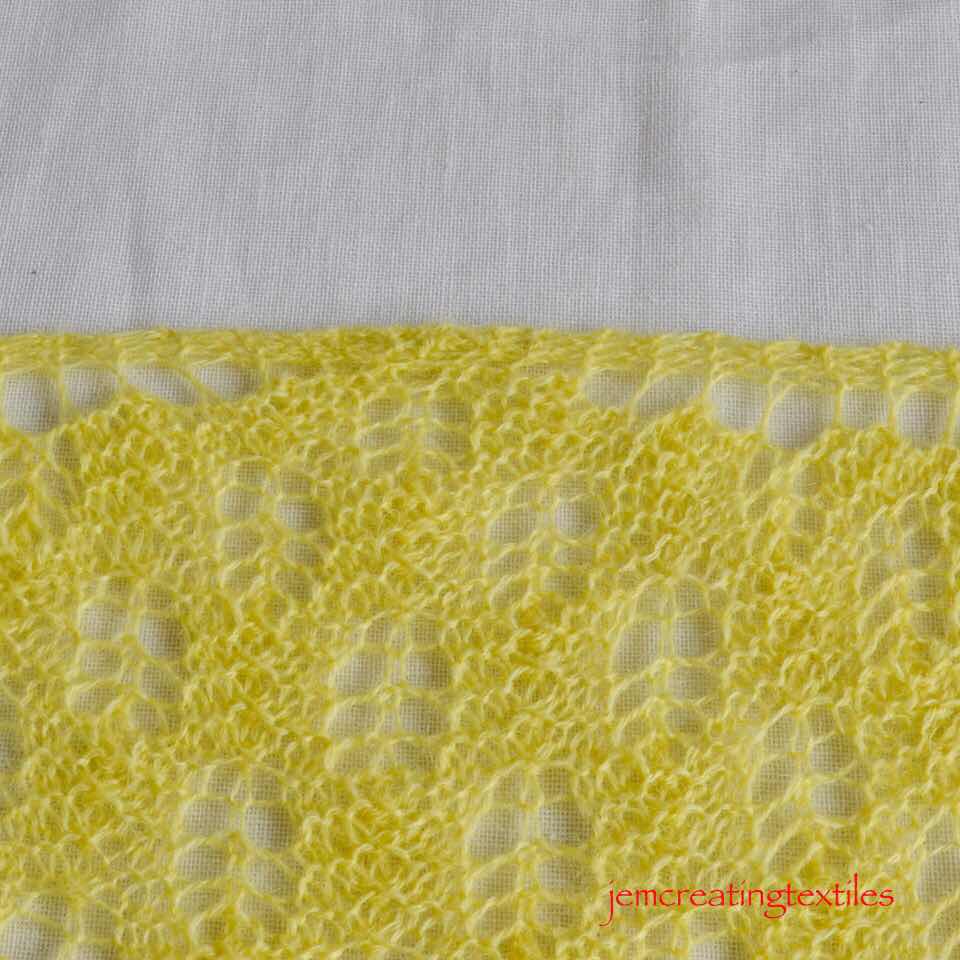
As you can see this time I naturally dyed the yarn a glorious shade of yellow. This is from Genista Tinctoria which was my first dyeing of the year. I used the prunings I took and left those to soak for about a week. The yarn was scoured and mordanted by my normal methods. It was a jolly colour to get from dyeing and to knit with during which can often be called ‘dull January’. 


I was delighted with the shawl. The crescent shape appeals to me and I hope to have a go at using the ‘methods’ of this shawl to see if I can scale this up, whilst using some different motifs before too long. 


Earlier I had knitted the Fladda shawl pattern from Elizabeth which again is worked from the neck down. (The outer edging of this shawl is knitted on much like in the circular one described in the last blog post. ) I have described much more about the Fladda shawl in the post of 14 Sept 21 and I can vouch for the ease and comfort of wearing a crescent shaped shawl compared to a more traditional triangular one, simply expressed… it stays ‘put’ better! 


I have enjoyed these workshops very much and learnt things I didn’t know I needed to know, which is always great. I am a great believer in learning for life. A dear uncle ( I only had one uncle) once wrote in a book he gave me: ‘Live as if you would die tomorrow, learn as if you would live forever’. Wise words. 


  1. More details available from elizabethwilliamsonknitting which also included details of Elizabeth’s online workshops.