You may have read my previous post about grafting fine Shetland Lace (26 July 2020). I have continued to work on this and am now at a stage when I fully understand what I am doing and can do it without any notes or props. This is quite a technical post!
My first workshop on ‘more than just Kitchener stitch grafting’ was at a half day with Anne Eunson and her sister Kathleen during Shetland Wool Week in 2018 where I learnt to graft holes. I have also watched (many times) the grafting section of the video by Hazel and Elizabeth (1) and found that useful too.
However, I have been aware that I did not know how to graft lace so that I got an invisible join in my Shetland Shawls. It is not possible to do a kitchener stitch graft across lace edging without it drawing my eye to it. There is no natural horizontal line across in fine lace edgings and to make one, to me, seems to spoil many, many hours of my fine lace knitting (and often spinning and fleece preparation too). So I set out to find a way that suited me that I could use to join across these rectangular shawls.(2)
Ideally I would have liked to have read different knitter’s methods and then chosen and adapted these to suit me. However this has not been possible. I have, luckily found a technical person who has written extensively on the subject of lace knitting grafting. Her name is Joni Coniglio and she has published 3 videos and an ebook with Interweave.(3) To me she is a genius as she explains so well. I started off with video 3, called Lace Knitting Grafting (check). This was a mistake as clearly I needed to study video 1 on ‘The Definitive Guide to Grafting: Fundamentals’. I even needed to study video 2 as she has made the videos increase in complexity. By the time I got onto Video 3 again it was all making sense. This has been a study of over 3 weeks. Most of the time that it was possible to think about anything other than ‘living’ I was working on this in my brain.
I have therefore made quite a substantial commitment in terms of money and time. I have read, made many samples, given myself little tests etc etc and it has all been worth it.
If you did look at the previous post I wrote on grafting you will see I got as far as I could before I grafted the Hinnywaar shawl.
Hinnywaar graft, the narrowest section of the lace edging above the black pin and across to the left.
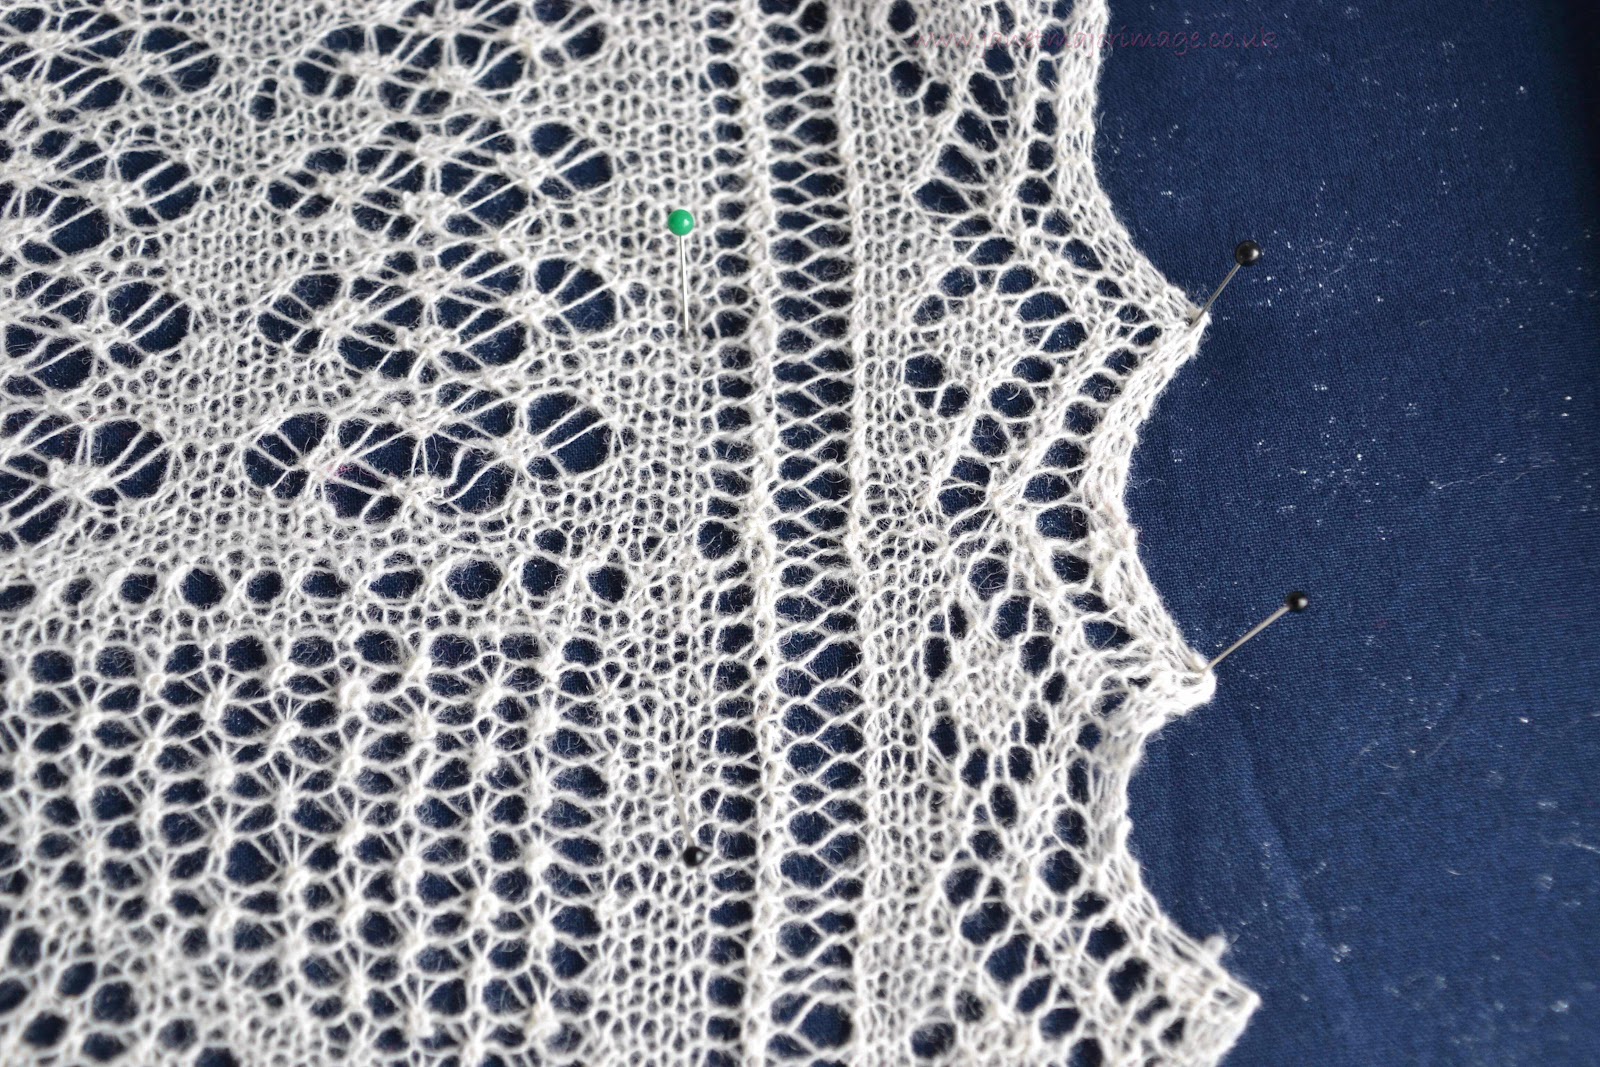
I was happy with what I had done but I knew I needed to have altered the pattern to give me 2 rows ‘room’ for grafting the pieces together and I could not do that once I had finished all the knitting, I only had one row.
So I have chosen another Unst Heritage Shawl to Knit. This one is called the Burrafirth shawl and means a lot to me, given our love of the Norwick, Burrafirth and Hermaness areas of Unst.
For grafting lace it seems to me there are 3 key things before you can think about starting:
- Knowing how to graft each lace stitch you will recreate on the front and back needle
- Finding 2 adjacent rows in the edging repeat that this will work for without too much difficulty
- Tweaking the pattern if necessary to ensure that these two rows are in the place where you need to do the graft.
The lace grafting I have taught myself ‘makes’ 2 rows of lace during the grafting.
There is an added complication (or two or three) in the Shetland Lace (rectangular) Shawls I like to knit. Namely there is a centre block and usually some garter stitch rows bordering this where the grafting will occur, so straightforward! On either side of this block on each row there will be a right lace edging row to graft which needs a matching row on the back needle and a different (from the right) left lace edging row to graft for the front needle which also needs a matching row for the back needle.
So counting the garter stitch graft as one sort of grafting pattern, there are 2 pairs that need to match themselves and to work in with the other two pairs of lace edging rows ! 3 different sorts of matching to get right besides the garter stitch to match garter stitch and not a row of lace holes for example! And of course this end that is grafted will need to match the end that was knitted.
I will try and explain the above in a diagam. It is usually possible to work this out but it does need planning before you start knitting.
Diagram of where matching needs to occur
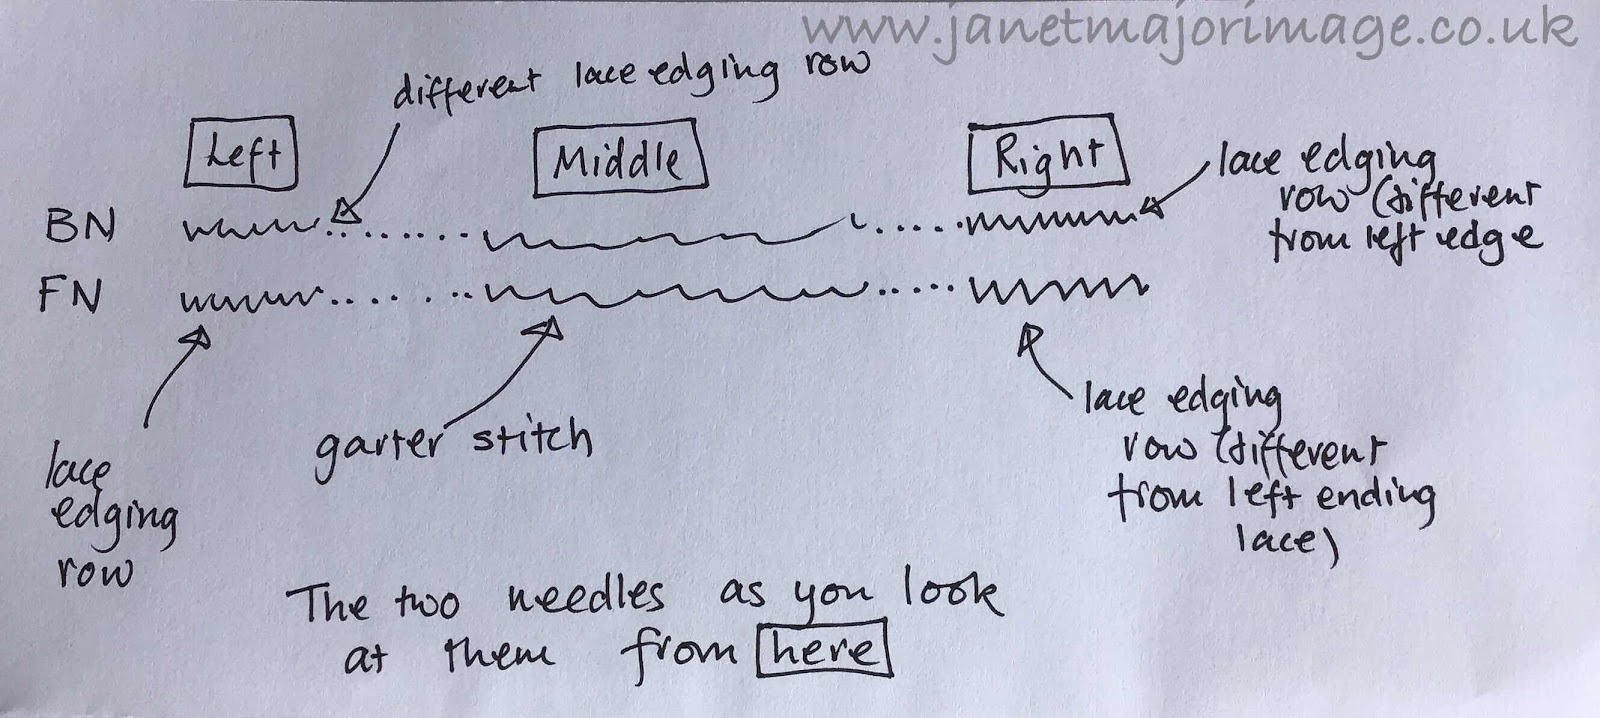
So in the Burrafirth shawl I worked out that on the left hand side I could end the
Front needle on row 14 of the lace edging and end the corresponding section on the back needle on row 15. (Total pattern rows for one edging repeat is 16)
This looks as if I have nowhere to graft, however remember that the back needle holds the lace looking towards you as you are grafting ‘top to top’.
Sketch of this.
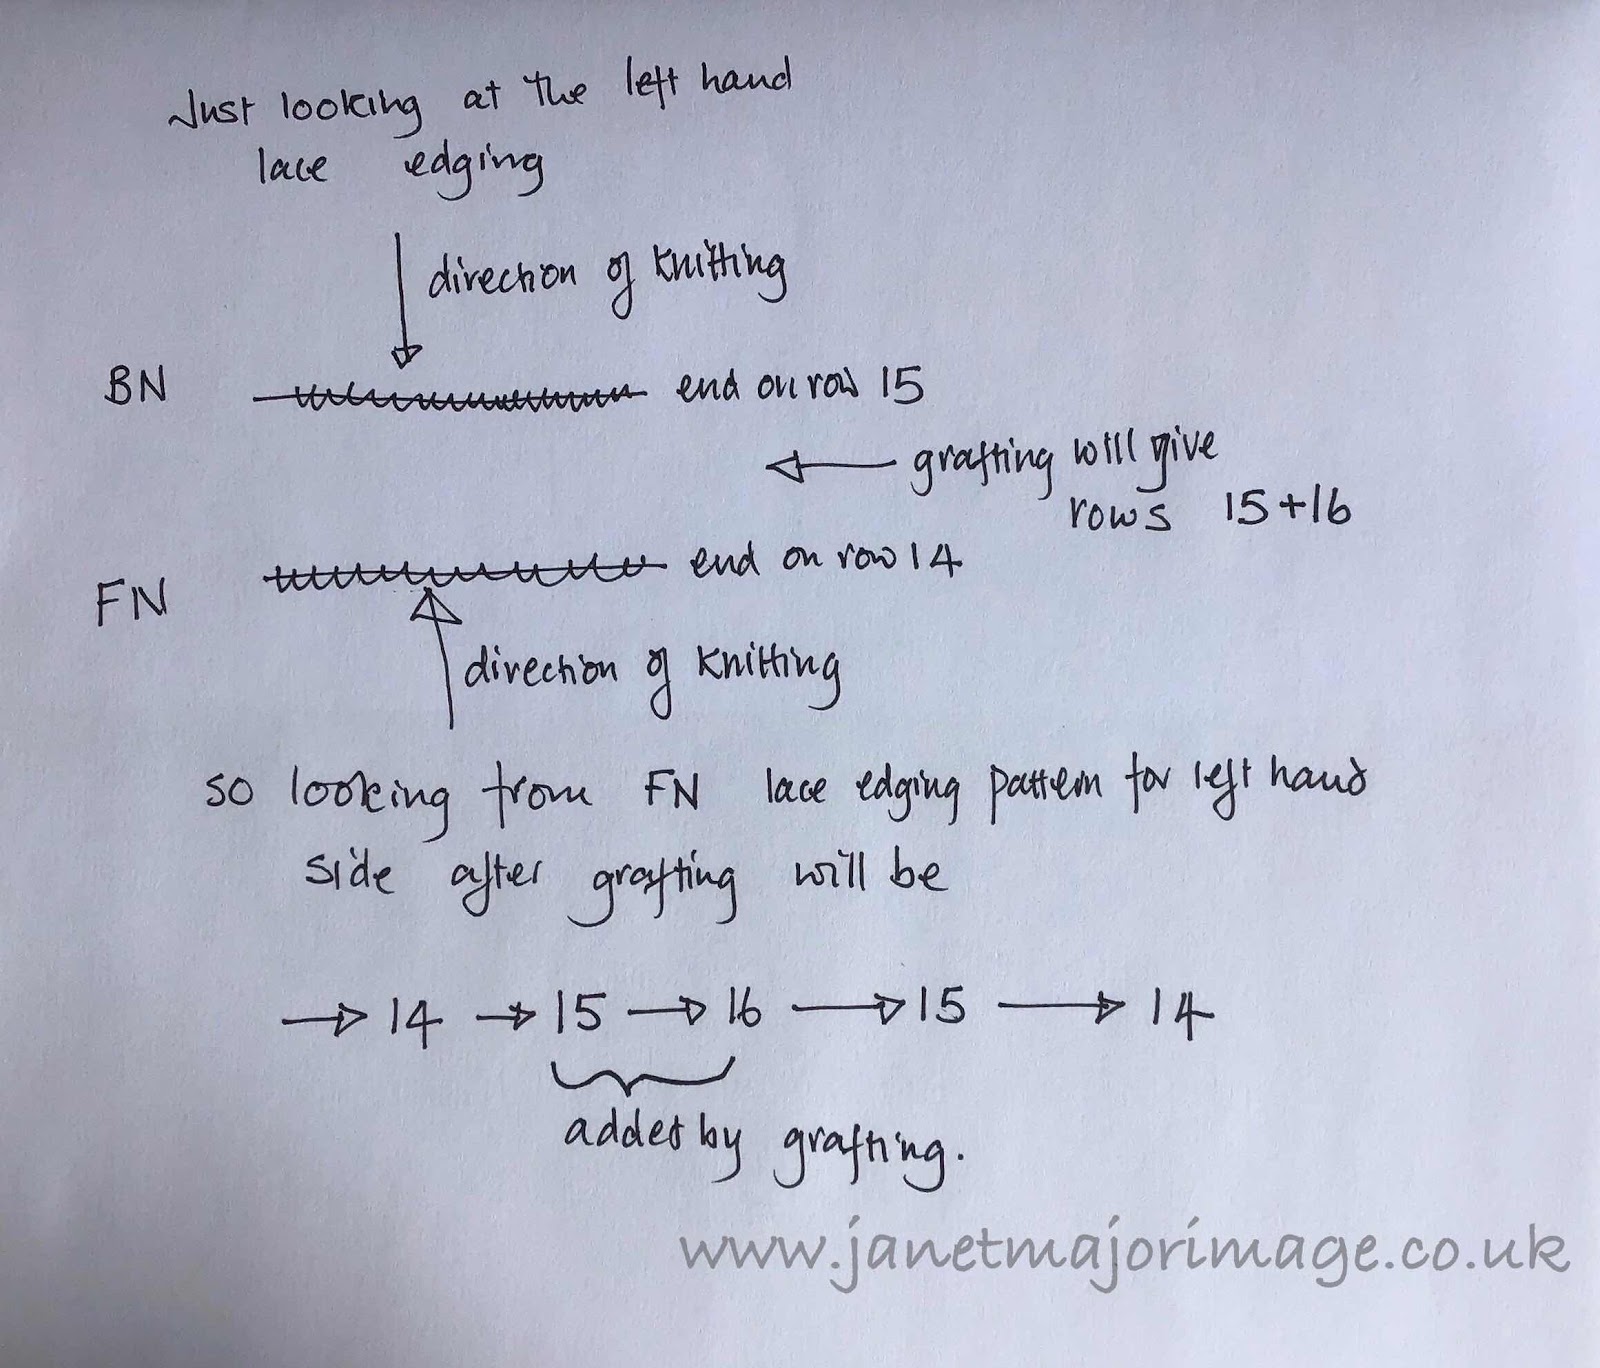
So holding the needles together I will graft row 15 coming out of the front needle and row 16 going into the back needle and the grafting should join up the lace edging seamlessly.
Sketch
So using the system that Joni discusses I made a chart with a row for each row of knitting that I would recreate. Before you can do this you need to work out where the bumps of the garter stitch will be for each needle so you get each stitch on the front and back needle correct in the chart (4)
Each movement of my tapestry needle was added to this.
First of all I did a trial of the grafting stitches on a piece of plain knitting, to remind myself of doing yarn overs and K2tog during grafting.
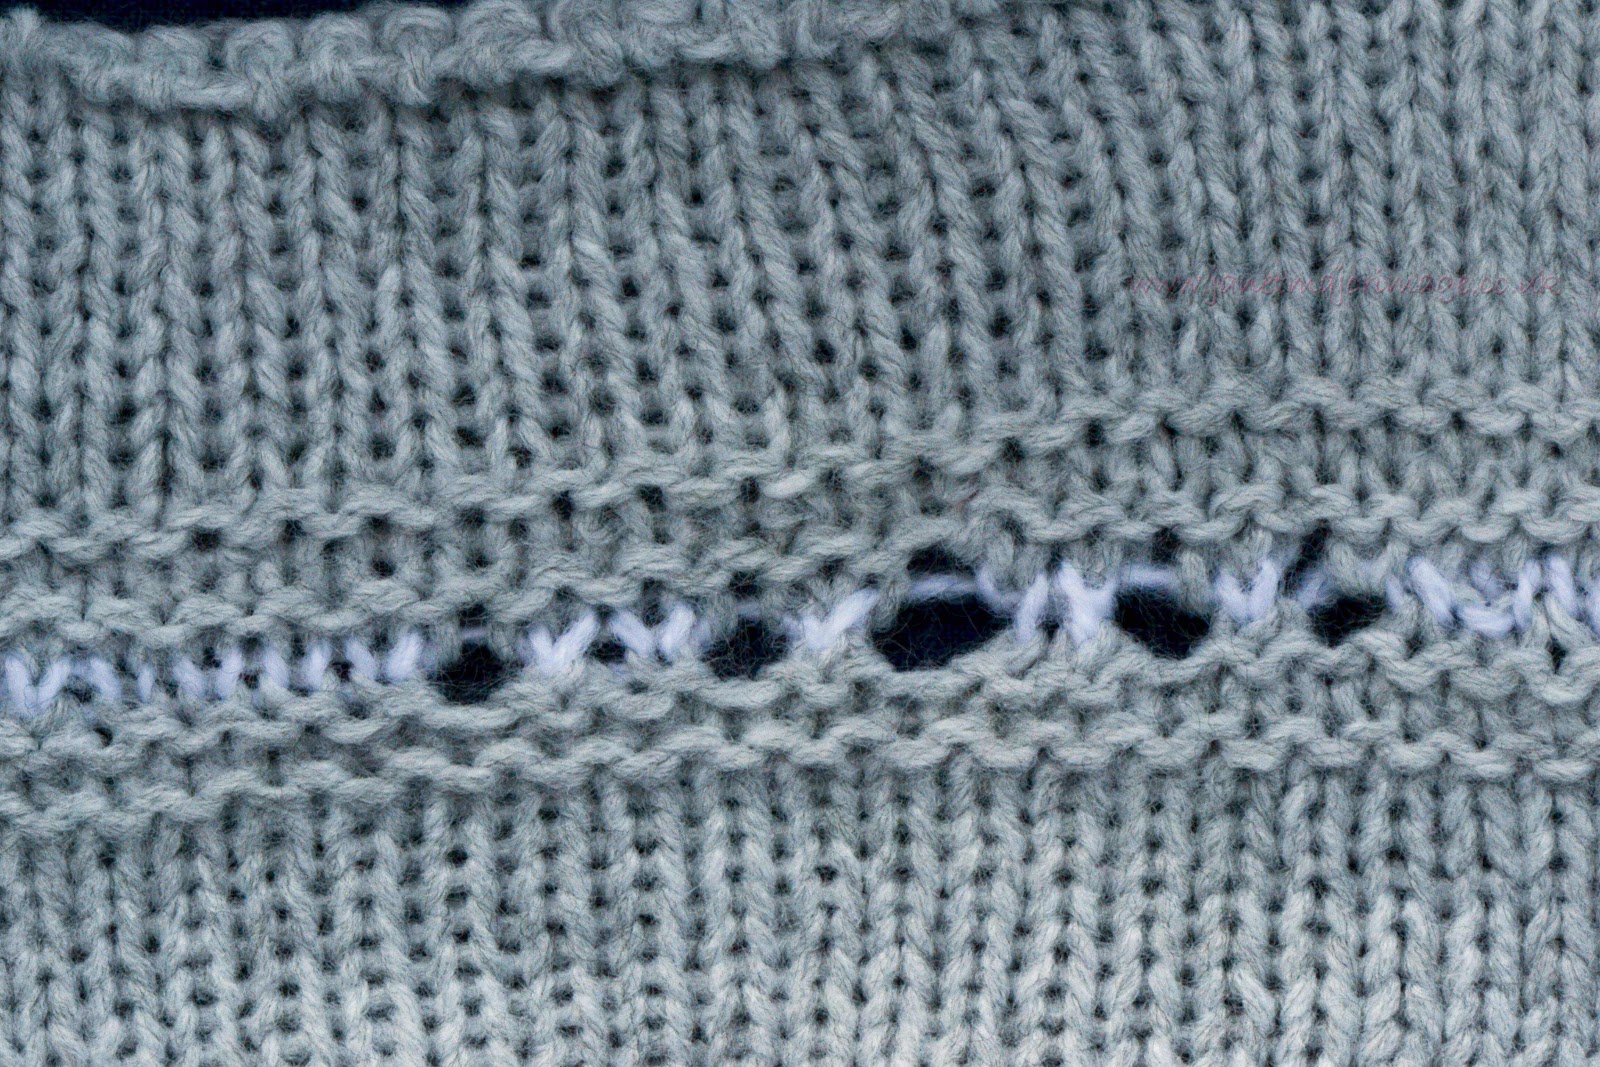
Then I moved over to 2 trial edge pieces for the left hand side.

Preparing for grafting- you can see my custom chart at the back, this is just for this left edging graft.
( Before I started I replaced the needles by thick yarn which I find more manageable than the needles when such concentration is needed)
I ticked off each movement of the tapestry needle as I made it.
This is the result and I am pretty pleased with it. The fagoting worked fine. It is not completely error free, I split the yarn in one or two places in the garter stitch lead in on the right for example)
I have left the yarn tails on the right start and left end so can you plot the line across.
I hope this is helpful and all makes sense.
Enlarged image of the grafting
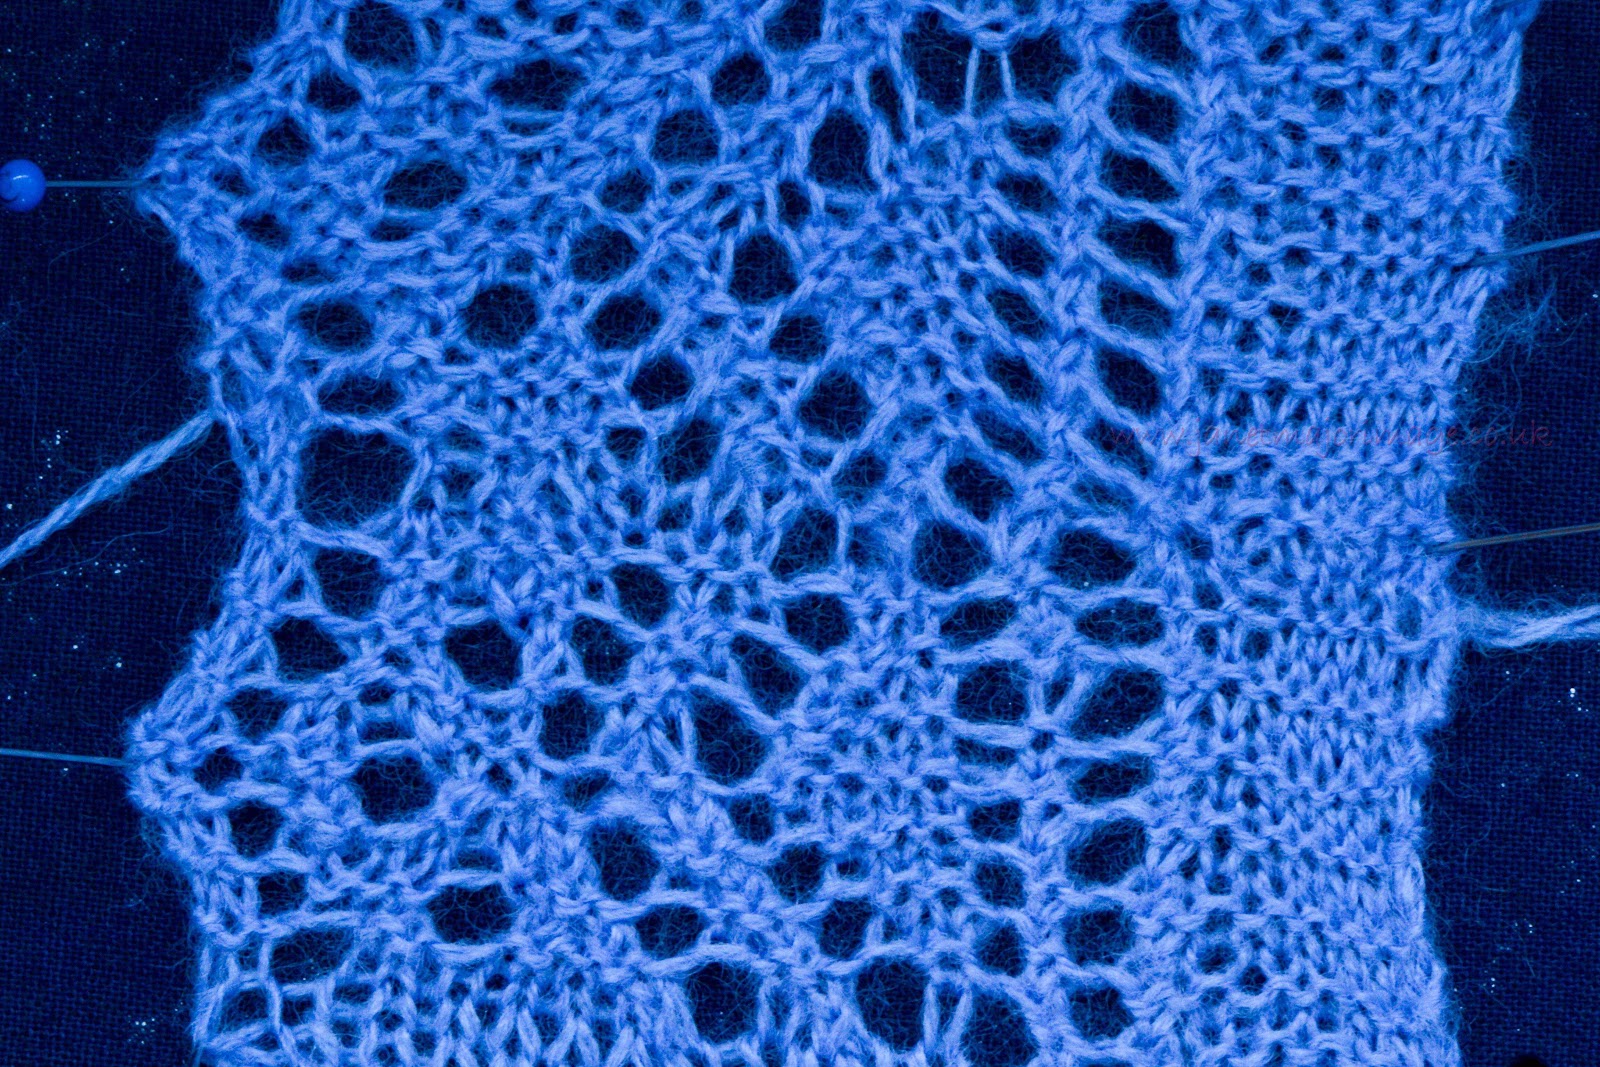
With many thanks to Joni Coniglio for giving me the confidence to do this and take my grafting of Fine Shetland Lace to a higher level.
The best advice to anyone is to look at the whole pattern before you think about knitting it. As important to me as the knitting is, is there a graft, if so is this graft doable to my standards? (At this stage I might knit a sample to try the graft. ) If I am not happy with the graft, then can I tweak the pattern to enable me to enjoy knitting it, enjoy finishing it and then enjoy wearing it.
- 50 tips from Shetland Knitters by Elizabeth Johnston and Hazel Tindall. 2 DVDs. Available from Hazel Tindall’s website or from Shetland Times. My go to first resource for knitting expertise on techniques.
- Some rectangular Shetland Shawls can be knit straight through with no grafting.Some have an edging where the bottom edge is knitted first, then the stitches are picked up from a long edge and knitted along the length of the shawl with an edging knitted separately at the end and the only graft is across the width of the lace edging as the last stage. Some Shetland rectangular shawls have a graft across the centre and some have the graft across the width about a third of the way from one end. The Unst series of Shawls I am talking about, follow this latter pattern.
- Joni Coniglio . The complete set of Videos ‘The Definitive Guide to Grafting’ Parts 1-3 video Download and also an e book from Interweave. I highly recommend these, but they do not just give the ‘answers’ but rather teach you to work out what you need to do yourself. Time is needed to get the best out of these, in my mind, excellent resources.
- You need to establish where the the bumps need to be formed during grafting by looking to check you maintain the pattern as it will determine whether you form ‘knit’ or ‘purl’ stitches during your grafting.